One question I’ve frequently been asked since becoming a mom of two is if there any new products I’ve found helpful that I didn’t previously have with just Nate? While we’ve thankfully been able to utilize nearly all of the clothing and gear that we amassed during his first year (yay for same gender siblings!), there are definitely a few items I’ve purchased within the last few months that I’d now
The post Random Products I Love As A Mom Of 2 appeared first on Katie's Bliss.
]]>One question I’ve frequently been asked since becoming a mom of two is if there any new products I’ve found helpful that I didn’t previously have with just Nate? While we’ve thankfully been able to utilize nearly all of the clothing and gear that we amassed during his first year (yay for same gender siblings!), there are definitely a few items I’ve purchased within the last few months that I’d now consider must-haves.
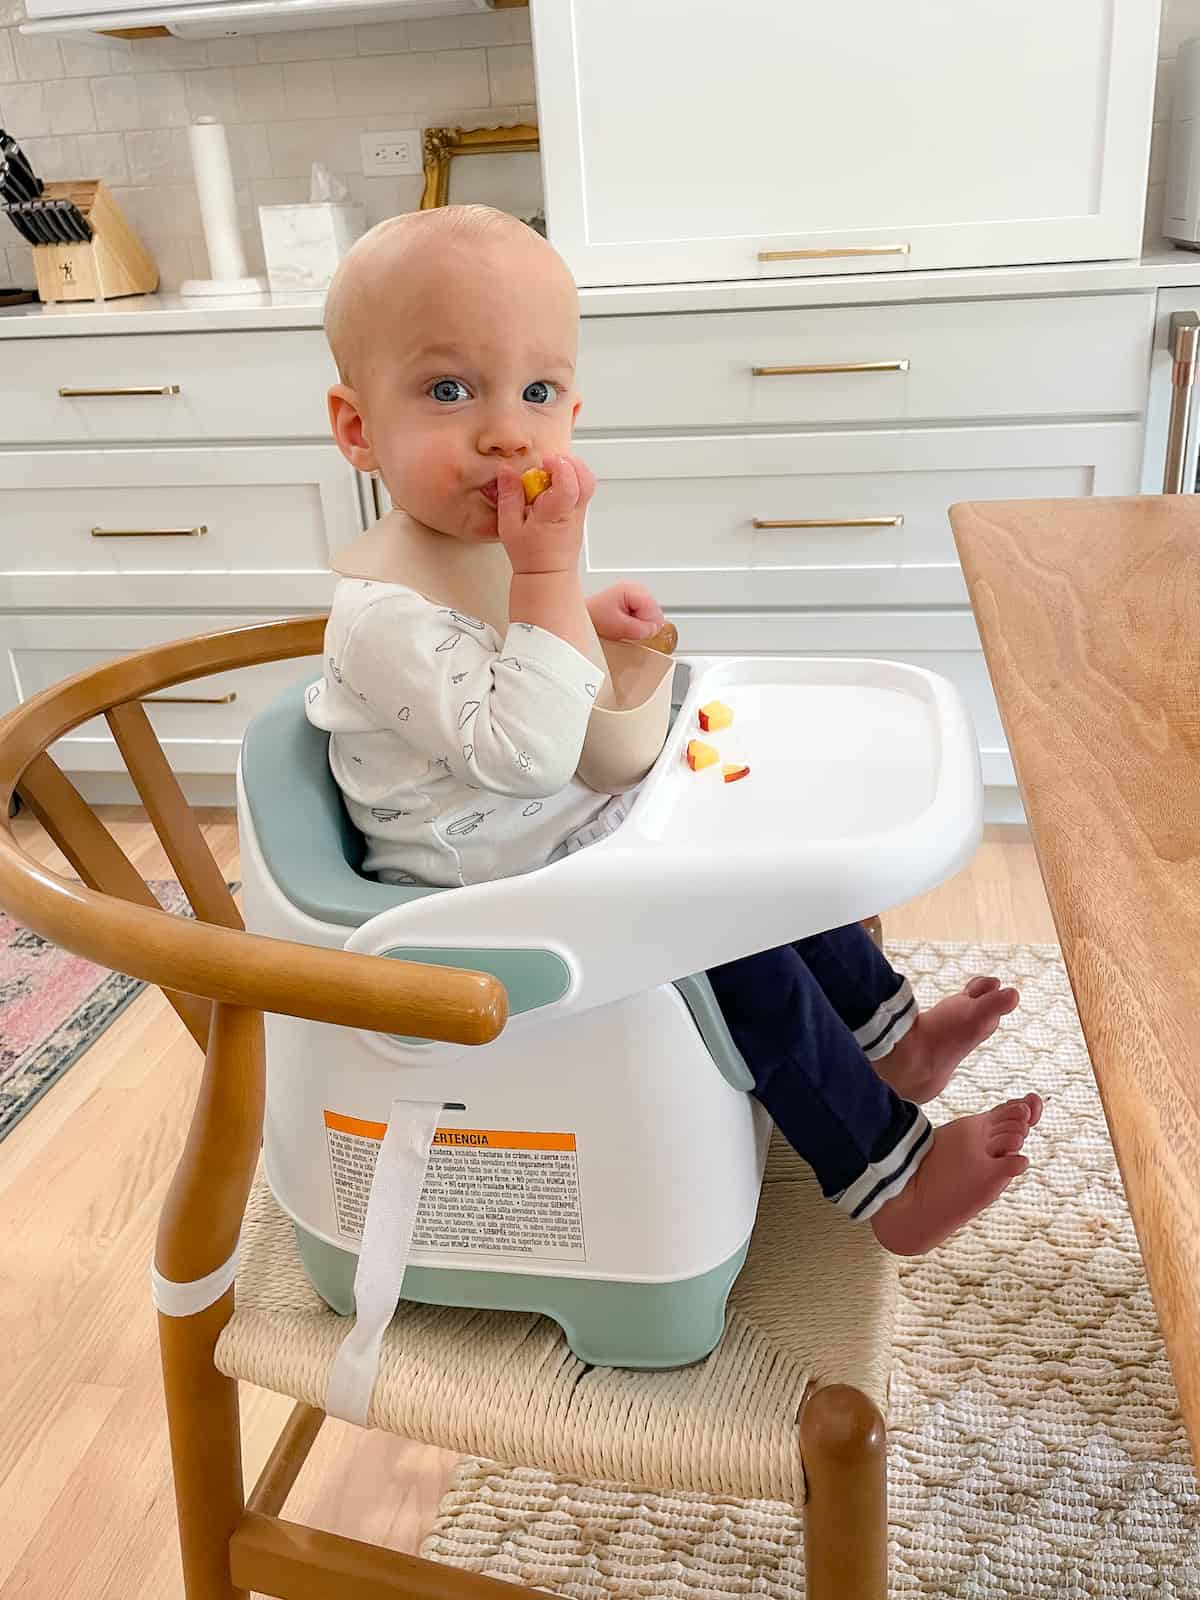
Julian may just be 10 months, but he thinks he’s 2 years old. Little man wants to be involved in everything, including meals at the dinner table. I saw this feeding booster seat at Walmart and knew right away it would be perfect for him. A few things I love about it– the feeding tray is removable and dishwasher-safe. You can also take out the liner to clean. It can be used from age 6 months-33 months, so it’s the type of product that grows with your child. You also can’t beat the $38 price tag. We’ve been so impressed with this!
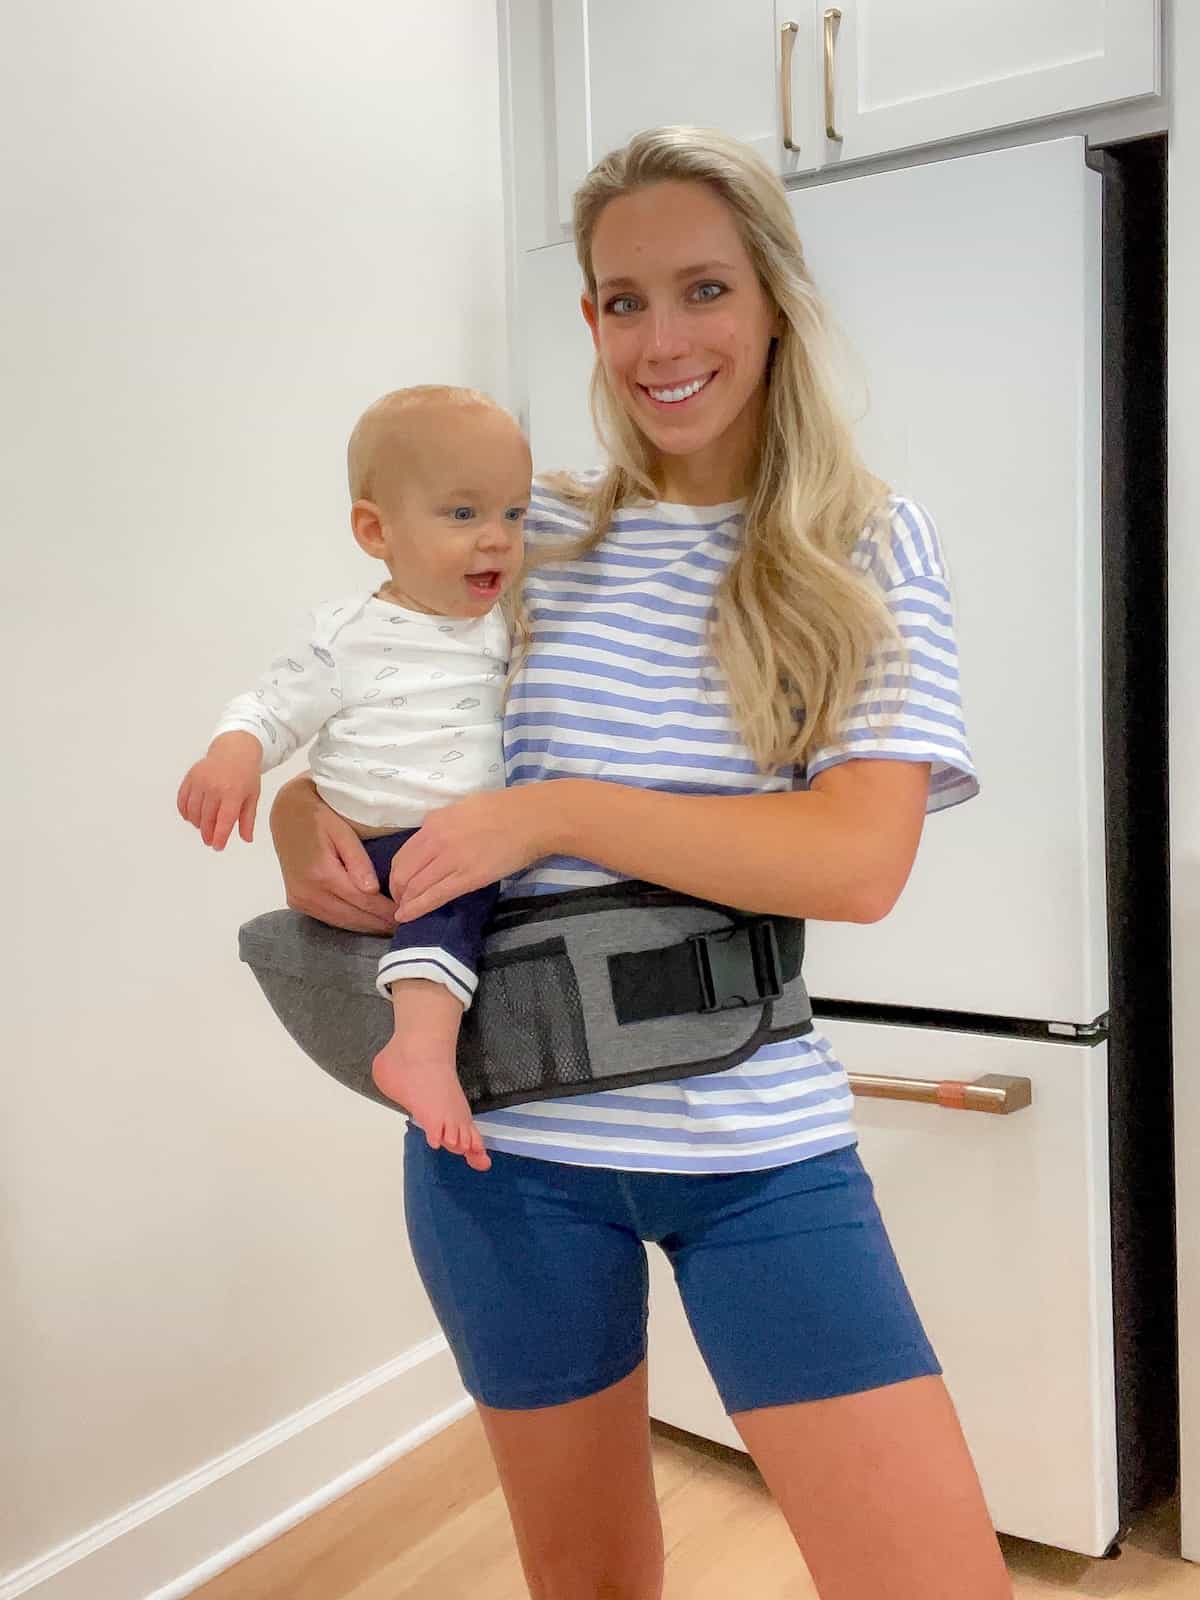
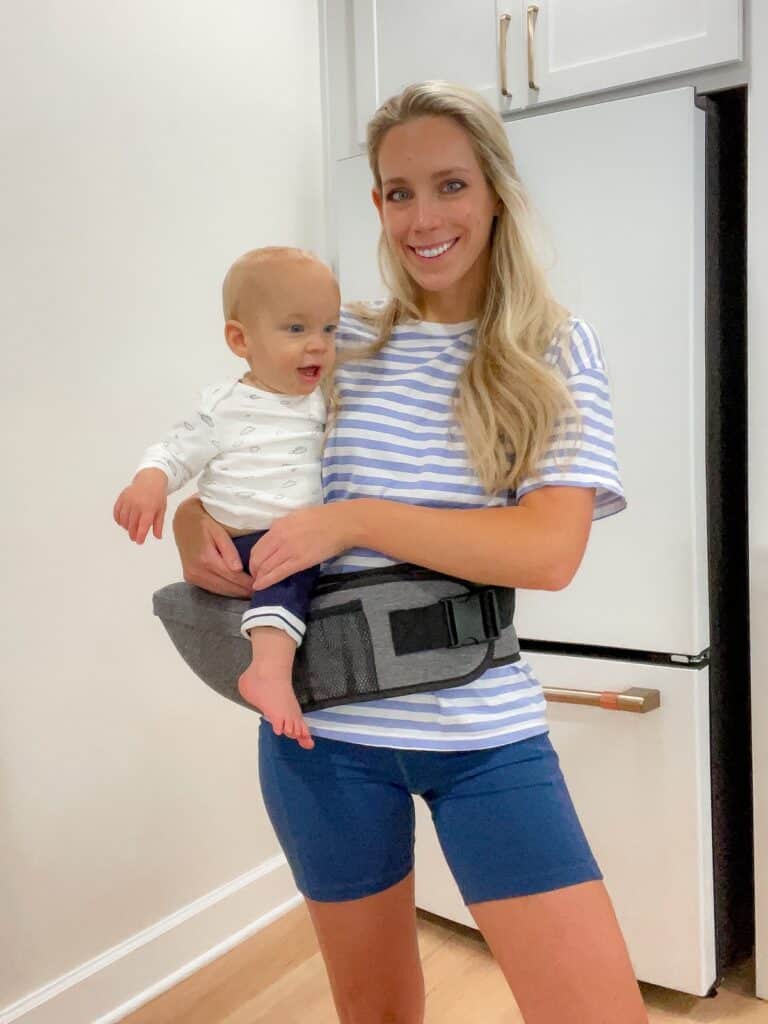
Earlier this spring when we were traveling back from the sister-in-law’s wedding, I was struggling to hold up Julian on my hip in line at the airport when another mom tapped me on the shoulder. She motioned to the baby hip seat carrier she was using to carry her little and was like, “YOU NEED THIS and I promise it will change your life.”
Fast forward a few months later, I finally ordered one for myself and now I don’t know how I lived without one. Julian is the definition of a wiggle worm and will throw a fit if I try and carry him in a traditional baby carrier, so this just works so much better for us. He can be up in my arms and see everything that’s going on, while I don’t have to feel like I’m lugging around a sack of potatoes. I found my Baby Hip Seat Carrier at Walmart— the price was under $30 and it takes just seconds to put on. J loves it so much!
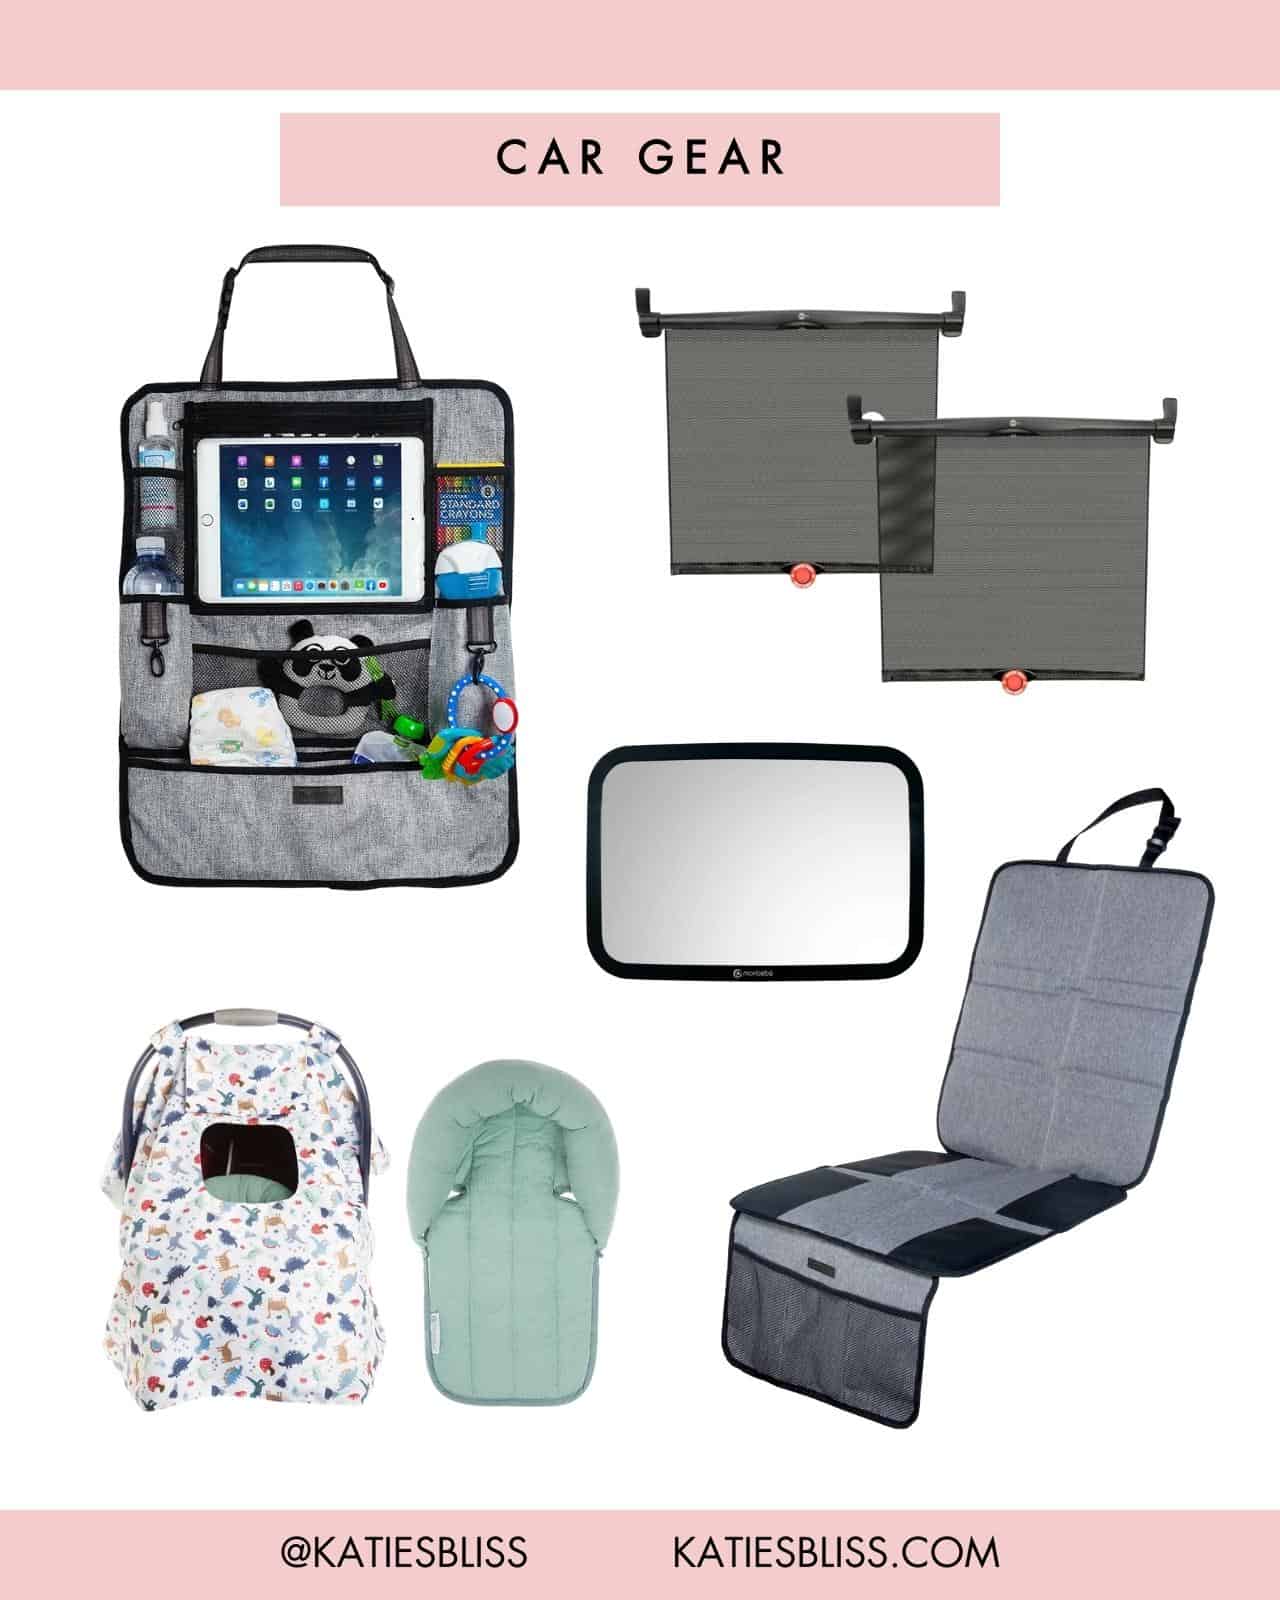
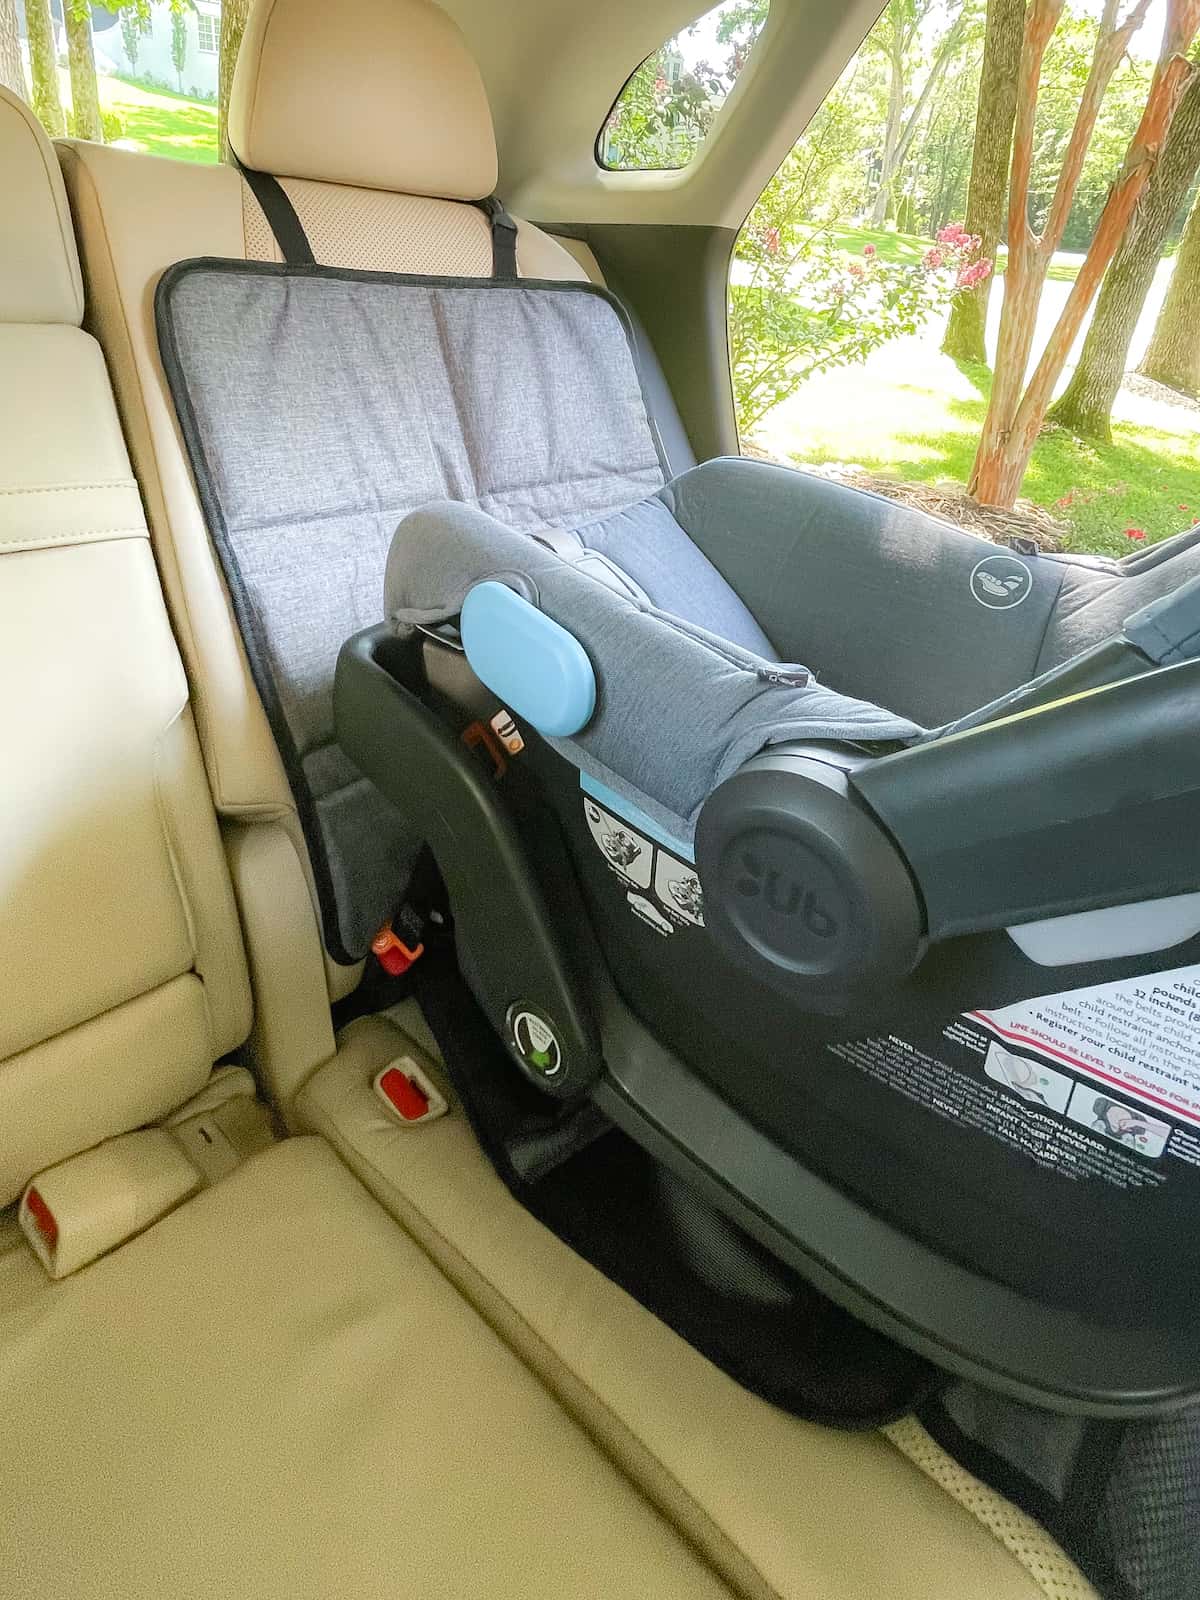
Car Gear // Seat Protectors | Backseat Organizer | Window Shades | Baby Mirror | Car Seat Pad + Cover
You can 100% file these under Products I Wish I Bought Sooner. A few weeks ago when I was cleaning out my car, I noticed some significant wear and tear to my back seats from spills, dirty toddler shoes, etc. I added one of these seat protectors underneath each of the boy’s car seats and then this organizer to the back of the seat facing Nate so he could have a place to keep snacks, books and toys.

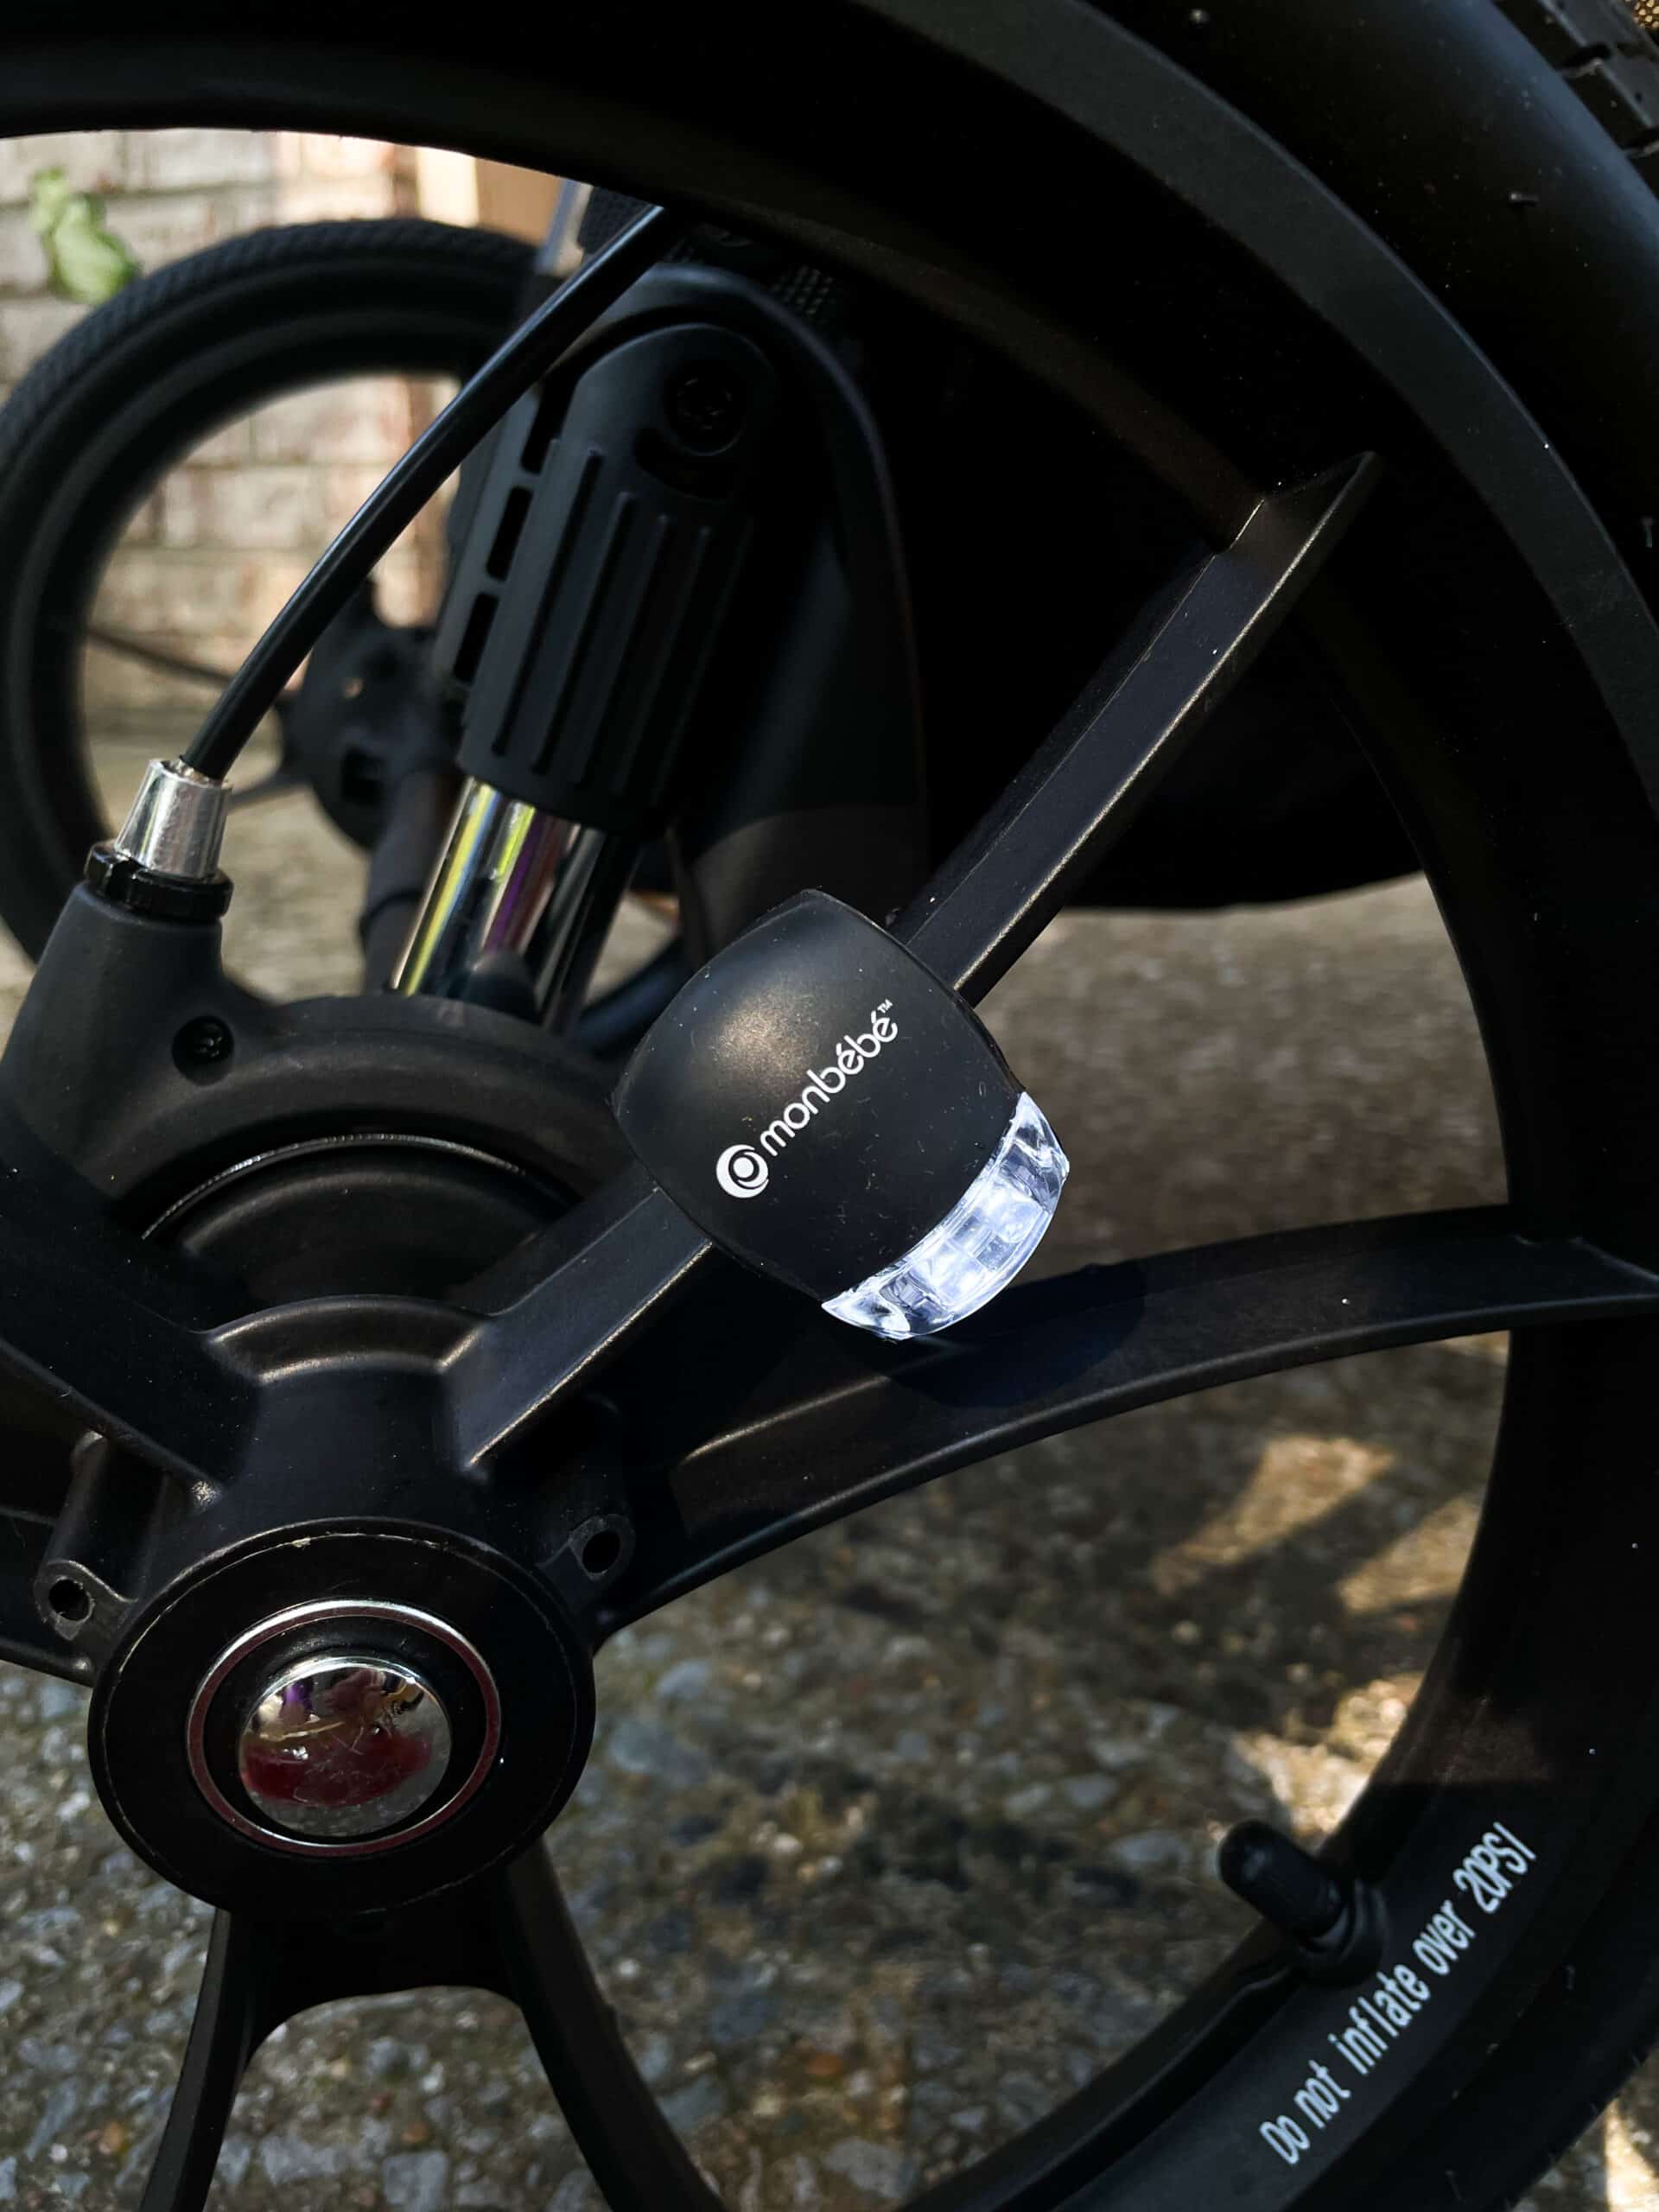
This is another product I wish I would’ve bought sooner. We take a lot of neighborhood walks and would consider these stroller lights a necessity for safety! The lights come in a pack of two, one for each side of the stroller and easily attach via a silicone strap. Other must-haves on my list: a stroller organizer, snack tray and ride board for big bro!
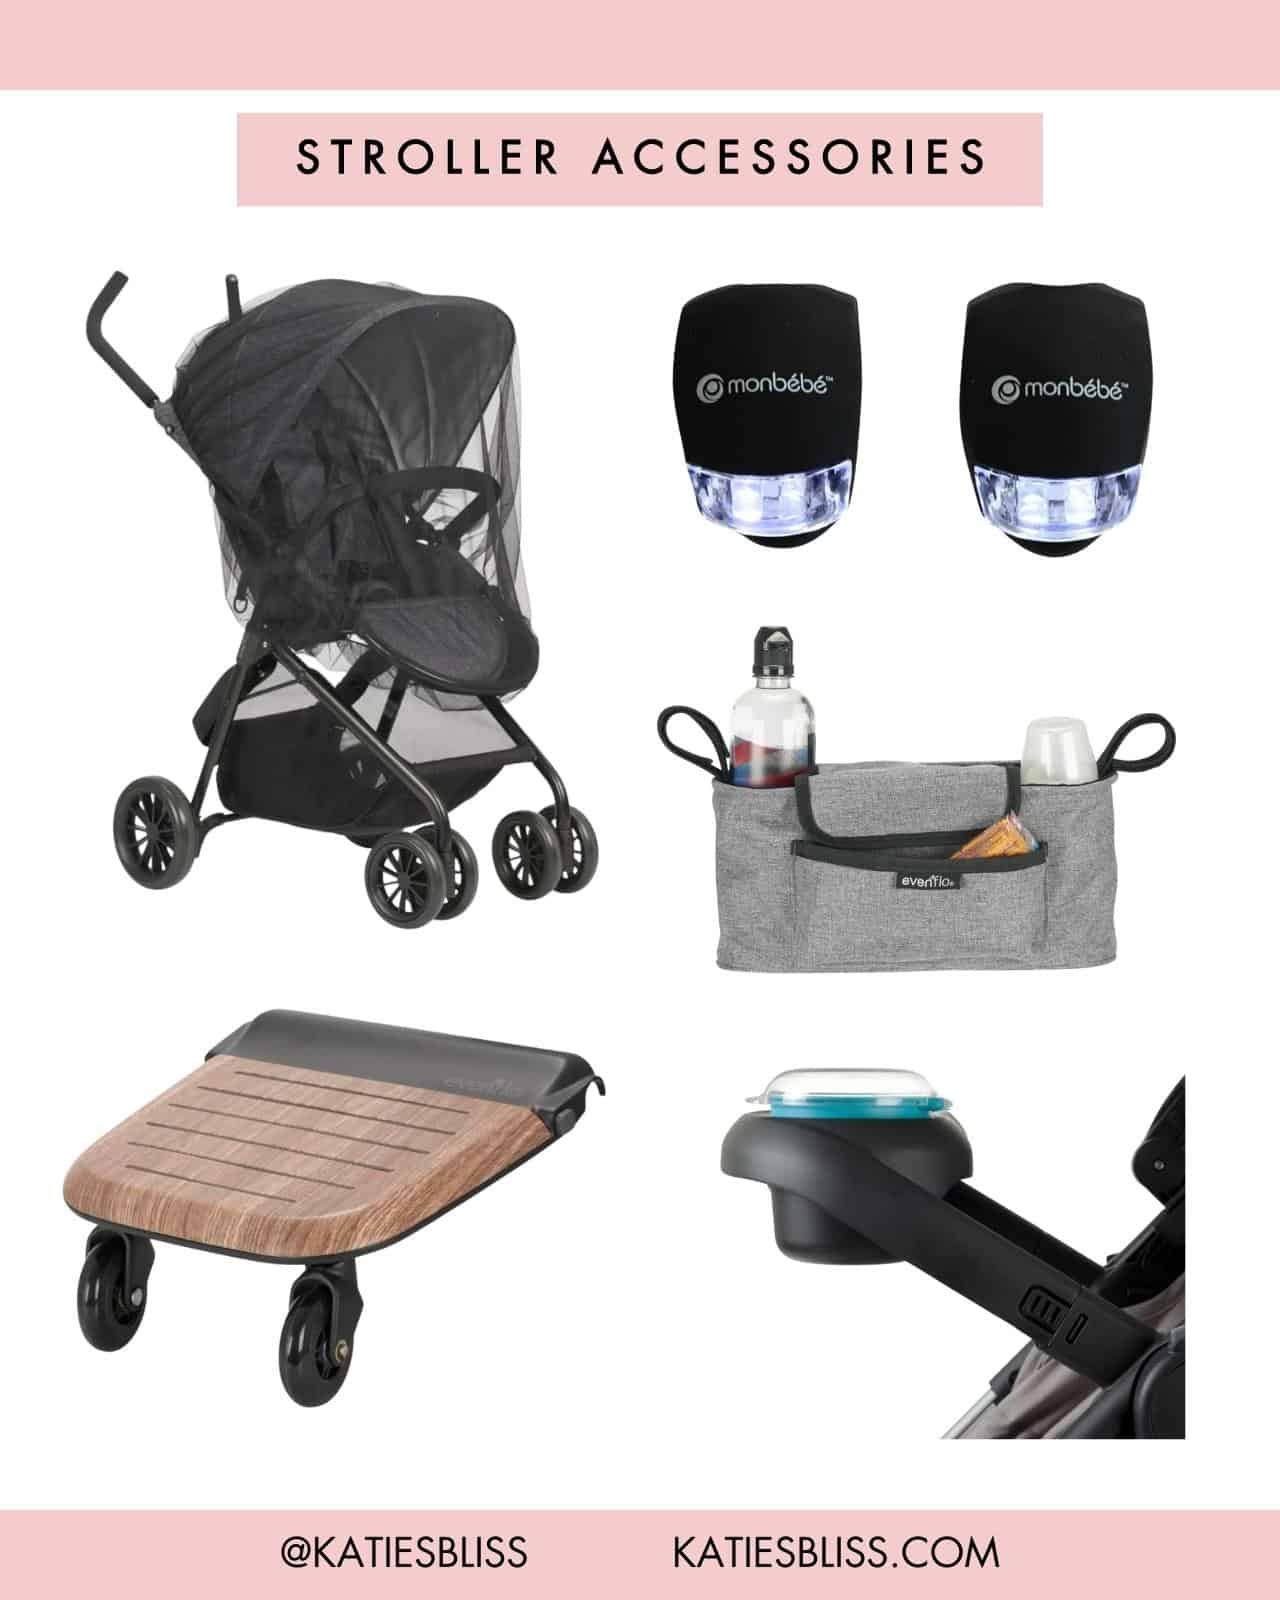
Stroller Accessories // Stroller Lights | Stroller Netting | Stroller Organizer | Stroller Stand + Ride Board | Snack Tray
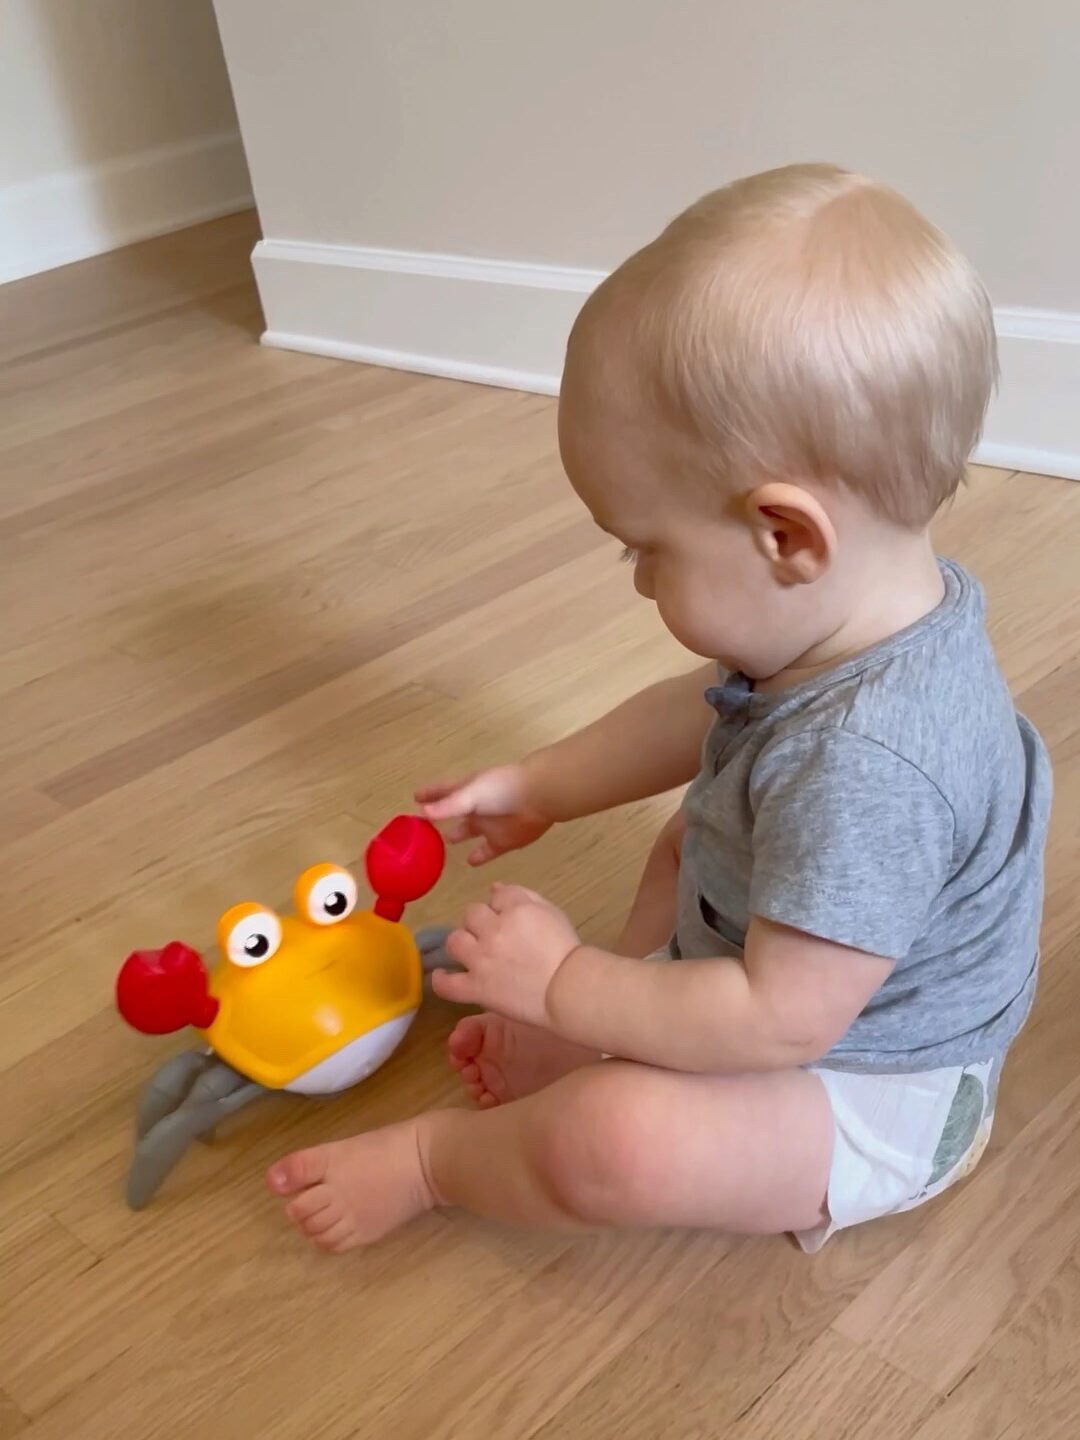
Highly-distracting musical toys have become my “secret weapons” when I need a break or need a few extra minutes to cook dinner or fold the laundry in peace. Julian LOVES this musical crawling crab toy and will hustle around after it for 15+ minutes. Nate is a HUGE water guy and would spend hours in the tub if he could and loves this Cloud and Rainbow Showerhead and Musical Bubble Crab. PS Walmart has a great selection of toys from brands like Bright Starts and Baby Einstein— two of my faves!
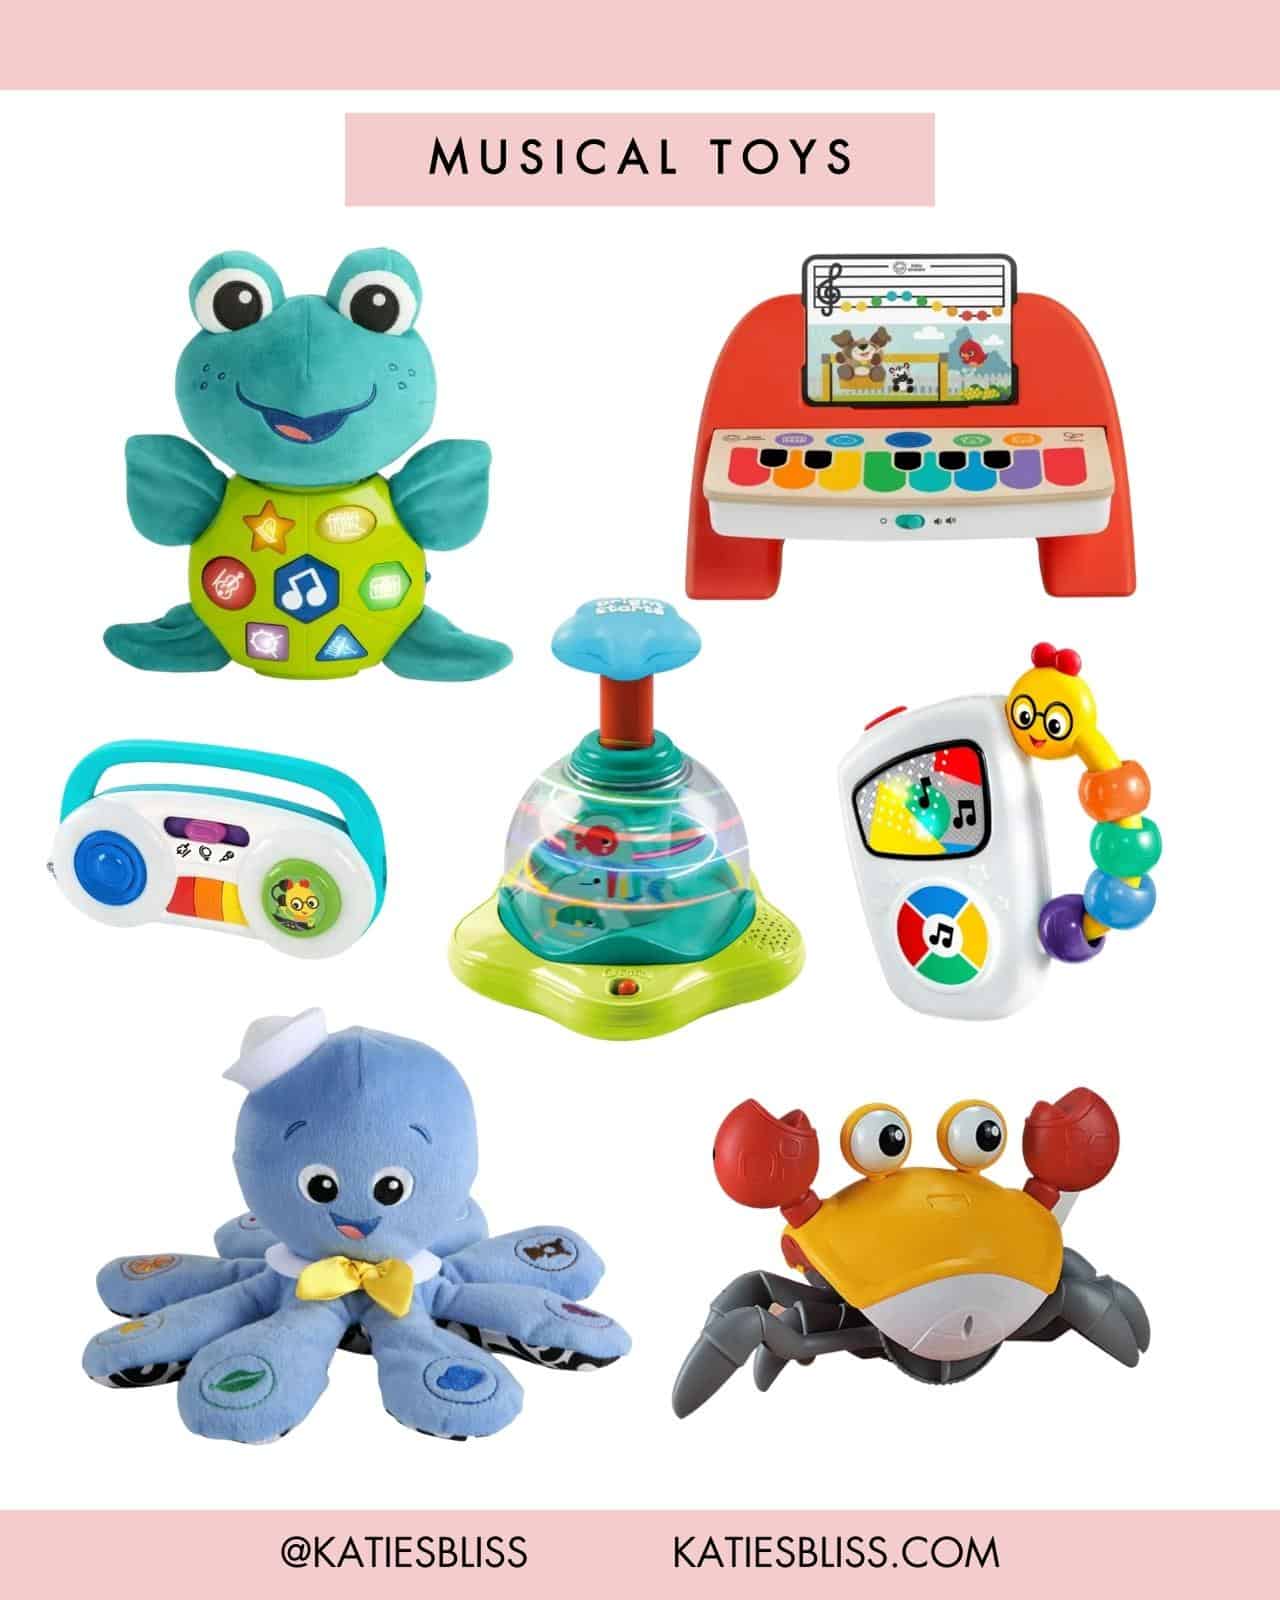
Silly Toys // Musical Crawling Crab | Bright Starts Press & Glow Spinner | Turtle Toy | Play Piano | Tiny Play Radio | Musical Phone | Octopus Toy
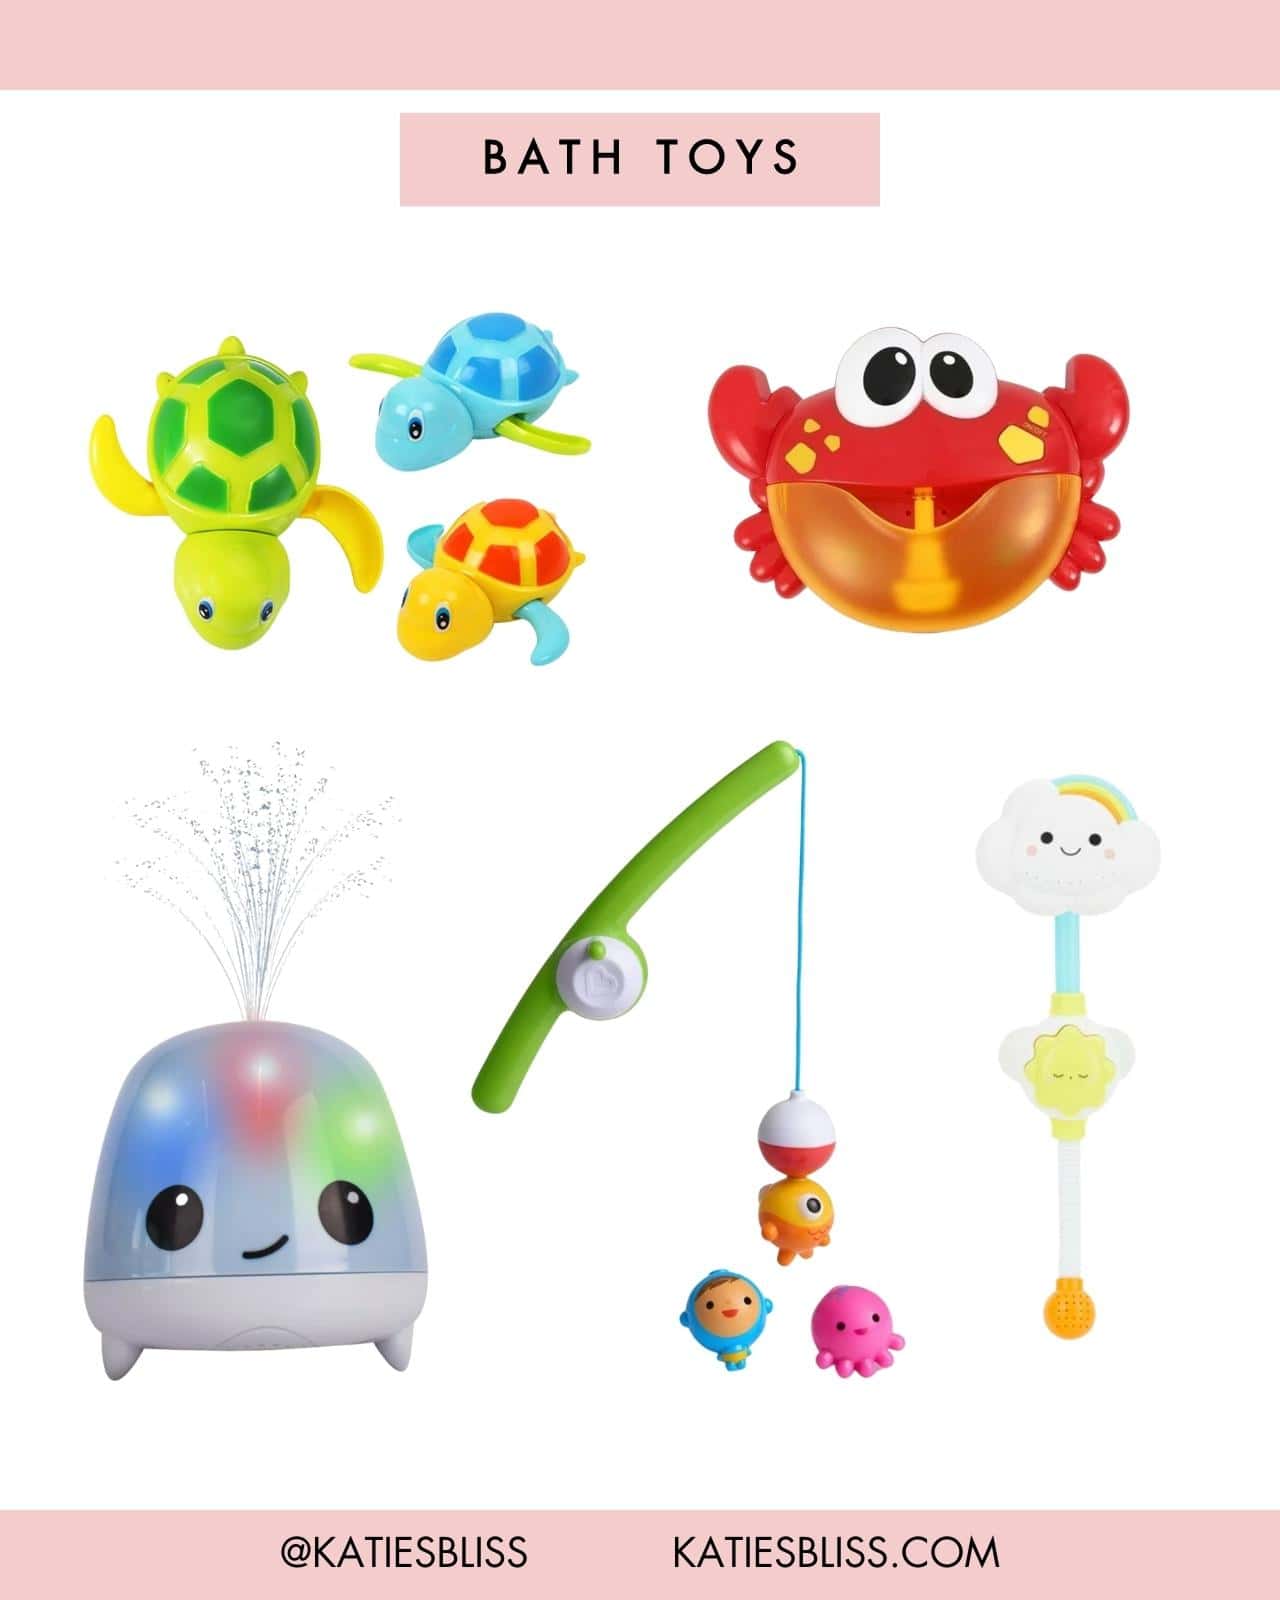
Bath Toys // Swimming Turtles | Fountain Toy | Fishing Pole | Cloud and Rainbow Showerhead Toy | Musical Bubble Crab Bath Toy
Big thank you to Walmart for sponsoring this post!
The post Random Products I Love As A Mom Of 2 appeared first on Katie's Bliss.
]]>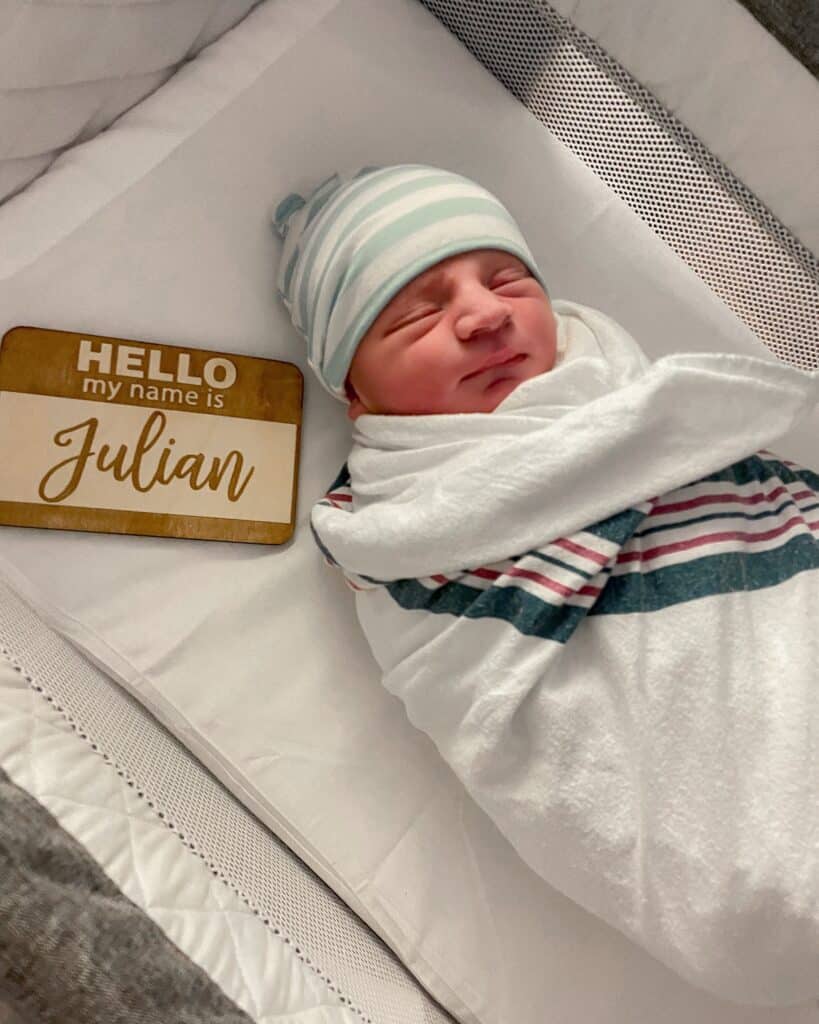
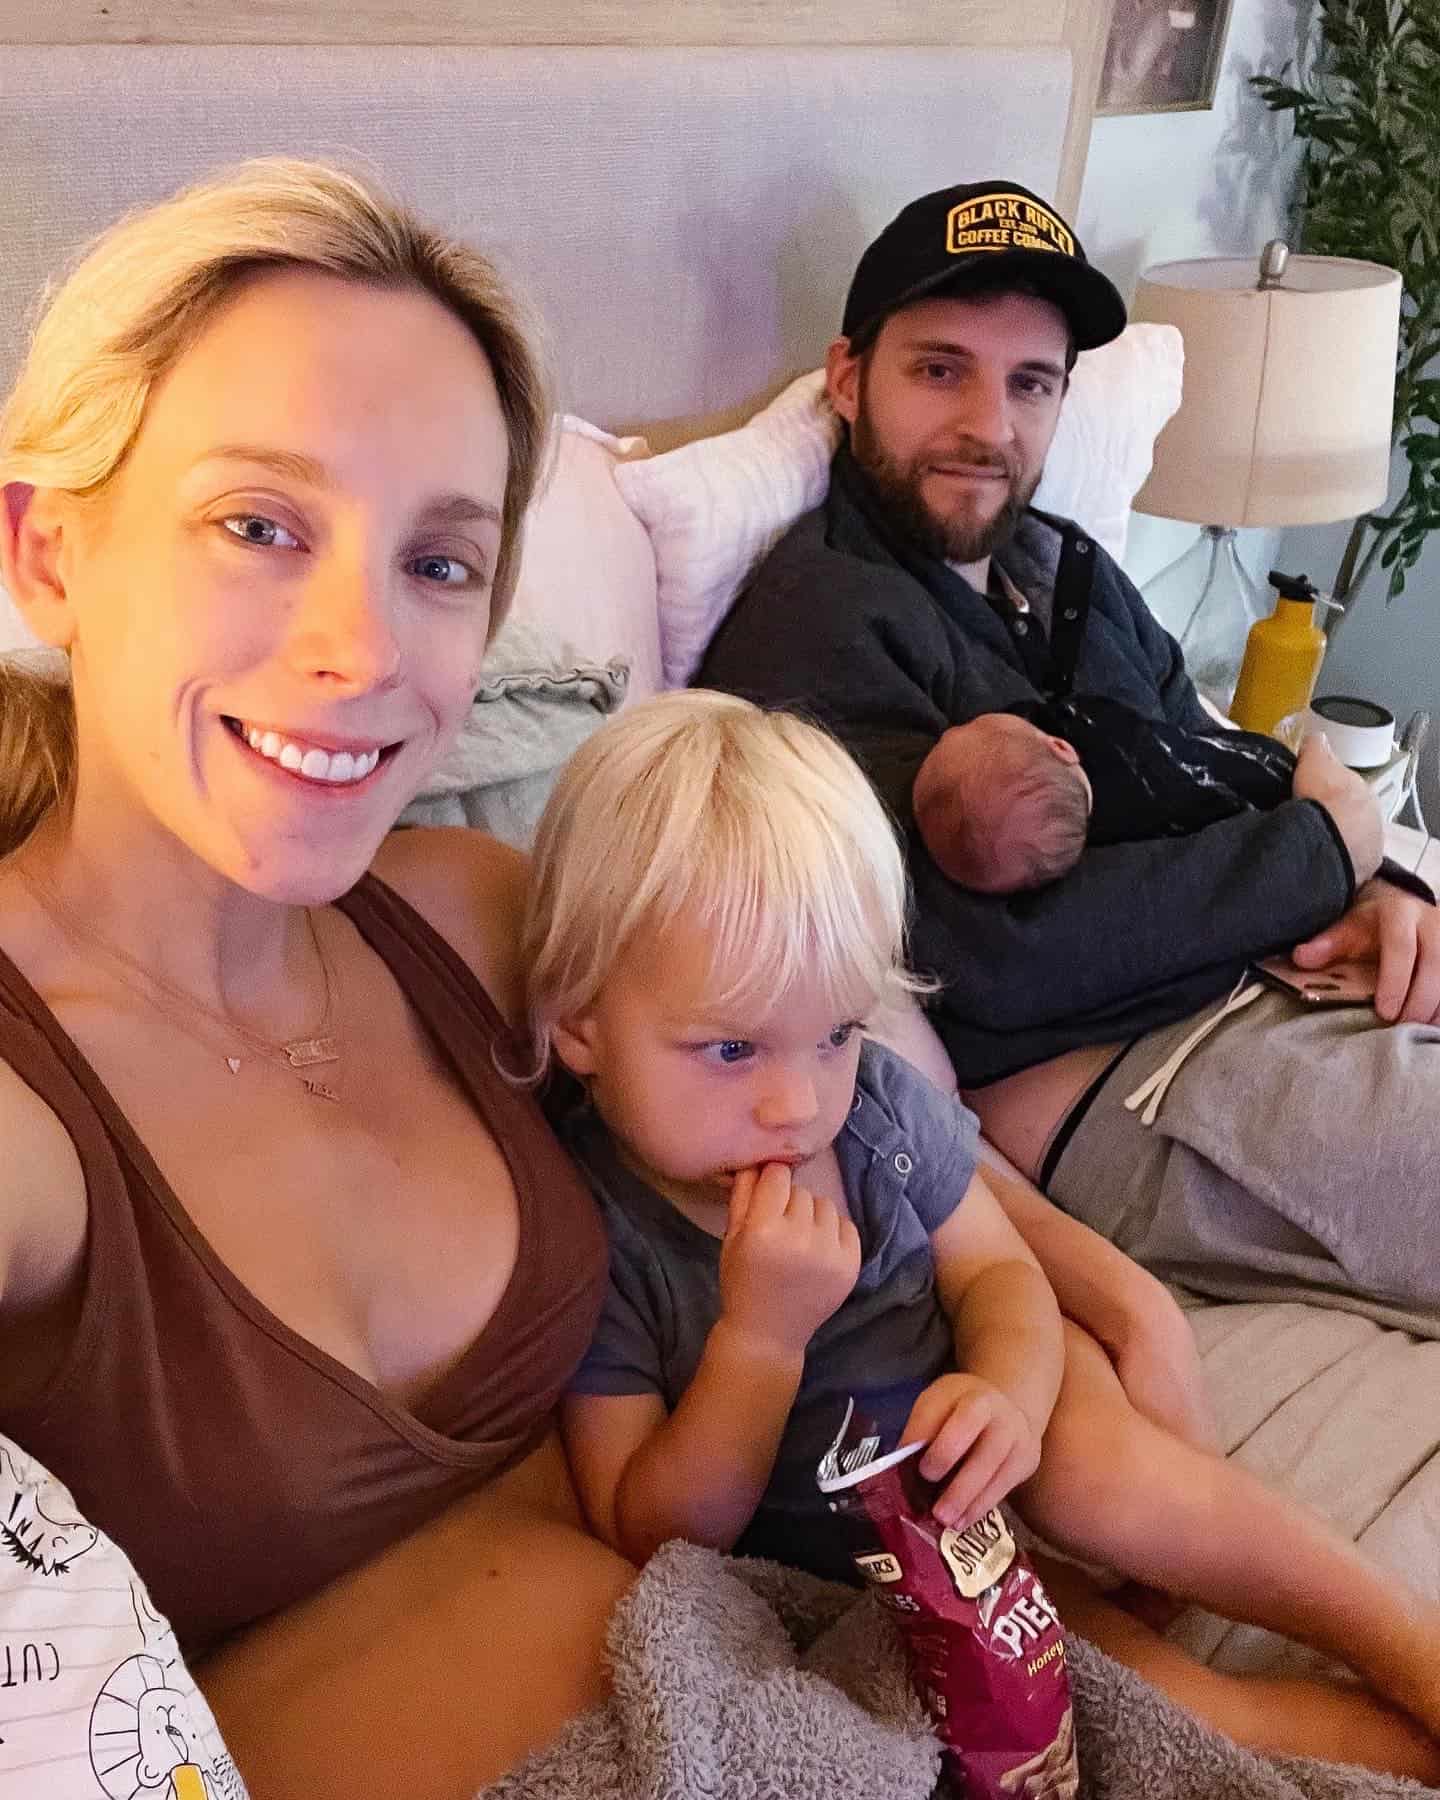
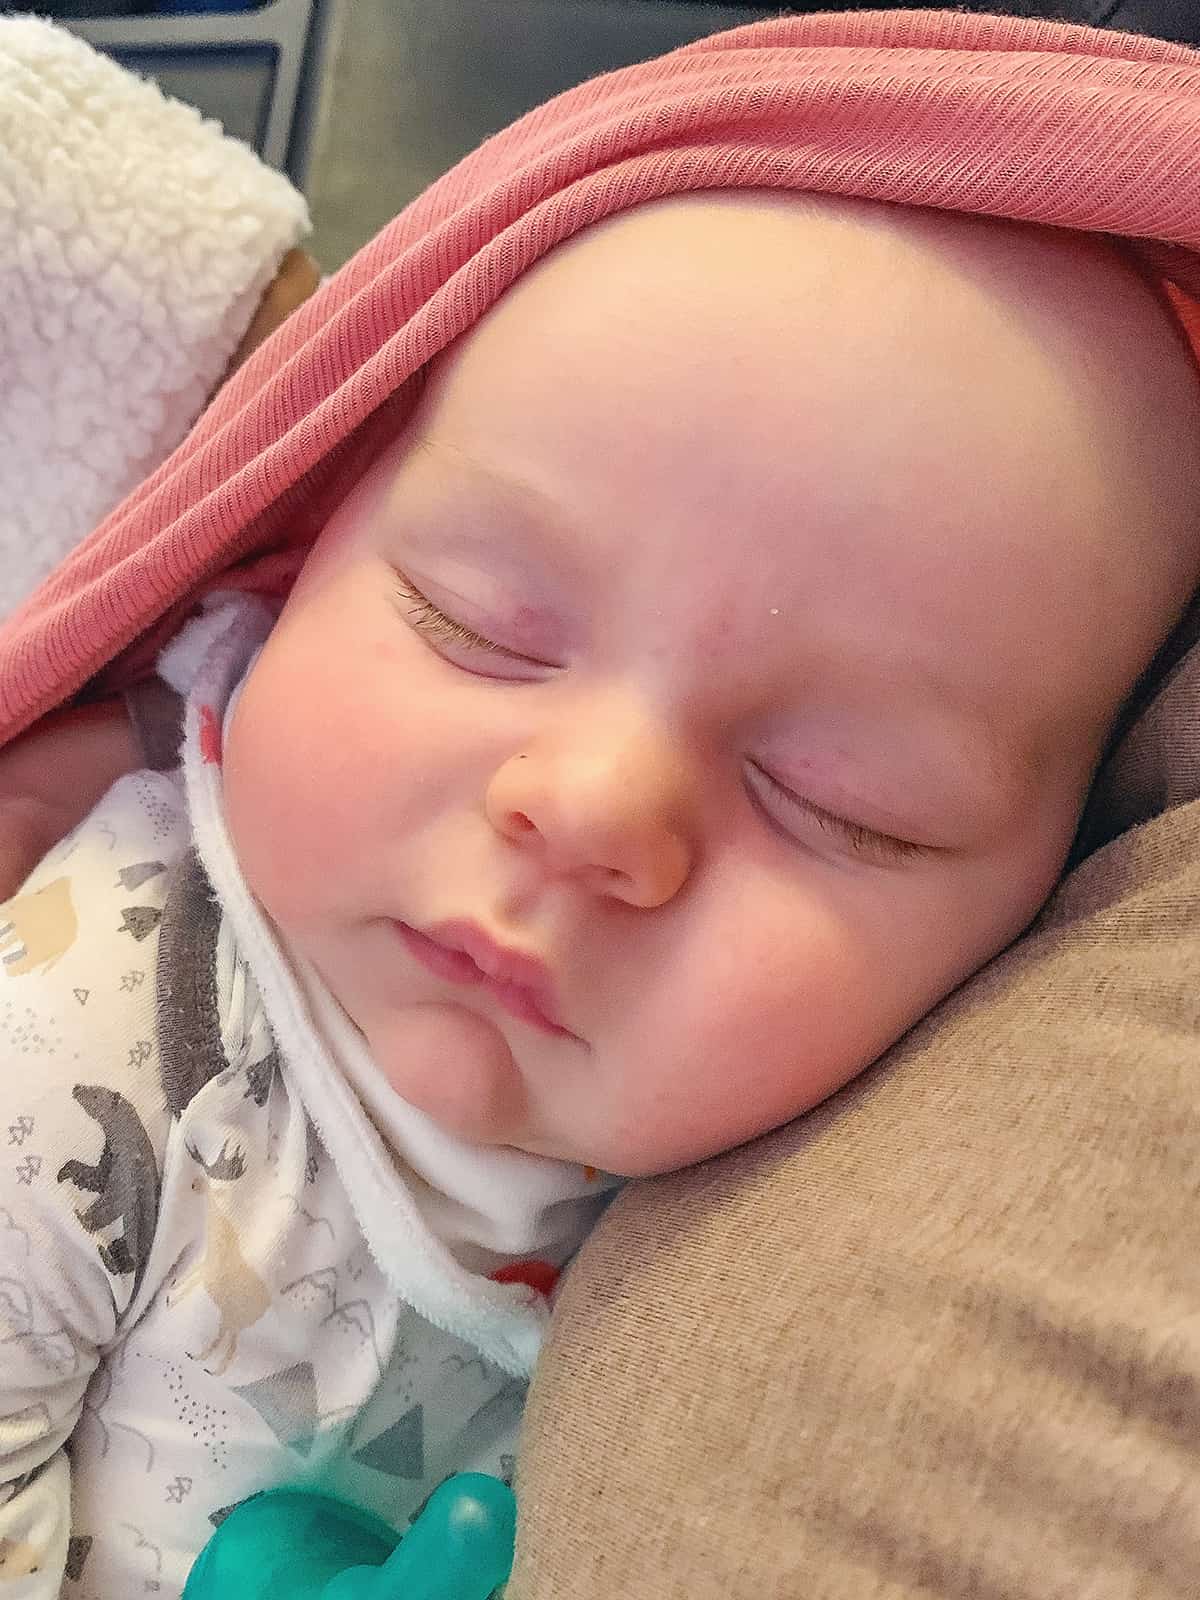
I can’t believe that Julian is officially one month old! The last few weeks as a family of four have flown by and it feels like yesterday that he was making his debut. He arrived at 4:25am on Tuesday October 4 after 9.5 hours of unmedicated labor. I promise I’m not crazy 😛 Let’s rewind a bit. My first pregnancy fell during the thick of the pandemic: shutdowns, masks, social distancing,
The post Julian’s Birth Story appeared first on Katie's Bliss.
]]>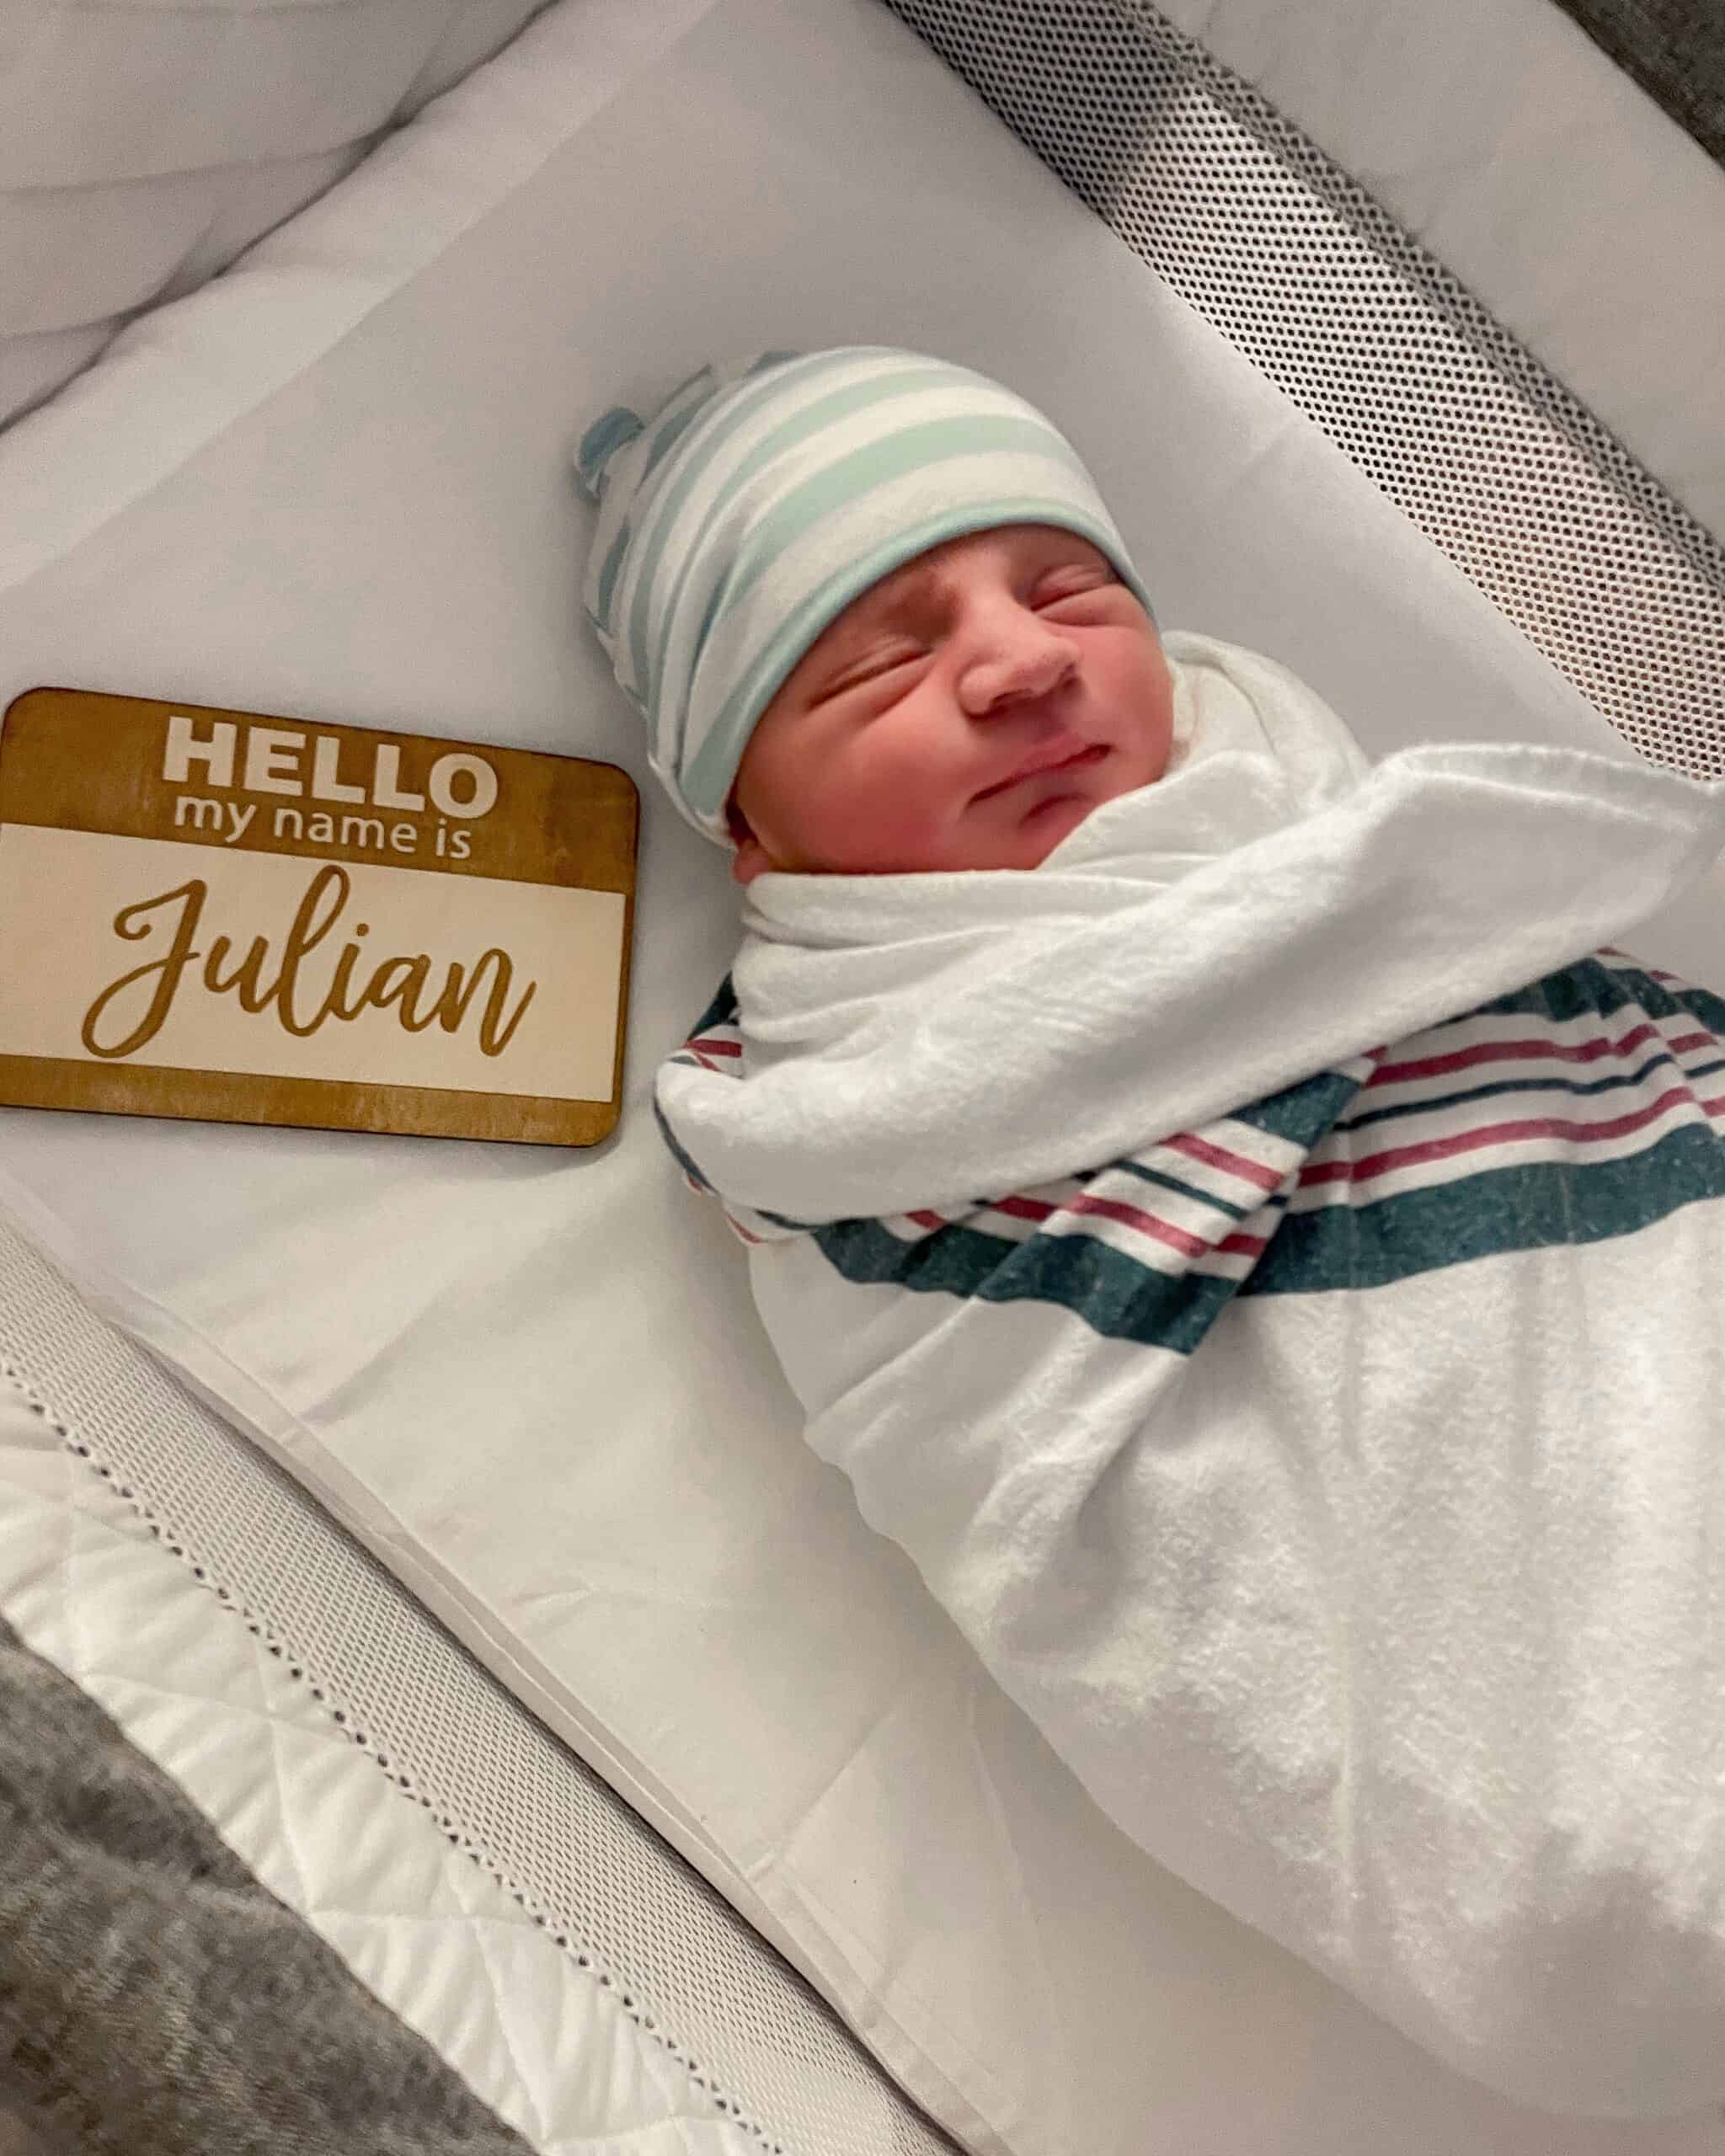
I can’t believe that Julian is officially one month old! The last few weeks as a family of four have flown by and it feels like yesterday that he was making his debut. He arrived at 4:25am on Tuesday October 4 after 9.5 hours of unmedicated labor. I promise I’m not crazy 
Let’s rewind a bit. My first pregnancy fell during the thick of the pandemic: shutdowns, masks, social distancing, constant testing, partners not allowed at appointments– there was so much unknown and the rules were always changing. After a terrible scare at 20 weeks, my pregnancy was deemed high risk and I had to see an MFM for regular ultrasounds up until Nate’s arrival. Having doctors tell you they aren’t sure what they are seeing and not knowing if your baby is going to be born healthy is something I wouldn’t wish on anyone.
In the end, I was blessed with a physically healthy pregnancy, an overall positive hospital birth experience and most importantly a happy healthy baby. But every moment up until the second Nate was placed on my chest had been filled with stress, anxiety and fear. As soon as we found out we were expecting again, I knew that I wanted this pregnancy and birth to be different.
The first step in doing that was opting to see a midwife vs a OBGYN. I went to a traditional large OBGYN practice my first pregnancy and remember feeling completely unheard at all my appointments (always with a different doctor) and that I was nothing more than a number on a chart. My care during my first pregnancy really opened my eyes to the completely backwards, overly-medicalized way pregnancy and birth is treated in the United States. This time I wanted to find a provider that had a more hands-off, holistically-minded approach and it was clear that a midwife was the best option for me.
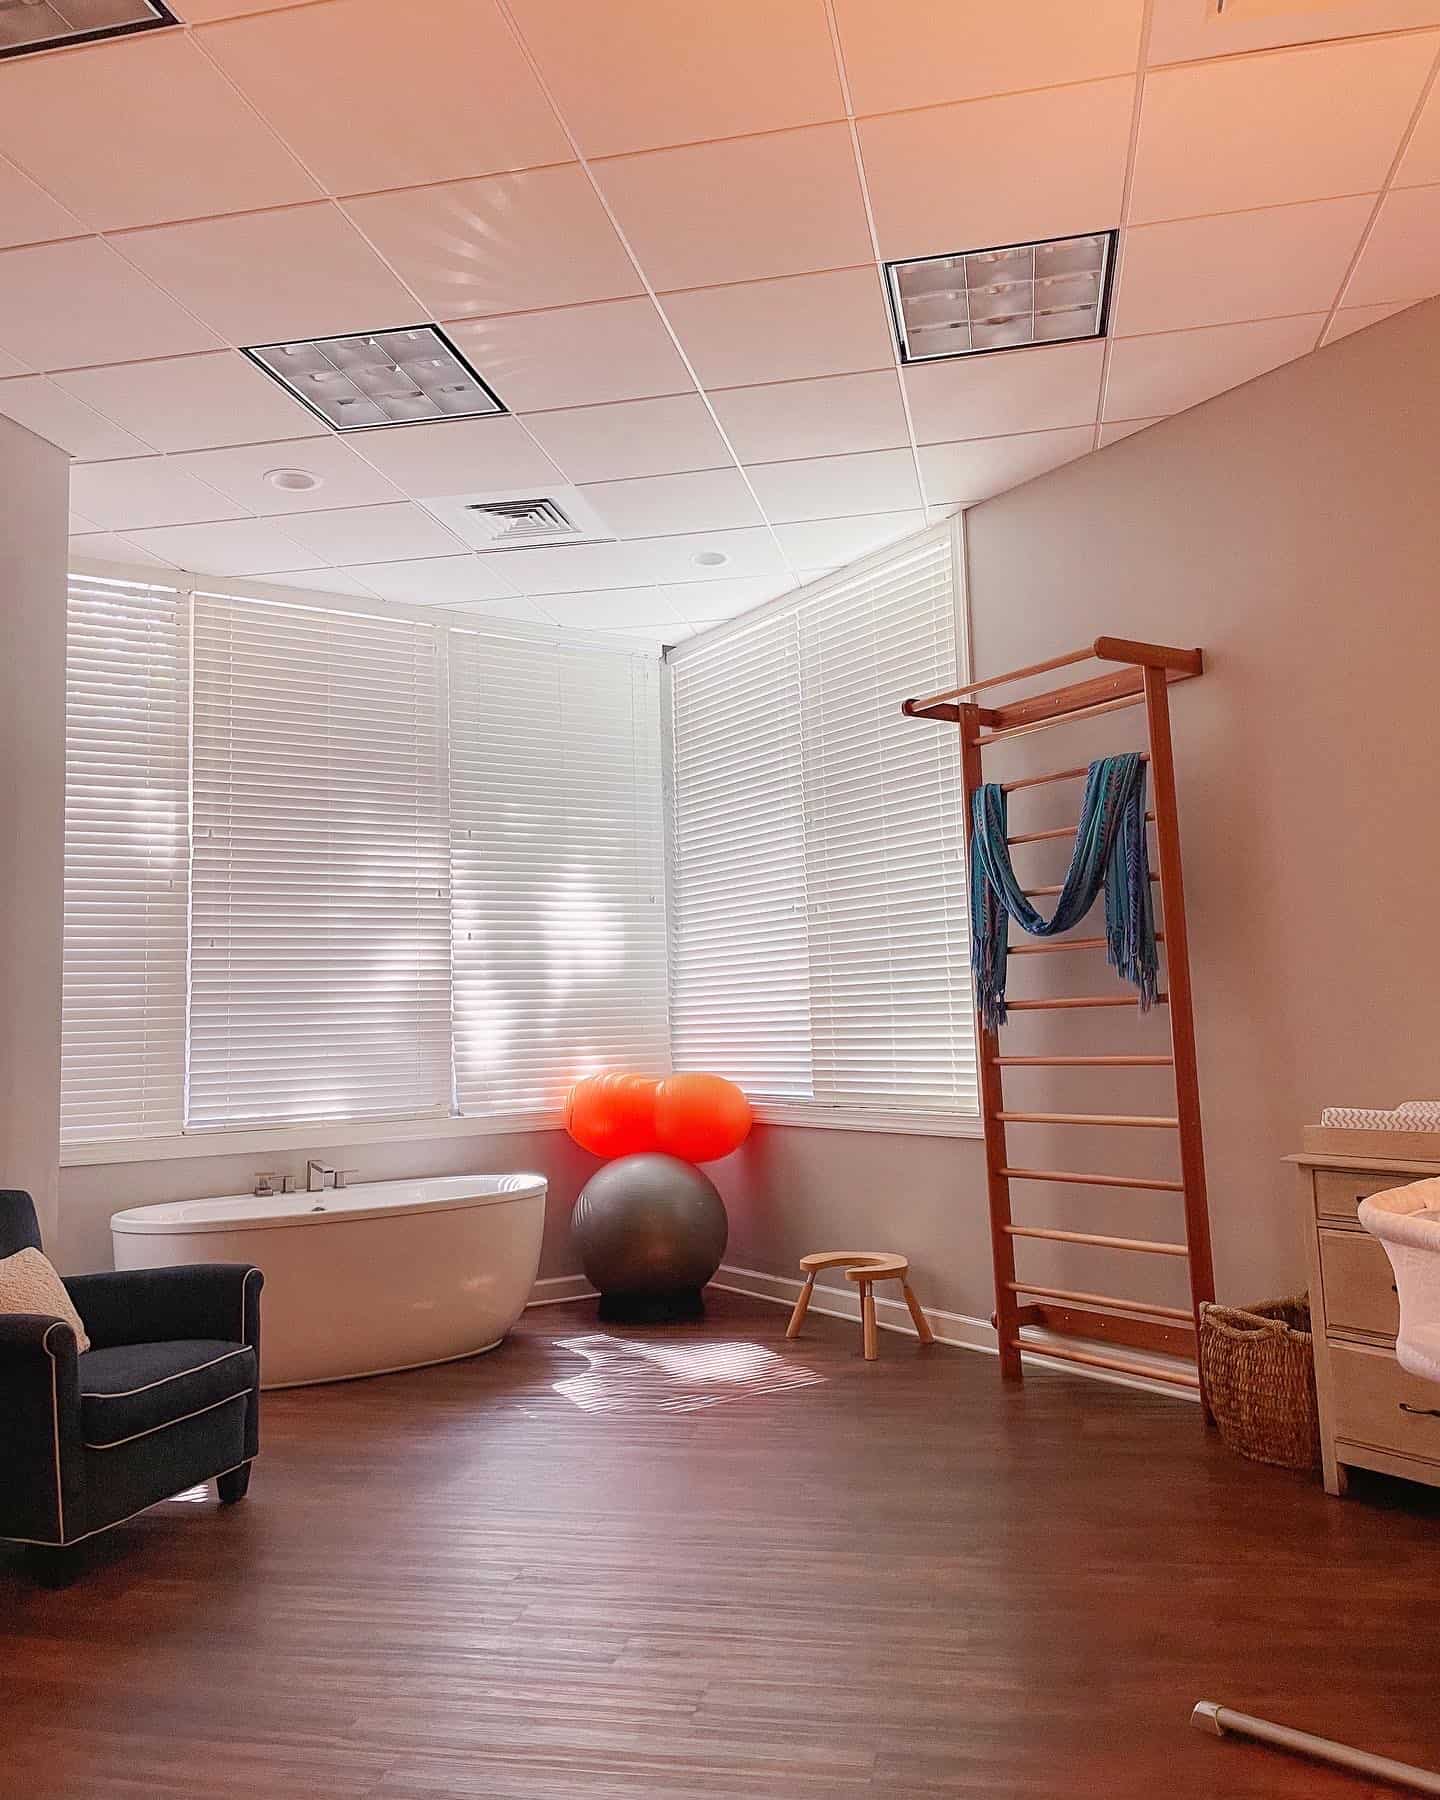
I also decided that as long as my pregnancy was deemed low risk, I didn’t want to give birth at a hospital. I won’t lie– it took some convincing to get Nick on board with the idea. Hospital births are pretty much the standard in the US and since we’d had a positive experience at Nate’s birth, why not just do the same again? Thankfully Nashville is home to the region’s only standalone, out-of-hospital birth center: Vanderbilt Birth Center. It checked all of my boxes: staffed by midwives, personalized prenatal care, a no-intervention approach to birth, located separate from a hospital with beautiful, home-like birthing suites. It also checked Nick’s box: top-notch medical care affiliated with a renowned hospital.
My experience at all my appointments this pregnancy felt like night and day. I never felt rushed, pressured or judged and was always given time to ask questions. I had an appointment during my first trimester where the only purpose was to discuss my diet, mental health and physical activity– nothing medical. I remember asking my midwife, “Wait, this is all you want to talk about today? You guys actually care about this stuff??” LOL. Overall all my prenatal appointments were very laidback and hands-off, which was a breath of fresh air compared to my first pregnancy.
As expected, my October 2nd due date came and went. I had Nate at 40 weeks 5 days so I was 100% mentally prepared to go late with Julian as well. I had an appointment with my midwife the morning after my due date (a Monday) and at the time was showing 0 signs of labor and felt for sure I’d be pregnant for at least another few days. She offered me an optional cervical check and a membrane sweep, but I declined both and felt confident that my body would do its thing when Julian was ready.
Well it turns out Julian decided he was ready later that evening. I started feeling mild sporadic contractions in the afternoon that steadily became more uncomfortable by 7-8PM. I remember having to stop and focus on my breathing while we were putting Nate down for bed and Nick being like, “omg is it really happening this fast?!” My early labor with Nate had been a slow 24+ hour crawl and while we knew that this time things were likely to happen faster, we were still taken by surprise at the quick progression and consistency of my contractions.
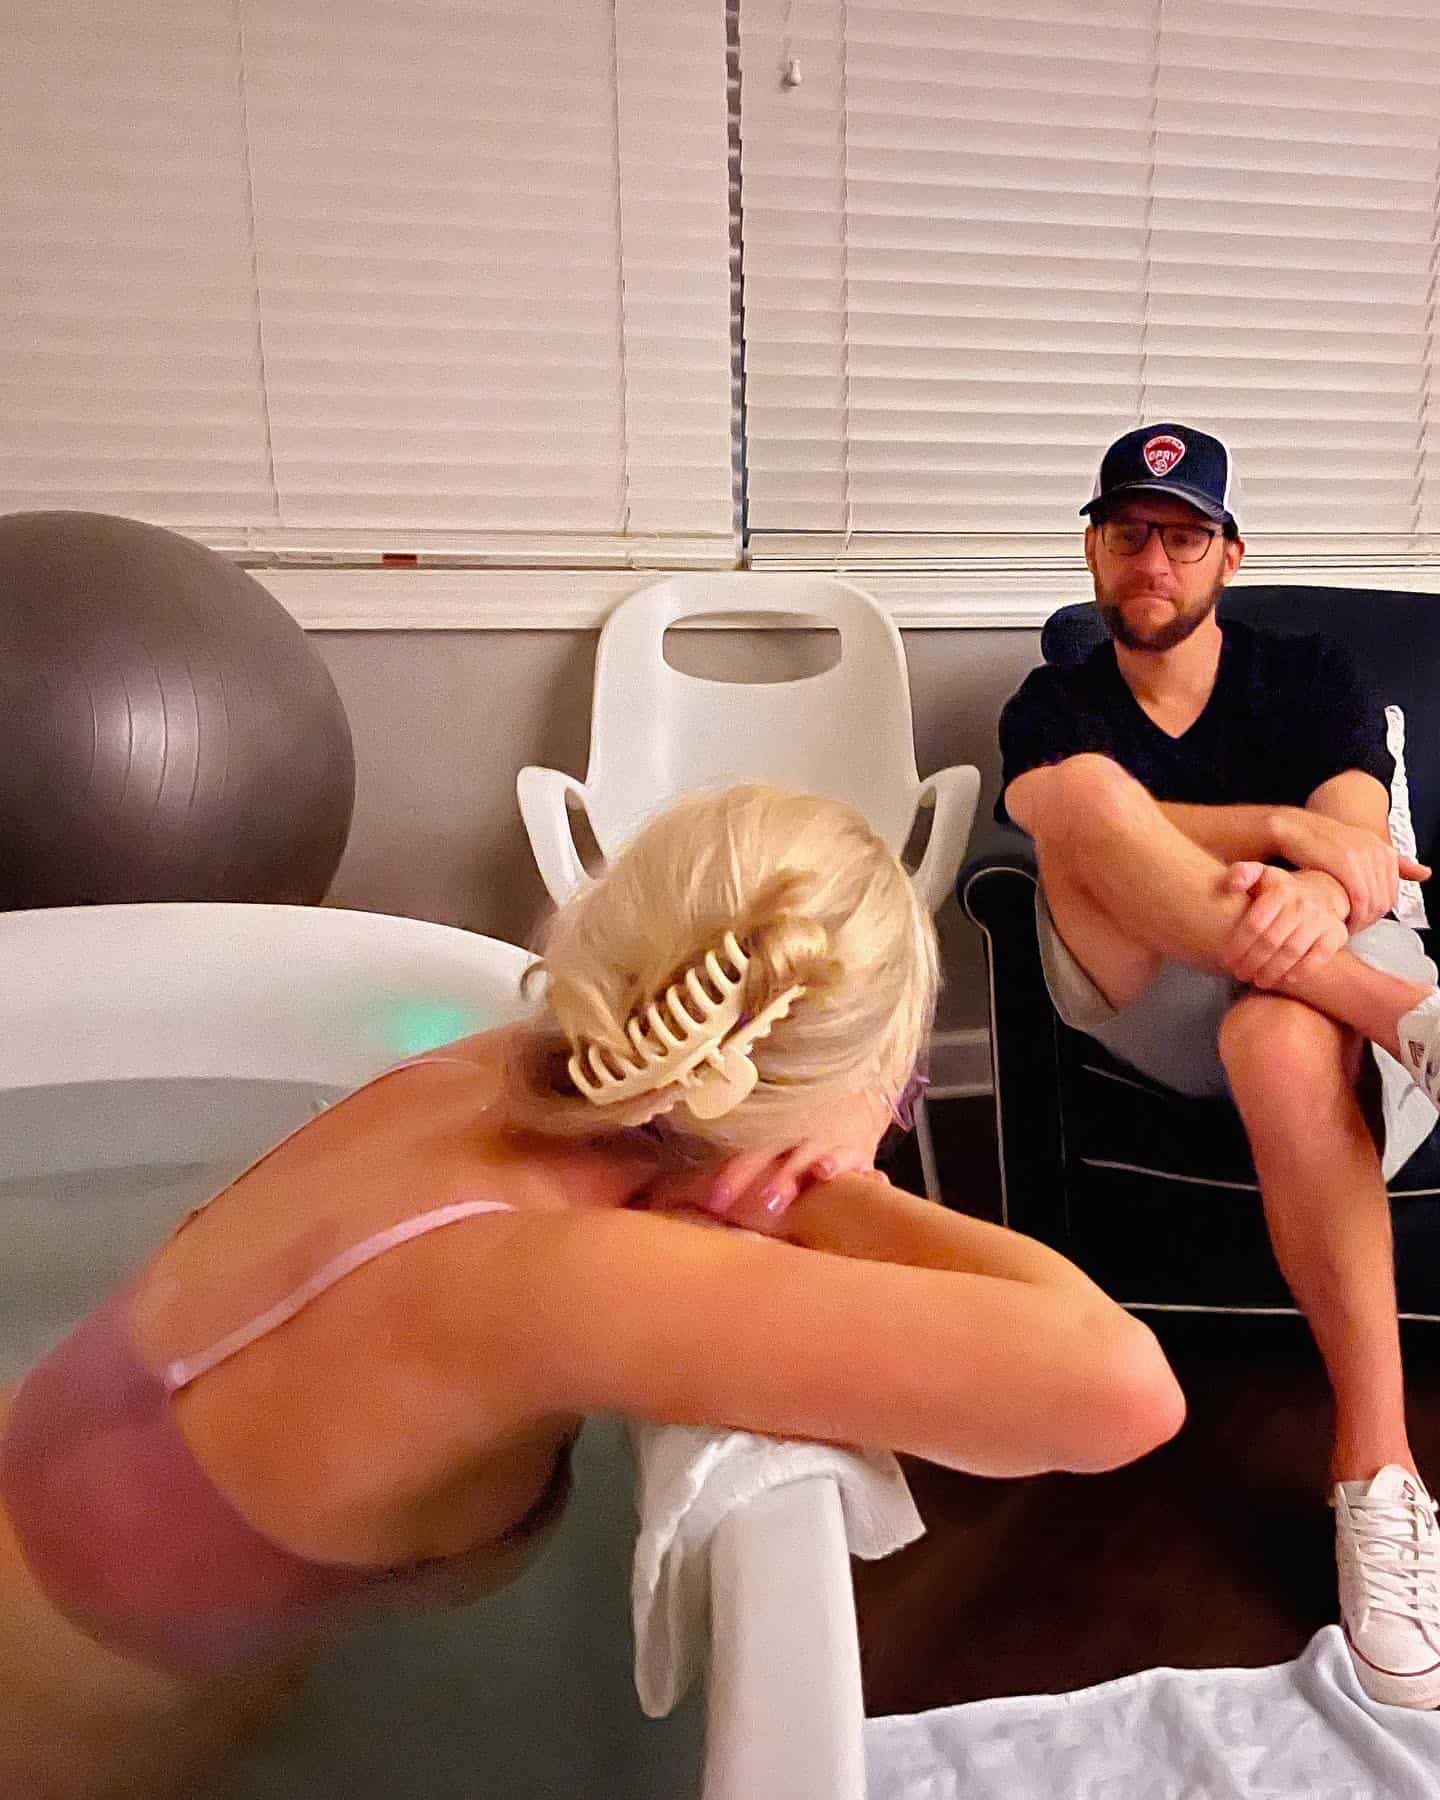
We called my midwives around 9PM to get their thoughts on if/when we should come in to the birth center. My contractions had continued getting closer and more intense and I had started laboring in our bath tub for pain relief and to help myself relax. Based on what I was experiencing, they told us it was time so we packed up the last of our things and called our nanny so she could come over to watch Nate. Part of me had hoped I’d go into labor during the day so we could say goodbye to him, but ultimately I’m glad he was asleep because I think I would’ve been wayyyy too emotional.
I remember the car ride to the hospital during my first labor feeling like complete torture. It was one aspect of birth that I really had been dreading, but thankfully it ended up being not as uncomfortable as I’d anticipated. I just continued breathing through my contractions trying my best to maintain a calm mindset. I think it helped a lot knowing that we were heading to a place where I knew I’d feel safe and comfortable. When we arrived at the birth center, my midwives were already waiting for us at the door and we were quickly ushered in to one of the birthing suites. A few minutes later my doula Anna also arrived.
I’m incredibly sensitive to my surroundings (lights, sounds, smells, colors, strangers’ energy) and remember feeling such a heightened sense of fear and anxiety at the hospital during Nate’s birth. Looking back, I was definitely in fight or flight. Walking into the birthing suite, I immediately felt such a sense of peace. The lights were dimmed, a diffuser was on and the bathtub was filled with warm water. It was as if we’d never left home.
Right away I was able to jump back in to my deep breathing and continue working through my contractions. I was shocked when my midwives told me I was already 6cm dilated! I barely made it to 3.5cm my first labor before asking for an epidural, so hearing that I was more than halfway to 10cm gave me such a confidence boost. Like OK I can do this.
Can you get an epidural at a birth center? I got flooded with this question after revealing that Julian’s birth was unmedicated. Answer: nope. At least not where I gave birth. A lot of you are probably wondering why I, or anyone, would want to go through labor without having the option for pain relief, especially considering I’d utilized it successfully during my first birth.
There were a few different reasons why I was drawn to an unmedicated birth.
The primary reason was my desire to give birth outside of a traditional hospital setting and be cared for by professionals whose #1 goal was for me to have an intervention-free birth. From the moment I saw the labor suites at the birth center, I was sold. The rooms were so peaceful and home-like and truly made me feel excited to give birth. Unmedicated births are the bread and butter of the midwives and nurses at the birth center and I felt from the beginning that everyone was on “my team” and that my birth plan would be fully supported.
At the hospital, there’s really no way to know in advance what you’re going to experience. Is the OB and nurses on call going to be supportive of an unmedicated birth? Will I be forced to push laying on my back? Would I be pressured to get Pitocin, other interventions, etc. if they felt I wasn’t progressing fast enough? Would there even be a room available where I could labor in the tub or shower? Would I be allowed to eat real food? I could list so many other common hospital birth practices and scenarios I knew I didn’t want to encounter for this birth.
I also just had a lot more confidence in myself as a second time mom knowing my body had already given birth once and that statistically my labor would go a lot faster. Another reason is I wanted a quick recovery.
I want to say we arrived at the birth center around 10:30PM and for the next 5ish hours I labored through my contractions with the support of Nick and my doula Anna. To keep things moving along, Anna had me change positions every 30 minutes or so. I would go from the labor tub to the bed where I got on my knees and laid with my belly against this large triangular pillow. I also found sitting on the toilet to be incredibly relieving and a great place to breathe through a contraction LOL.
One thing that surprised me was that I somehow was able to truly relax and even fall asleep in between contractions. Prior to going into labor, i’d listened to a ton of podcasts and positive birth stories where moms who gave birth unmedicated mentioned how with the right deep breathing and relaxation techniques they were actually able to sleep during the late phases of labor. It sounded completely crazy to me and I thought there was no way I could do that because 1) I’m a total wimp about pain and 2) I’m a naturally very anxious person. But it happened! Nick told me that when I was probably 8cm+ dilated there was a period of 15+ minutes where I dozed off between contractions and that he and Anna were like, wait how is she sleeping through this right now??
My contractions continued to gain intensity and eventually got to the point where I really was only have a minute or so break in between. Having Anna there to apply counter pressure to my hips and back was everything. No matter what type of birth you’re planning, I’d highly recommend hiring a doula if you’re able to. I didn’t have one with my first birth and wish I did because 1) they can act as your voice and ensure your birth plan is being followed and 2) they’re experts at providing support during childbirth for both mom AND dad. Overall Anna added such a calm presence to my birth experience. Throughout my labor she was there making sure all my needs were met and offering helpful suggestions (she’s literally attended hundreds of births.) She also acted as a guide/mentor for Nick and made sure he was involved and felt included.
After a few hours of laboring, I remember feeling like time was passing so slowly and even got a little frustrated that I wasn’t progressing faster. I asked one of my midwives why things weren’t happening faster especially since I was a second time mom and had in my head that labor would be quick and her saying to me, “I know you feel like this is going slowly but I promise you it’s going much faster than you think and you’re making amazing progress.”
From that point on I tried to get the idea of time out of my head and just kept telling myself that every contraction was one step closer to meeting my baby. They continued to gain intensity and eventually got to the point where I really only had a minute or so break in between. By then I’d gone totally primal– moaning low tones, crouching on the bed on all fours and I couldn’t have cared less about who was seeing me basically naked. It’s true that during birth all your inhibitions go out the window. I’m a very modest person– aka the girl that changes in the bathroom stall at the gym because God forbid anyone sees my underwear. During birth? GET THESE CLOTHES OFF ME.
One thing that I had prepared for with unmedicated labor that ended up happening a lot differently was the transition phase. This phase of labor is when you progress from 8-10cm dilation, just before it’s time to push. Transition is typically very noticeable and intense, but also short (under 30 minutes.) I weirdly never noticed any difference between my active labor and transition phase. There was never a moment where I felt an intense jump in contraction pain– they just continued to grow in intensity.
Then things got REAL. My water finally broke at 10cm and that’s when things went 0-100. The calm demeanor and deep breaths that I’d been able to maintain during active labor and transition completely went out the window. I had been on my knees on the bed laying with my chest against the large triangle pillow, but what I was feeling was so intense that Nick had to get on the bed in front of me and physically hold me up while I pushed.
I won’t lie. The contraction “pain” I’d felt previously was peanuts compared to the ring of fire. This was the one and only moment of J’s birth where I felt fearful and like things could get out of my control. I definitely screamed a few lines that you’d probably expect to hear in a movie. I also somehow ended up putting Nick in a chokehold LOL. I was pretty much gripping on to him for dear life.
In total I pushed for about a half hour and I want to say the ring of fire lasted about 5-10 minutes. During pushing I thought for sure that I was tearing because that’s exactly how it felt. Thankfully that wasn’t the case. My midwife informed me after that I had a small cosmetic interior tear and that my perineum was completely intact. BIG sigh of relief. During pushing she and the nurses continually applied warm compresses and coconut oil “down there” to protect me and help my skin stretch. I remember at my hospital birth asking the OB if they could do similar and pretty much getting laughed off by the OB. I’m VERY grateful that this time I had a care team that prioritized this without me even having to ask.
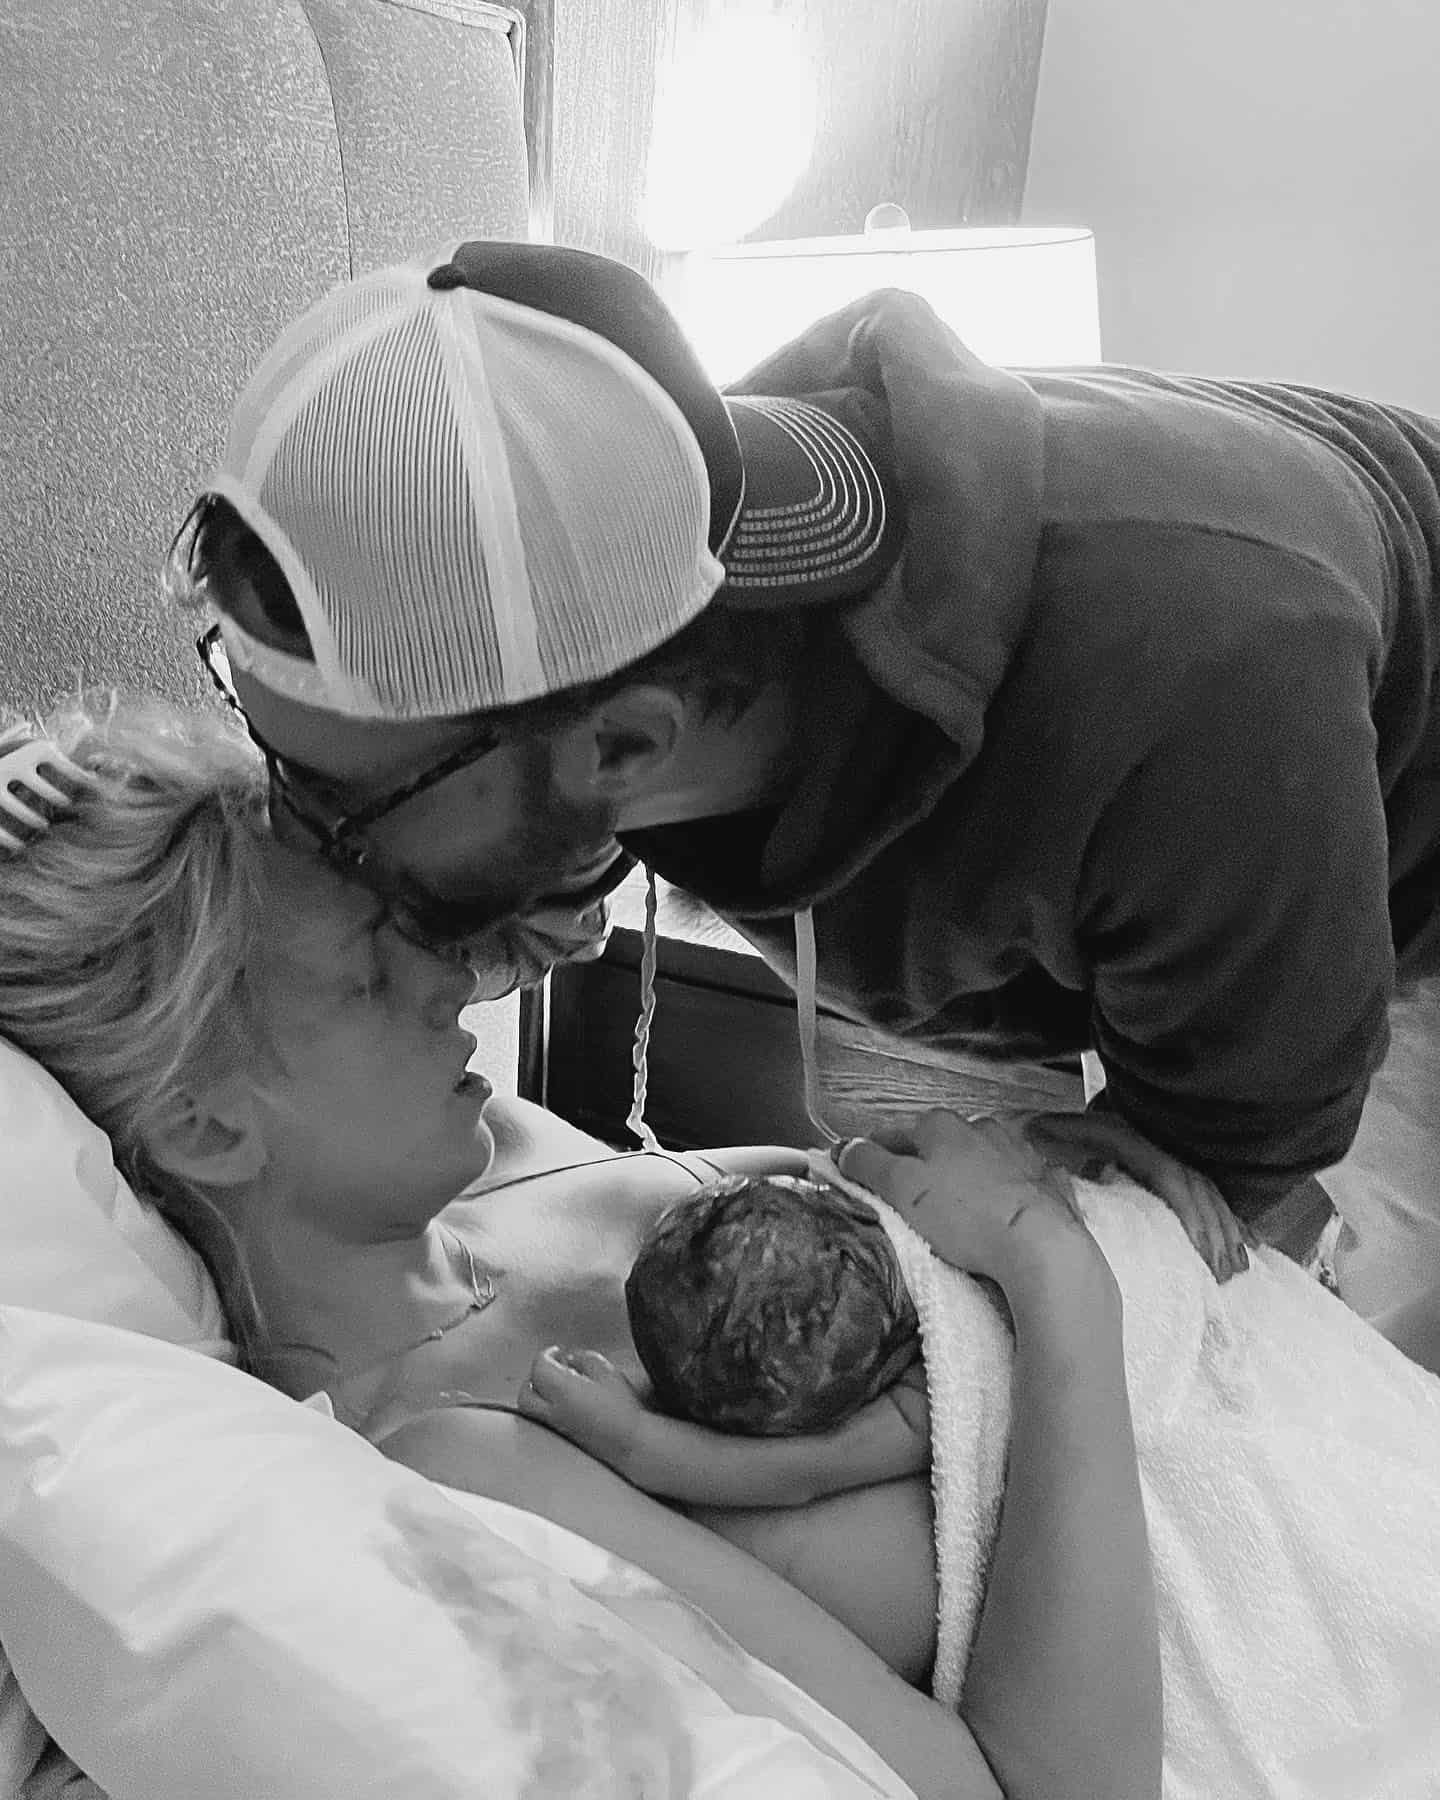
Giving birth unmedicated was the hardest thing I’ve ever done in my entire life, but then it was OVER! The pain and discomfort immediately went away as soon as Julian was placed on my chest. I think for that first hour after I was still in disbelief that I’d actually birthed a whole human without any pain relief or medical intervention.
I even cut his cord myself! Once it had finished pulsing (we did delayed cord clamping) I remember my midwife asking Nick if he wanted to do it, but since he was still feeling a little squeamish from the birth he was like “noooo that’s OK” LOL. She then proceeded to ask ME if I wanted to and obviously I said yes, so I literally cut it right there as he was laying on my chest. It was so surreal!
The entire experience just felt so… normal, I guess? Laying in the bed in the birthing suite during that first golden hour Julian felt similar to being at home. I just remember feeling very relaxed and at peace while the midwives and nurses gently tended to Julian and I while we soaked up cuddles and he nursed for the first time.
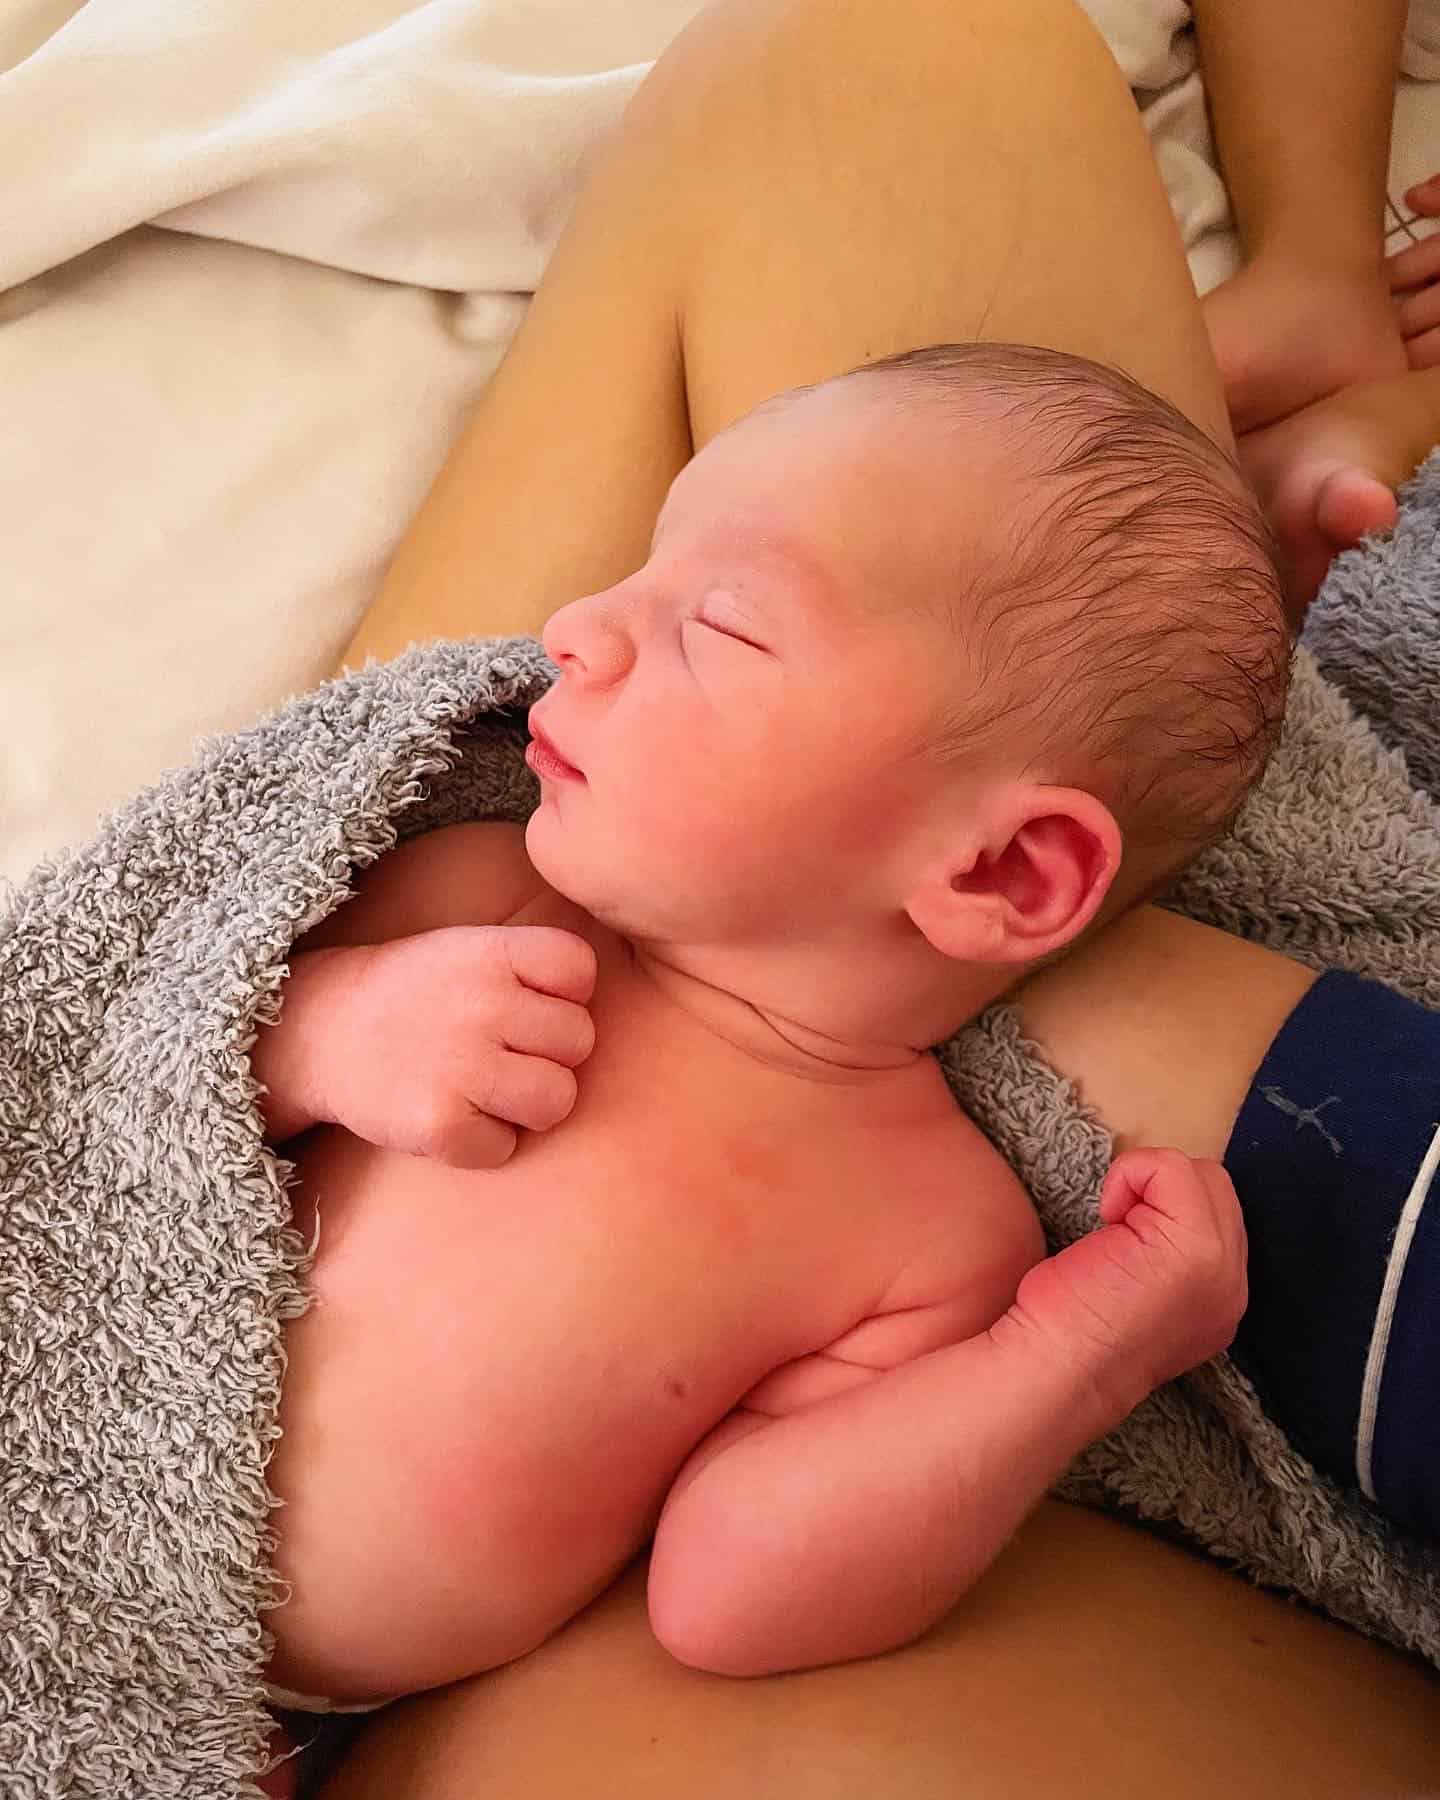
So Julian was officially born at 4:25am on Tuesday October 4. We ended up being able to head home within a few hours after his arrival. I think we left the birth center around noon– 7 hours after he made his debut–and since then our lives have changed in the best way! We’re still working on getting into a new routine and groove, but I know that will all come in time. One thing I can say is that so far going from 1-2 kids has been vastly easier than going from 0-1. I was a little worried we’d “forget” how to do all the newborn things, but it came back to us almost immediately. Julian is the sweetest boy– super snuggly, BIG appetite and a great sleeper  We’re obsessed!

The post Julian’s Birth Story appeared first on Katie's Bliss.
]]>
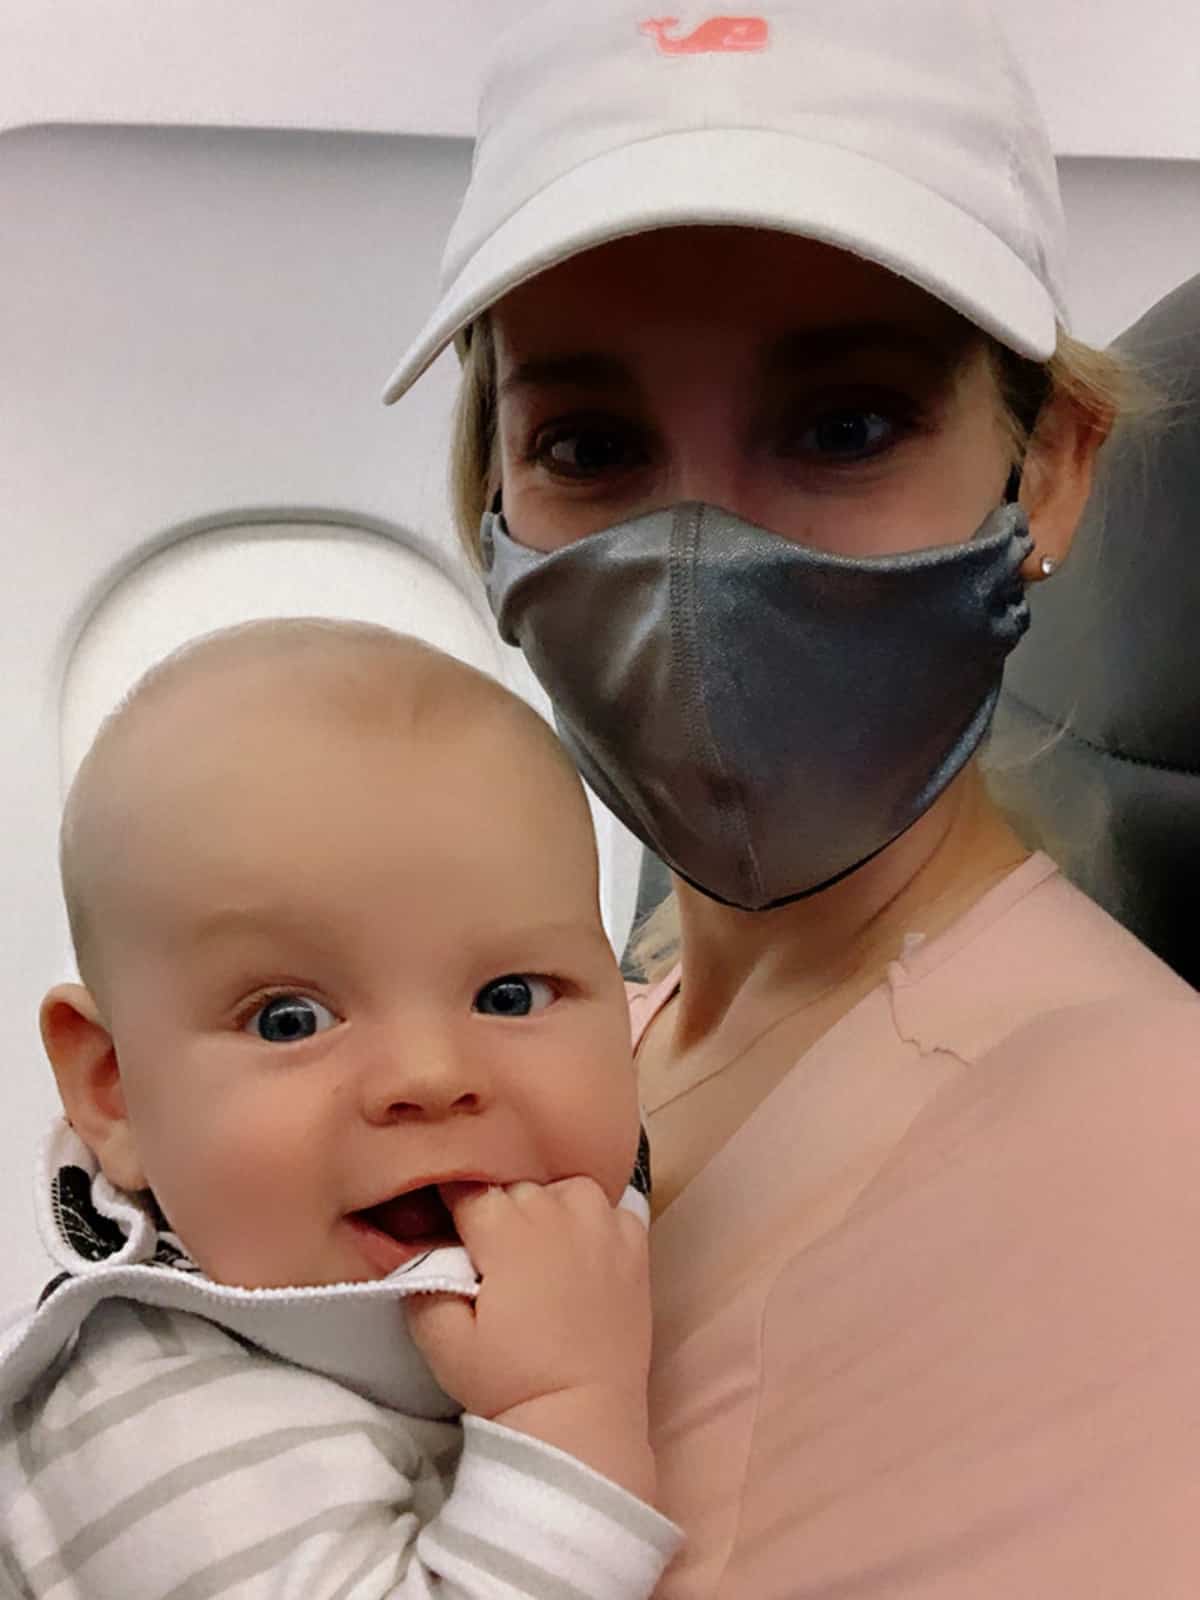
Thanks to all the time we spent going back and forth between the northeast and Florida last year, Nate had over 8 flights under his belt by the time he turned one. Since he was still in the baby stage, my goal was always to try and get him to sleep during the flight (it was hit or miss) and if he was awake I’d just try and keep him occupied
The post How To Fly With A Toddler | Travel Must-Haves appeared first on Katie's Bliss.
]]>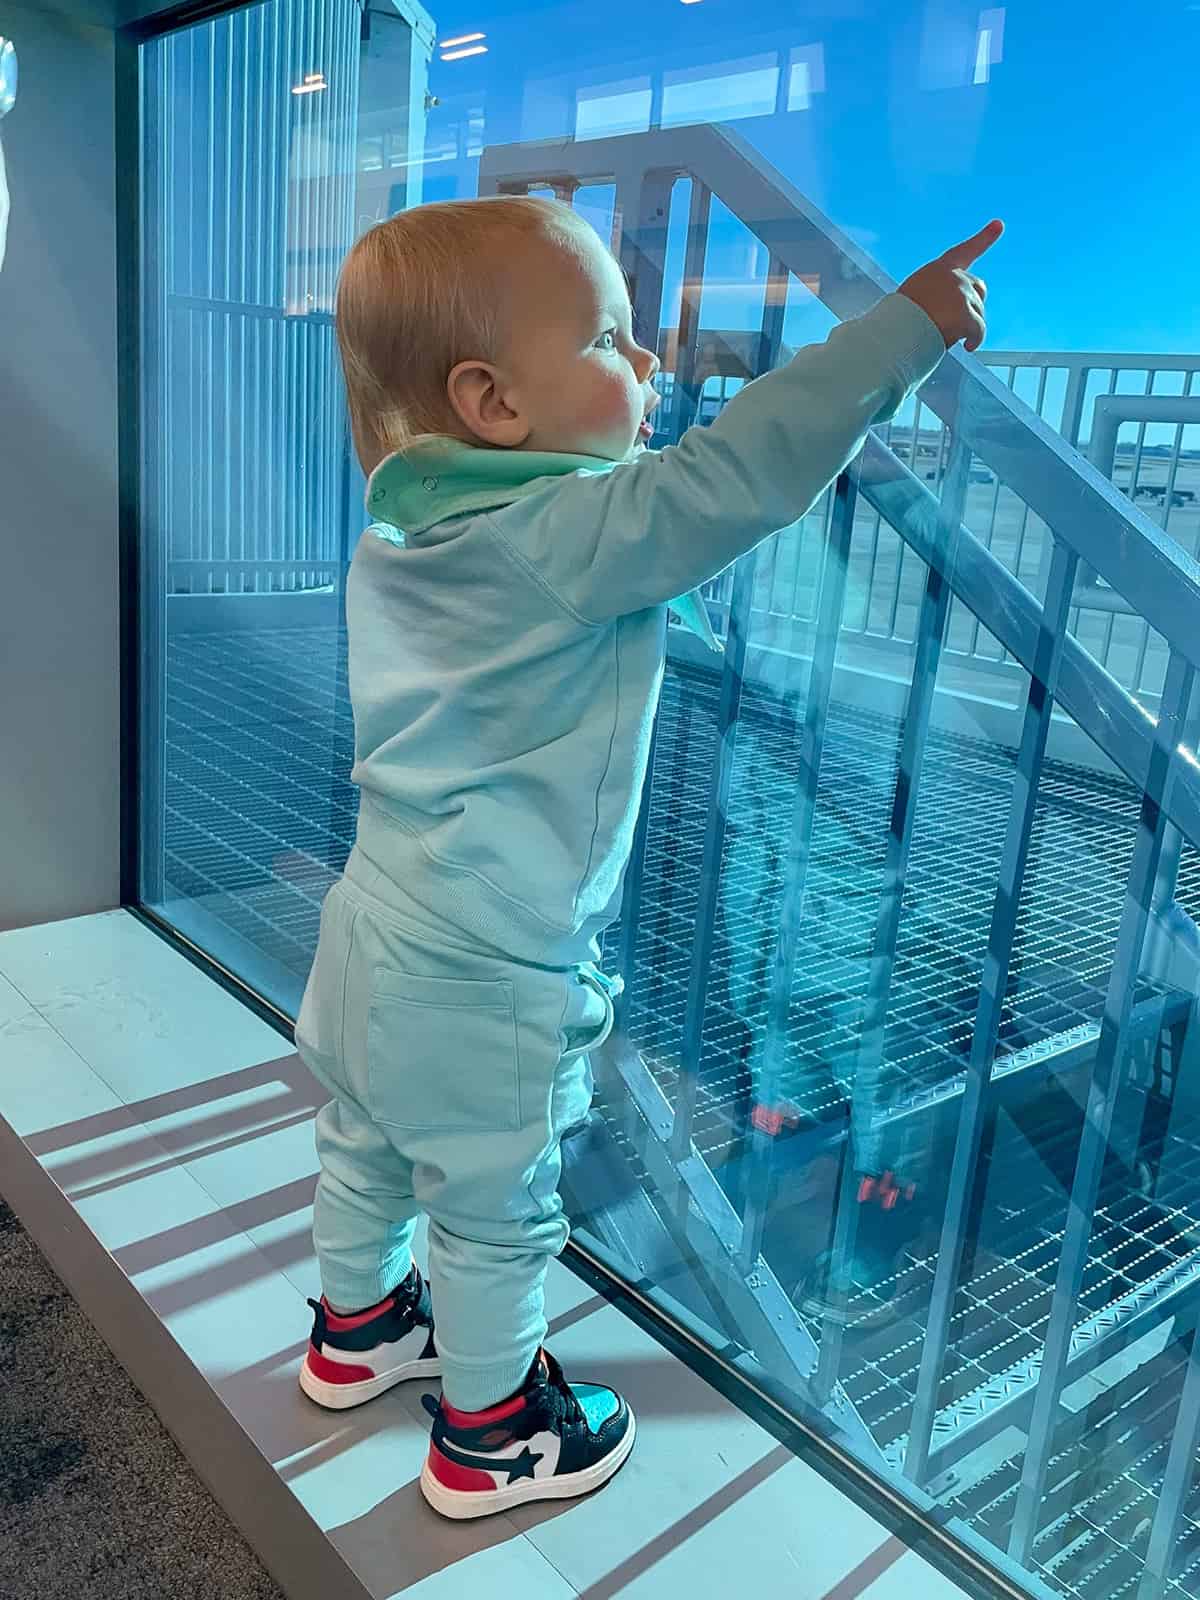
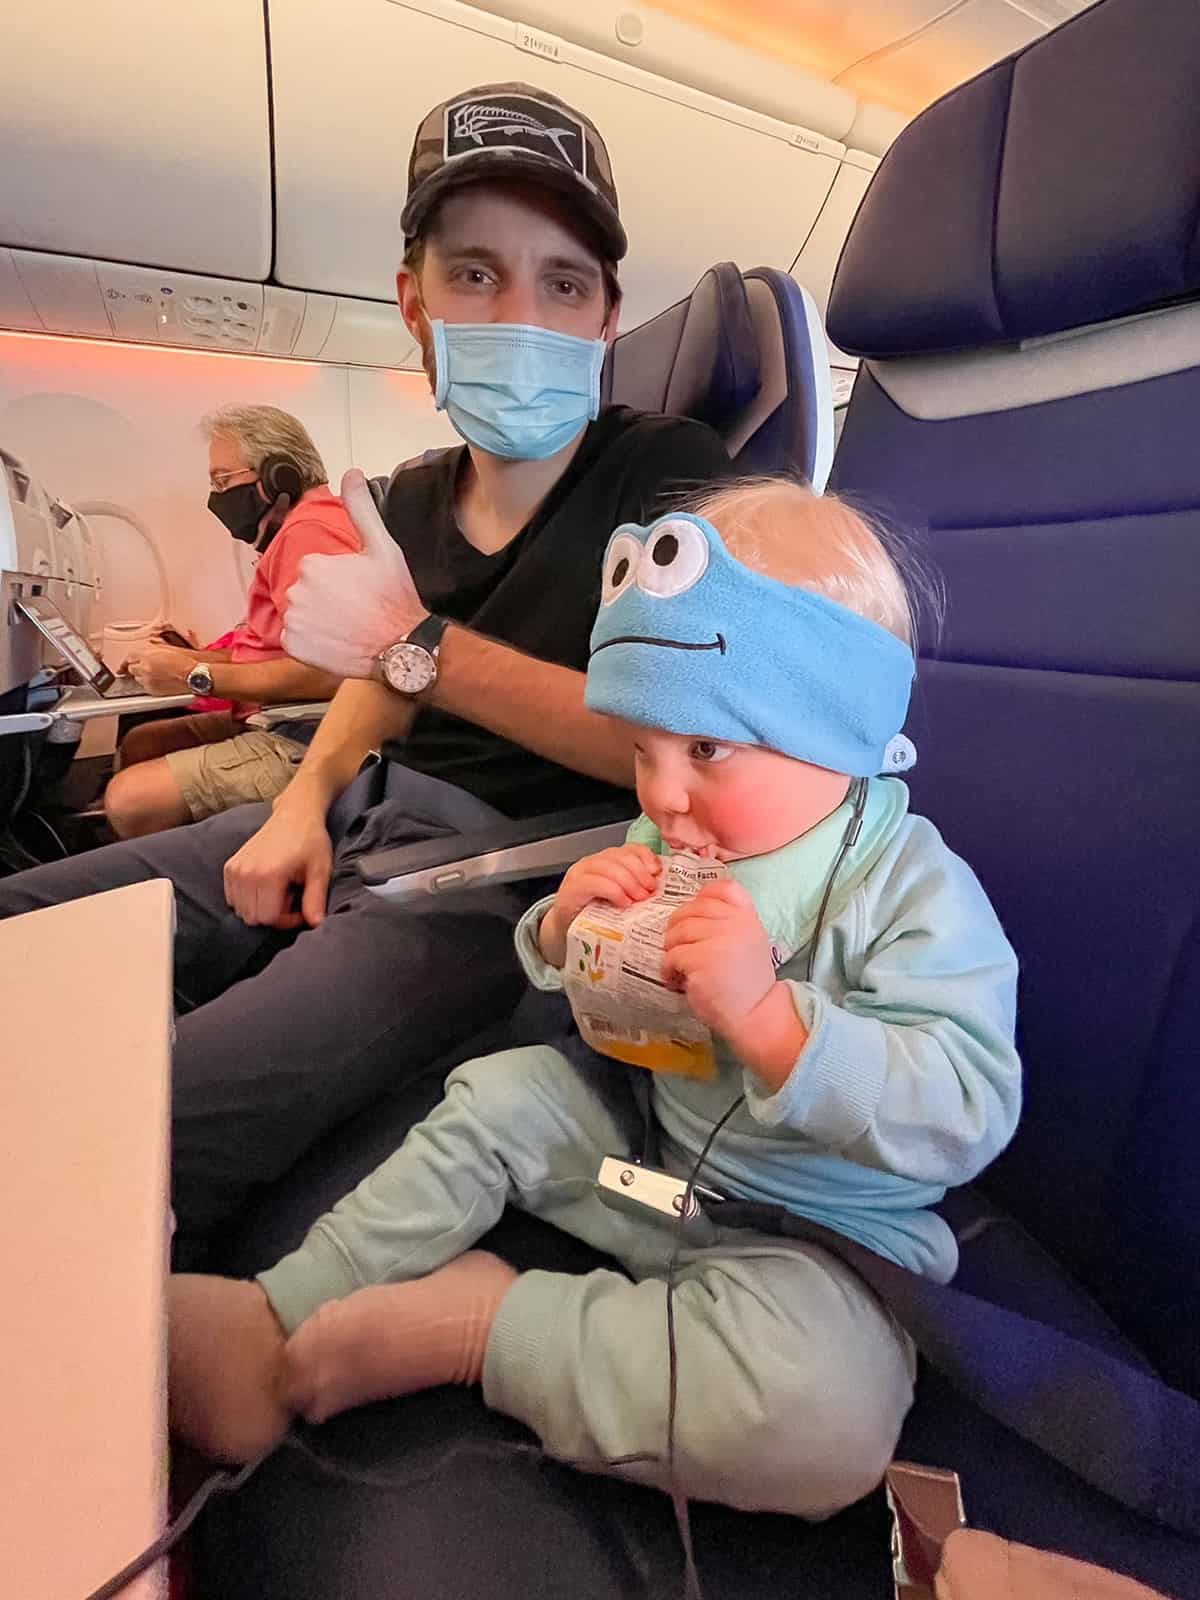
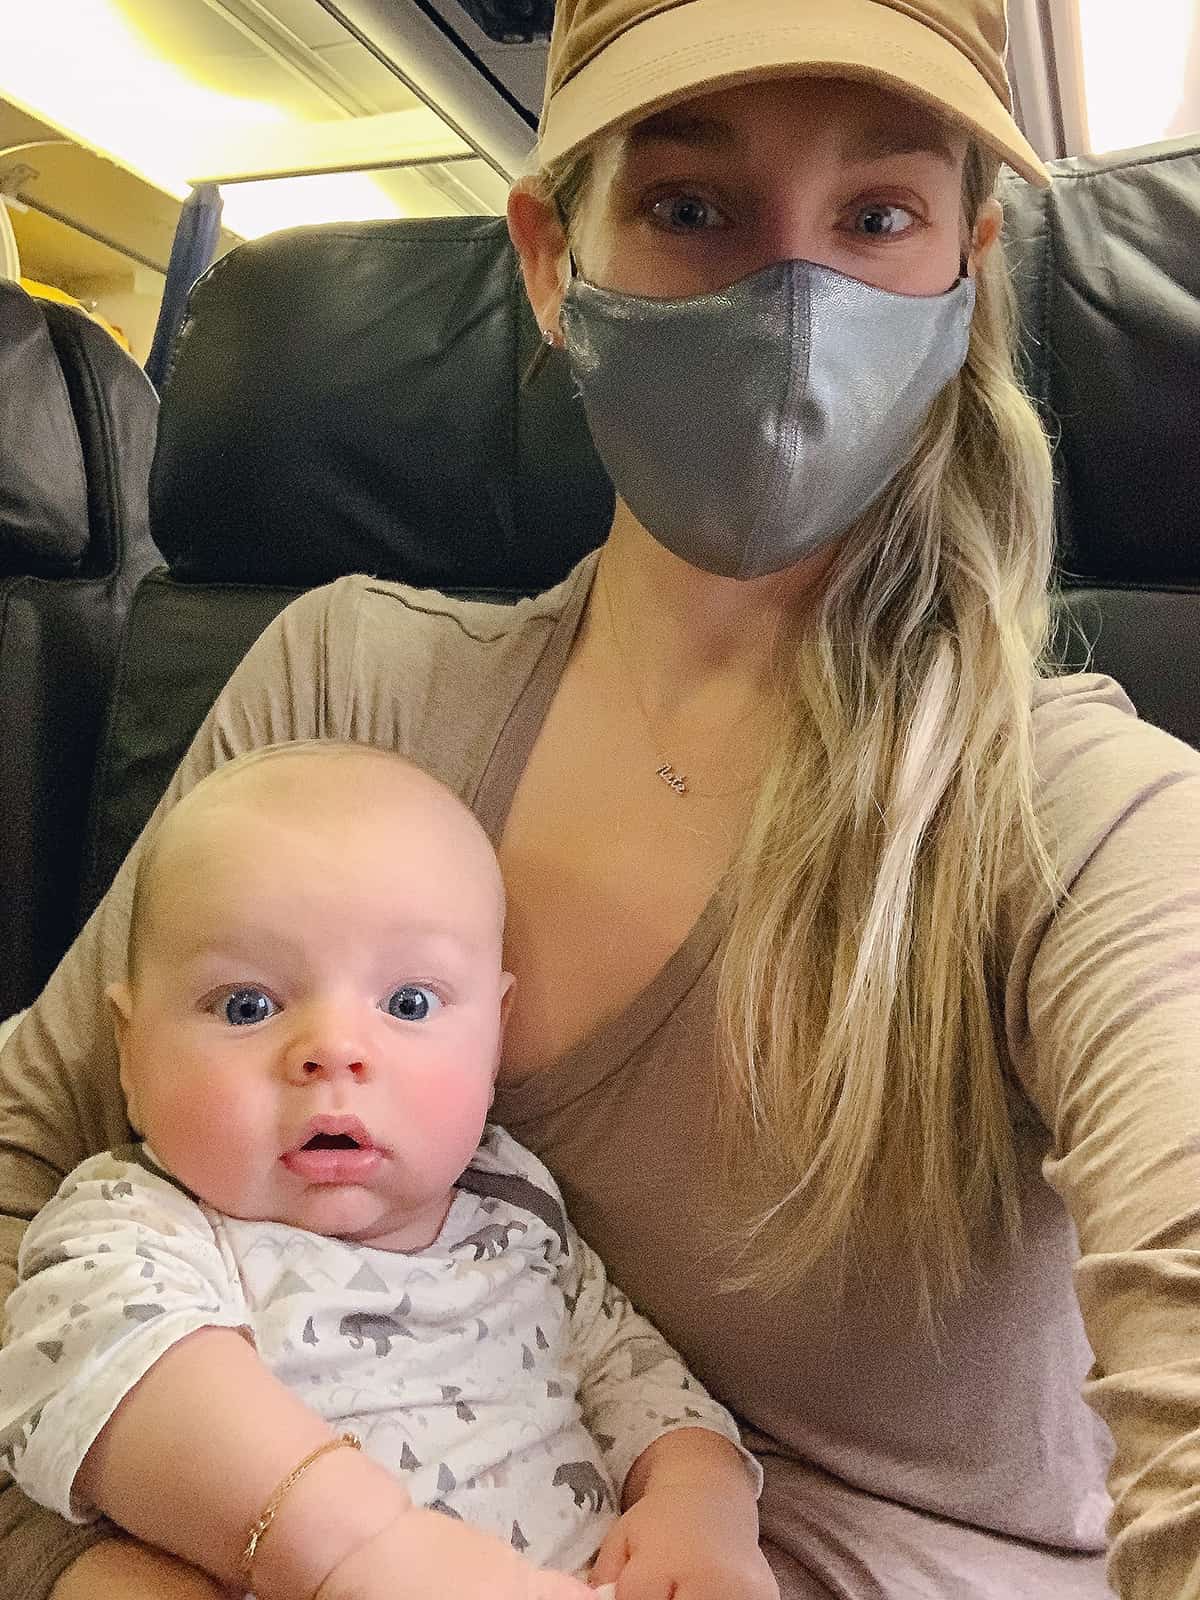
Thanks to all the time we spent going back and forth between the northeast and Florida last year, Nate had over 8 flights under his belt by the time he turned one. Since he was still in the baby stage, my goal was always to try and get him to sleep during the flight (it was hit or miss) and if he was awake I’d just try and keep him occupied with breastfeeding lol. Flying with Baby Nate was one thing, but Toddler Nate is a whole different ball game so I wanted to share our go-to in-flight gear + some toddler travel tips!
Snacks + Entertainment = Happy Toddler

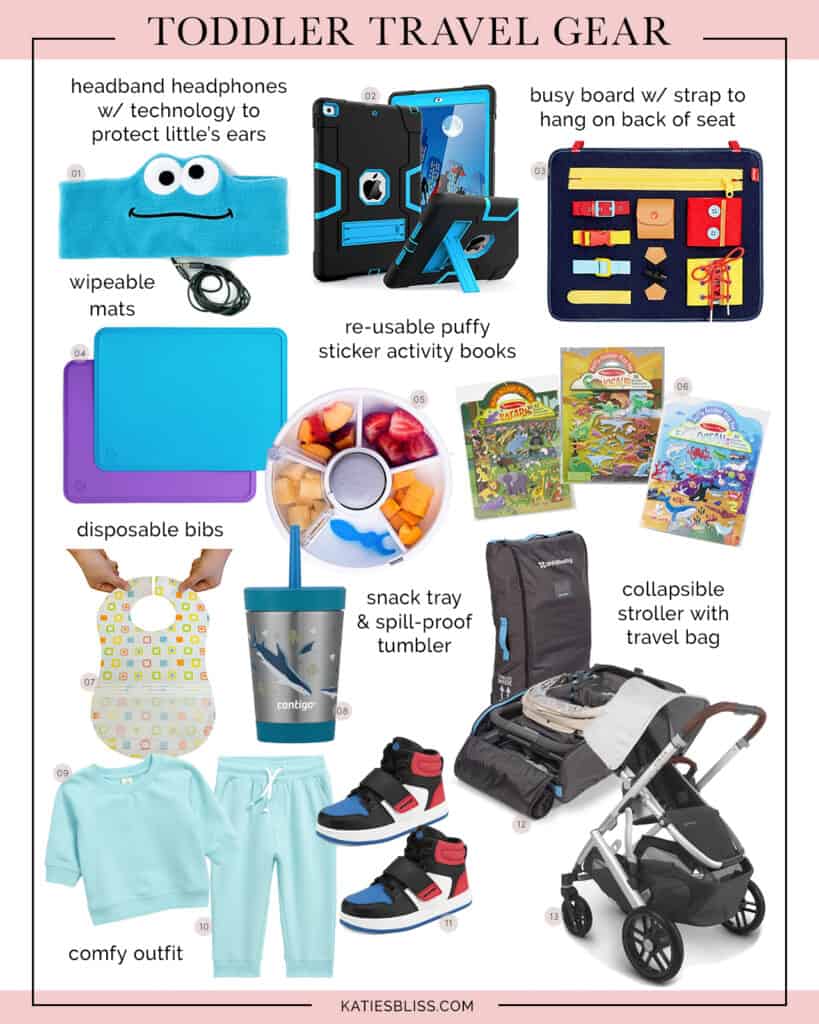
1. Kid’s Headband Headphones | 2. Heavy Duty iPad Case | 3. Busy Board | 4. Wipeable Mats | 5. Travel Snack Tray | 6. Reusable Puffy Sticker Play Books | 7. Disposable Bibs | 8. Spill-Proof Tumbler | 9. Cotton Sweatshirt | 10. Kid’s Joggers | 11. High Top Sneakers | 12. Stroller Travel Bag | 13. Collapsable Stroller
We used all of this gear on our recent trips to Florida and the Bahamas! We got lucky with flights that lined up with his wake windows so I just made sure to have lots of things to keep him entertained (aka snacks, an iPad, books and toys.) I also included in my carry-on all the things we typically bring when we eat out at a restaurant– disposable bibs, a mat to put on the table + his water cup.
Travel Tips
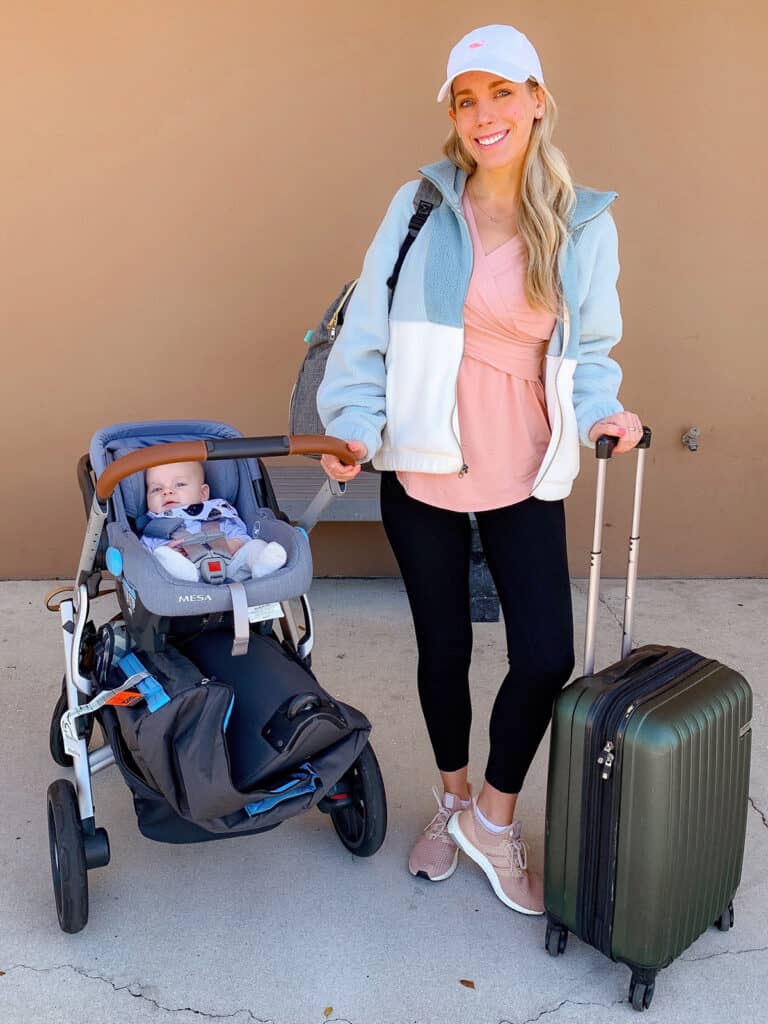
If your kiddo is under 2, consider buying them their own seat. Sure, if your flight isn’t full you could end up getting lucky and have an extra seat in your row, but that’s never guaranteed. I’ve flown with Nate as a lap infant and have bought him his own seat and definitely prefer the latter. Even if your kiddo ends up in your lap for most of the flight, it’s still nice to have space to spread out and put them down if needed. I typically always breastfeed Nate during landings and takeoff, so having the seat next to me empty is a game changer, not just for our comfort but privacy too.
How do you handle the car seat + stroller? This is what we do: we check the car seat as baggage right when we get to the airport and then we keep our stroller with us until boarding and check it at the gate. I’m almost certain that every airline is required to waive baggage fees for car seats and strollers so you can always bring these free of charge. When Nate was a little younger and we flew, there were a few times that I did bring his car seat on the flight for him to sit in (I had purchased him a ticket/his own seat.) If you’d prefer to do that, just make sure your car seat is FAA approved. We used the UPPABaby Mesa with no issues! In terms of stroller, we are big fans of the UPPABaby Vista. Yes, it’s a little heavy, but the quality is unmatched and it’s so easy to breakdown and fold up. Highly recommend getting the Vista travel case. We keep it with us as carry-on baggage folded up in the bottom stroller basket while we’re in the airport and then pack up the stroller once boarding begins. It has wheels and you can roll it right down to the gate agent.
Snacks, snacks and more snacks. Our last flight Nate literally snacked the entire time. I think he was honestly more entertained by the endless food than his iPad LOL. How cute is this spinning travel snack tray? I plan on packing this with all his favorite treats for our flight to the Bahamas. Other essentials: a wipeable mat that you can lay over the airplane tray, a travel cup for water/milk and disposable bibs. In terms of specific snacks– I packed Nate a bunch of squeezable pouches, crackers + some cut up fruit and cheese.
Screen time rules do not apply when traveling. While we don’t do screen time at home, flights are a different situation and completely fair game. I have a hard enough time as an adult not going stir crazy on a plane… Can you imagine how small kiddos must feel? On our last flight we prepped our iPad in advance with lots of Netflix downloads. I went for slower-paced series like Llama Llama, Trash Truck and Puffin Rock and avoided the overstimulating shows aka Cocomelon, Baby Bum, Gabby’s Dollhouse, etc. We also used these toddler headband headphones that have a volume-limiting feature to protect littles’ ears.
Save new toys + books for the flight. If you can, try and pack a few new activities that you can “gift” your kiddo on the flight. The last time we traveled these re-usable sticker books were a hit! I’ve already heard really good things about these poppers.
Try to book a morning flight/during your kiddos wake window. This way your kiddo will be well-rested so if a nap doesn’t happen– it’s not the end of the world. You’re also less likely to experience flight delays and issues at the airport. If a morning flight isn’t an option, then I’d opt for one that’s during a wake window (unless you’re confident your kiddo will sleep on the plane.)
Get to the airport early. Especially if you have a lot of baggage or don’t have TSA precheck. We all know that everything takes 2-3x as long with kids. Plan accordingly!
The post How To Fly With A Toddler | Travel Must-Haves appeared first on Katie's Bliss.
]]>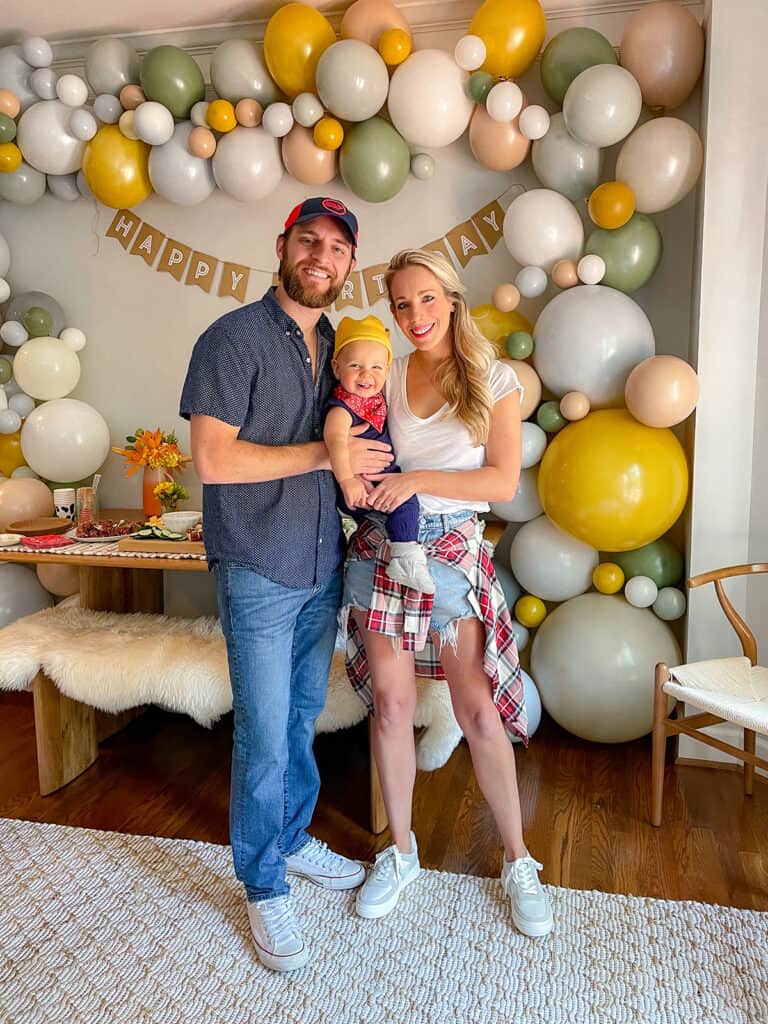
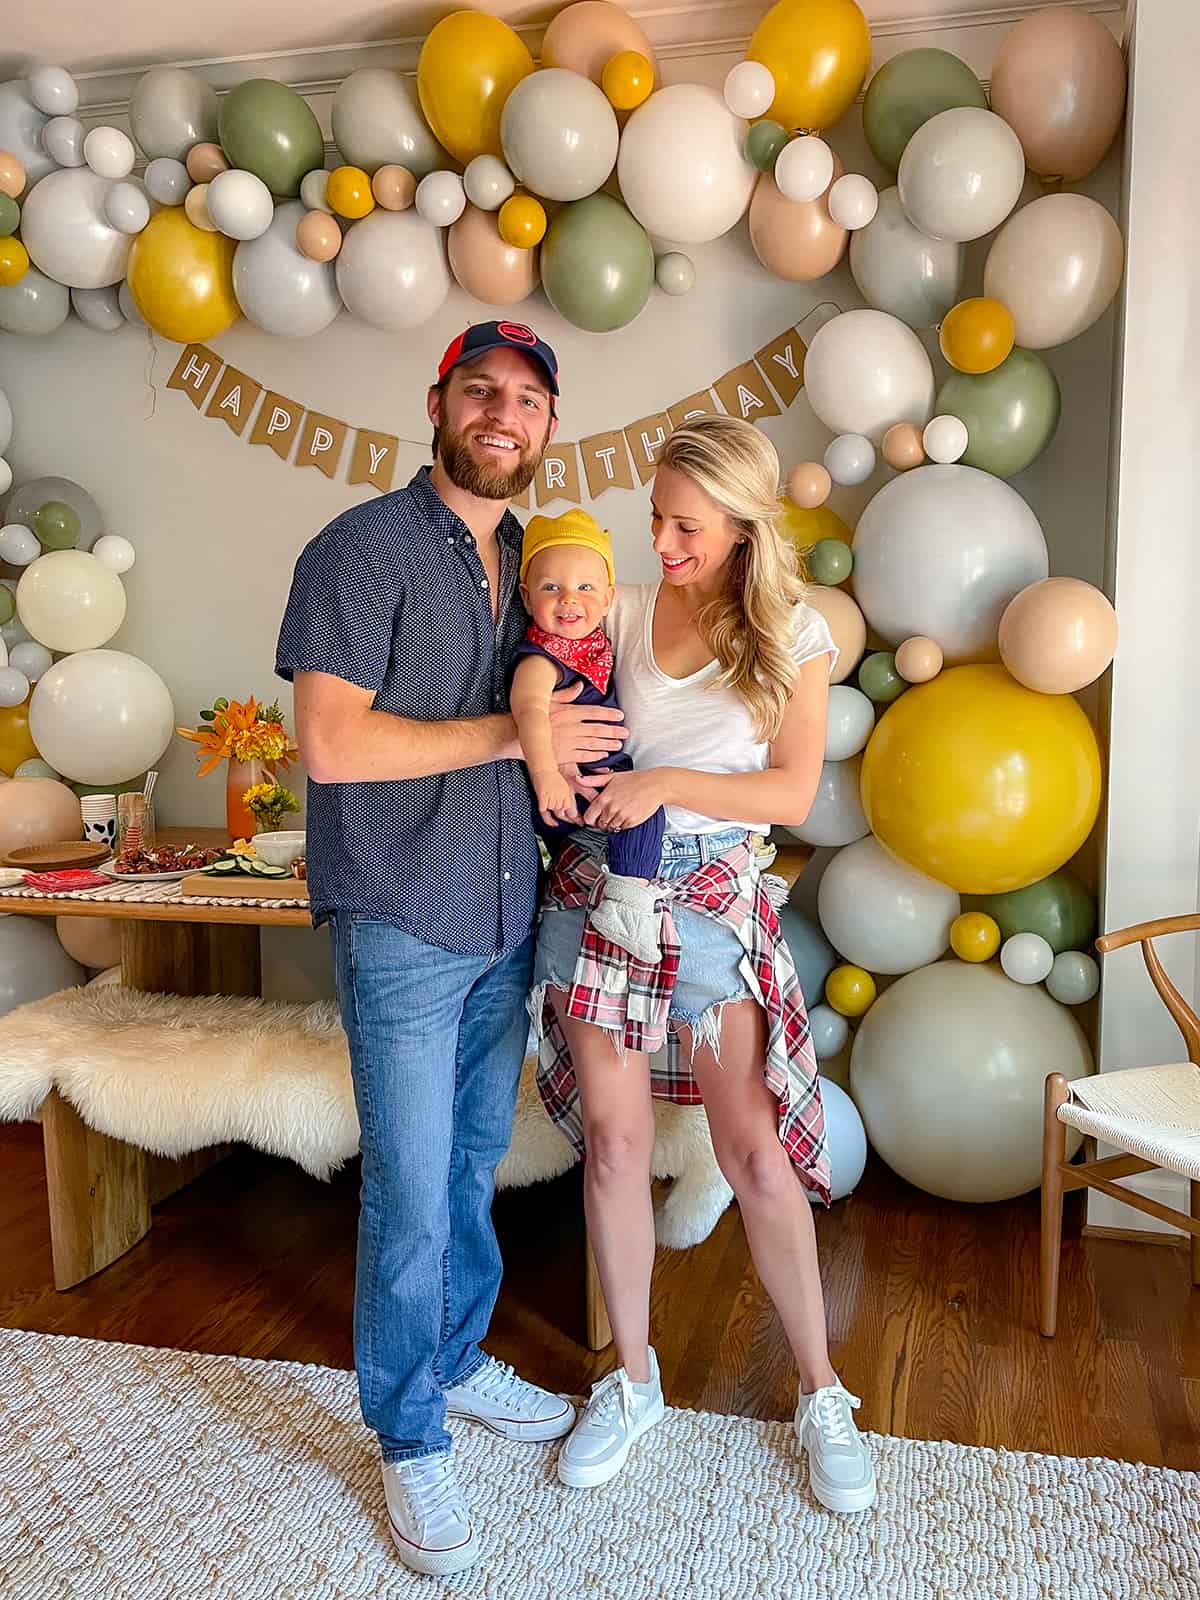
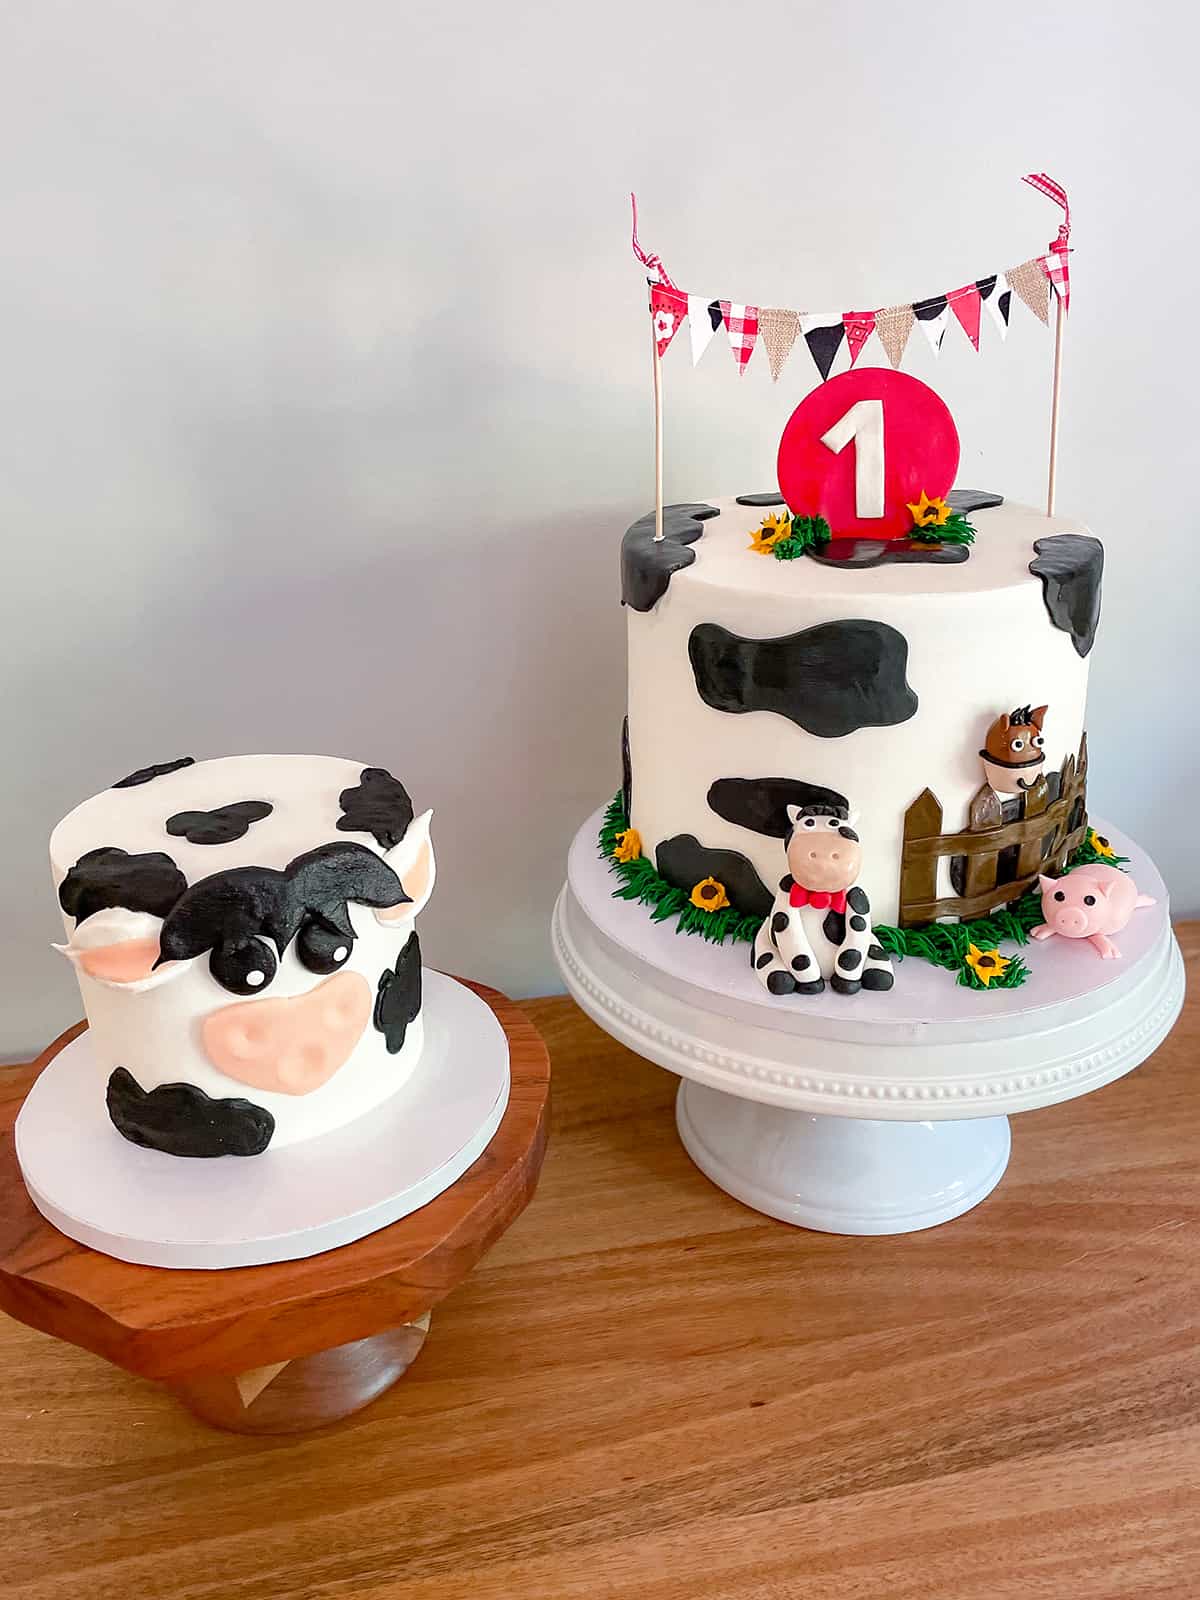
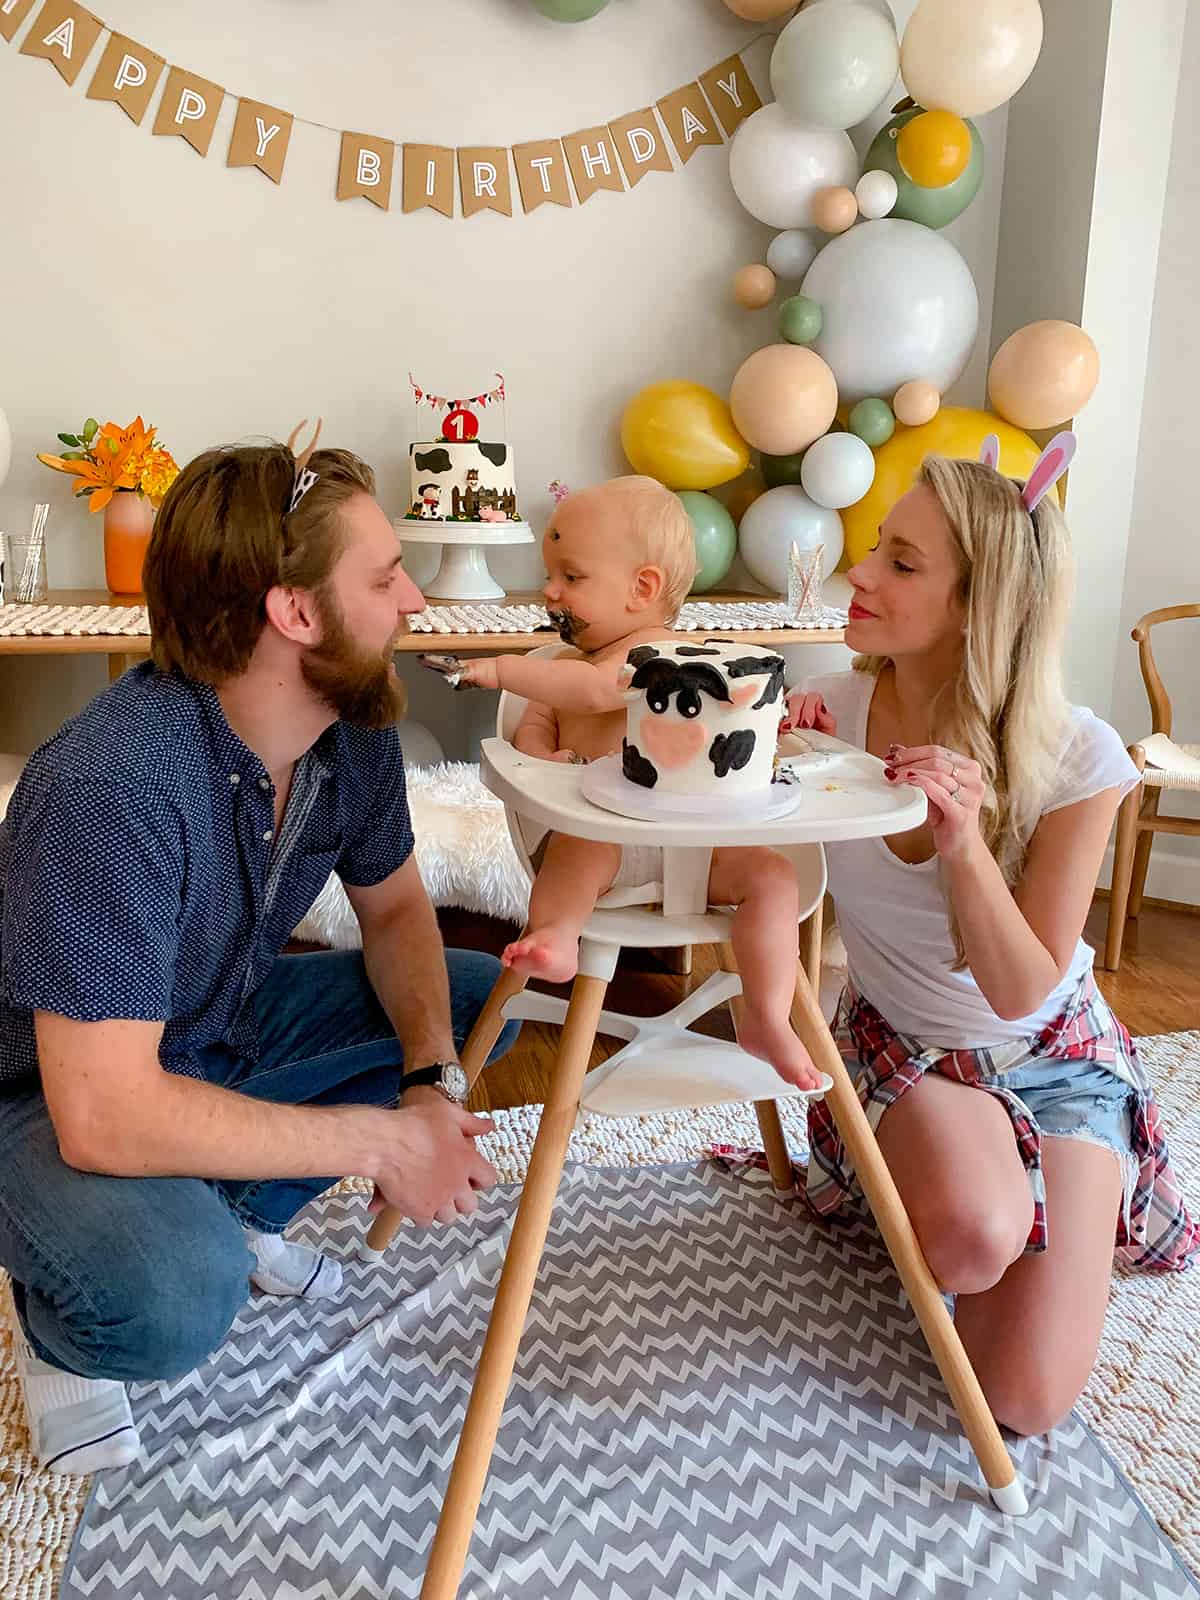
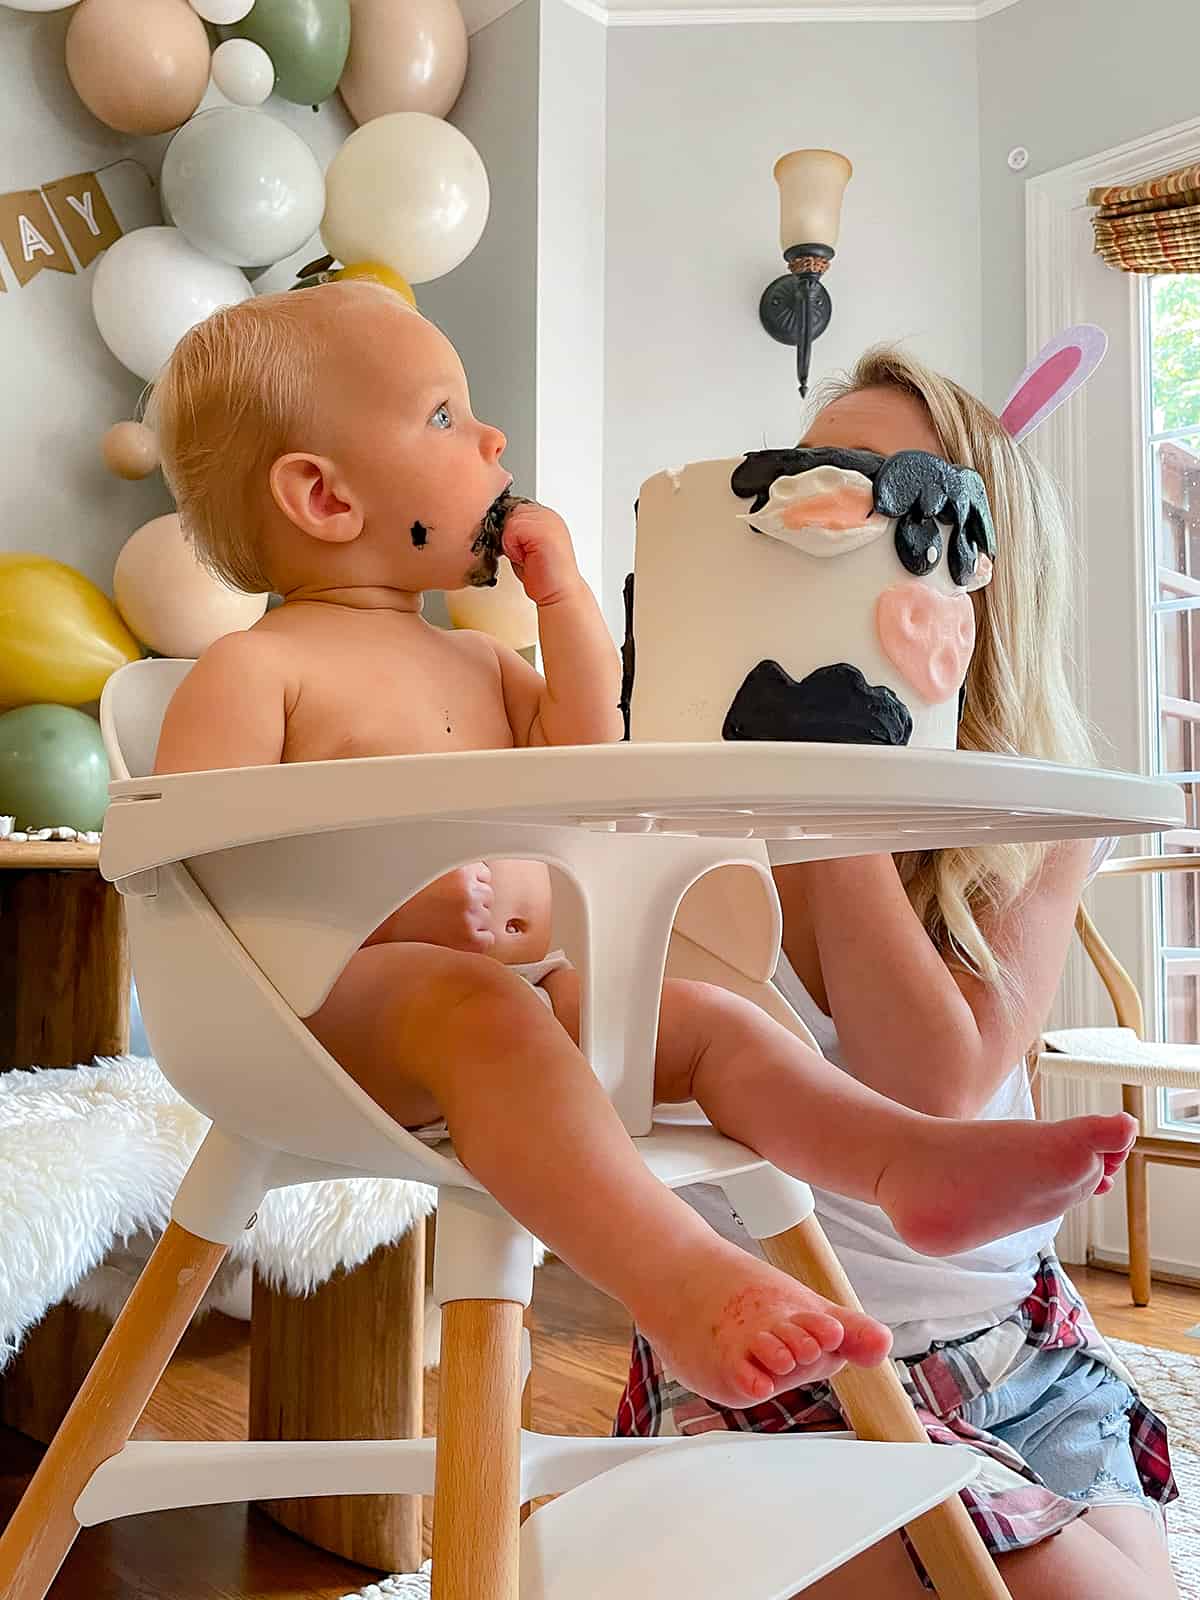
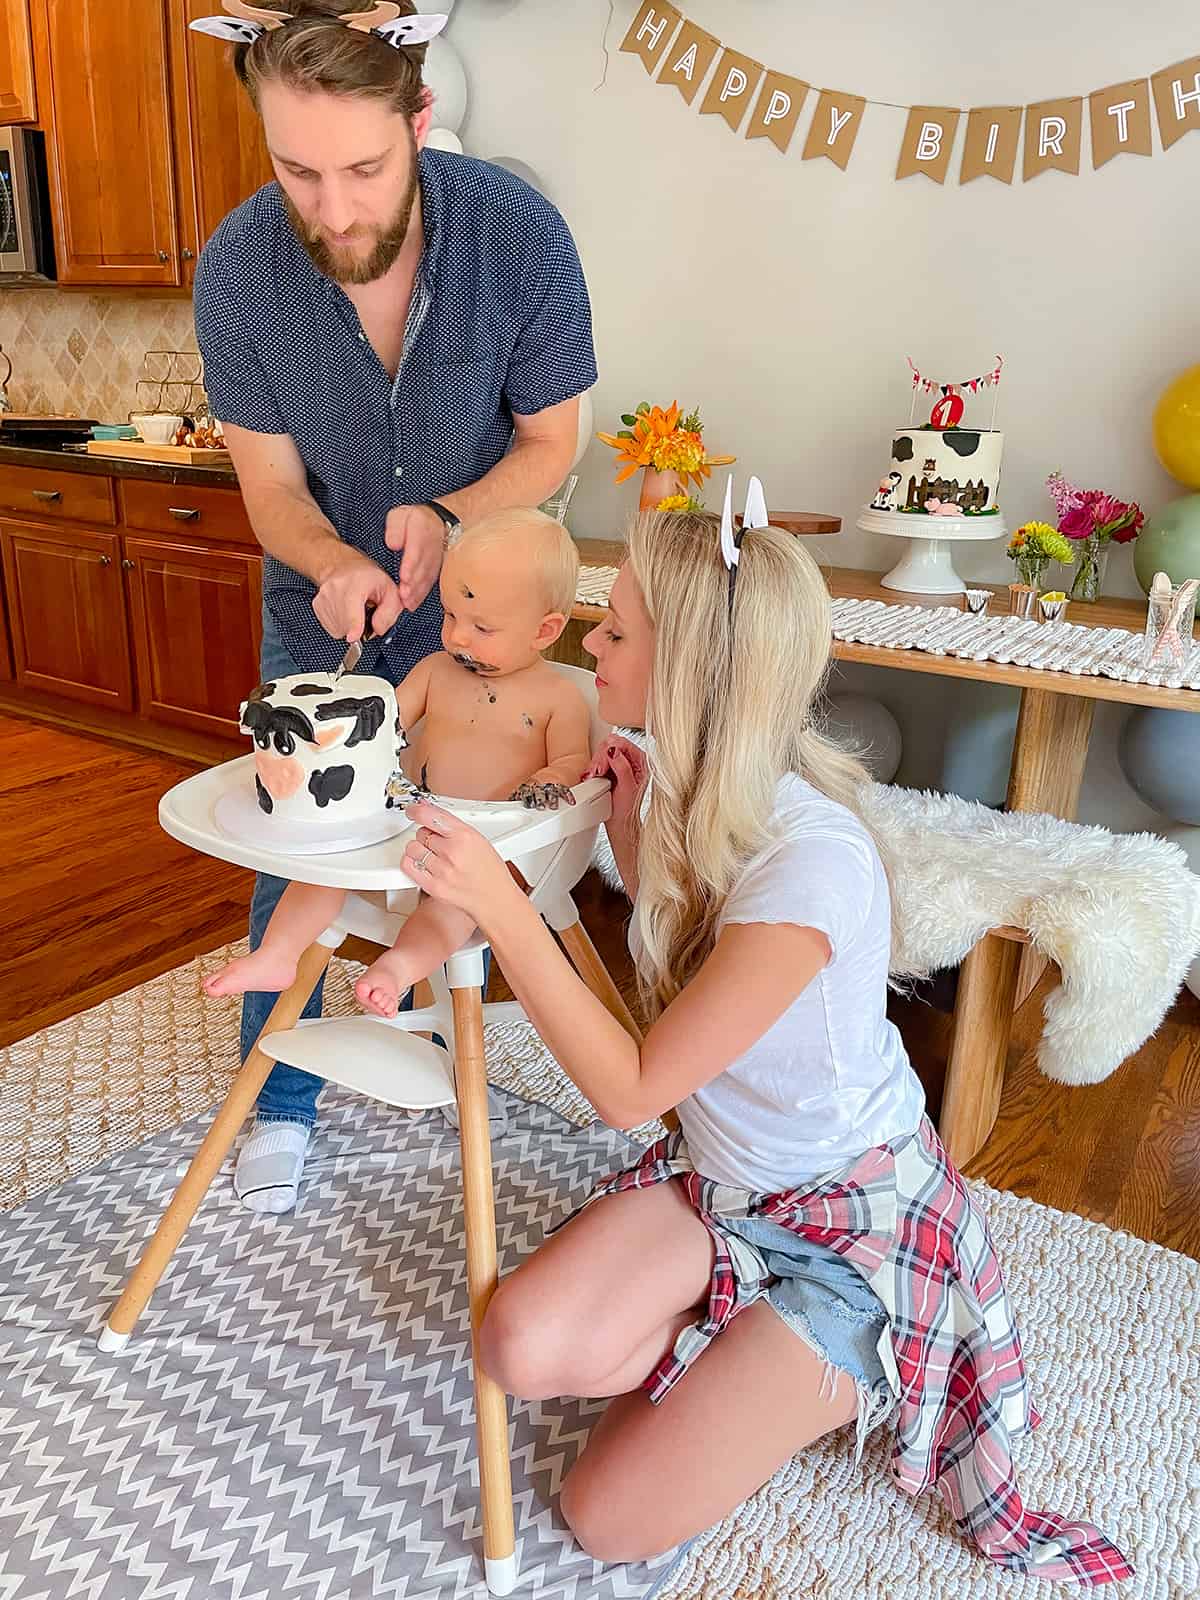
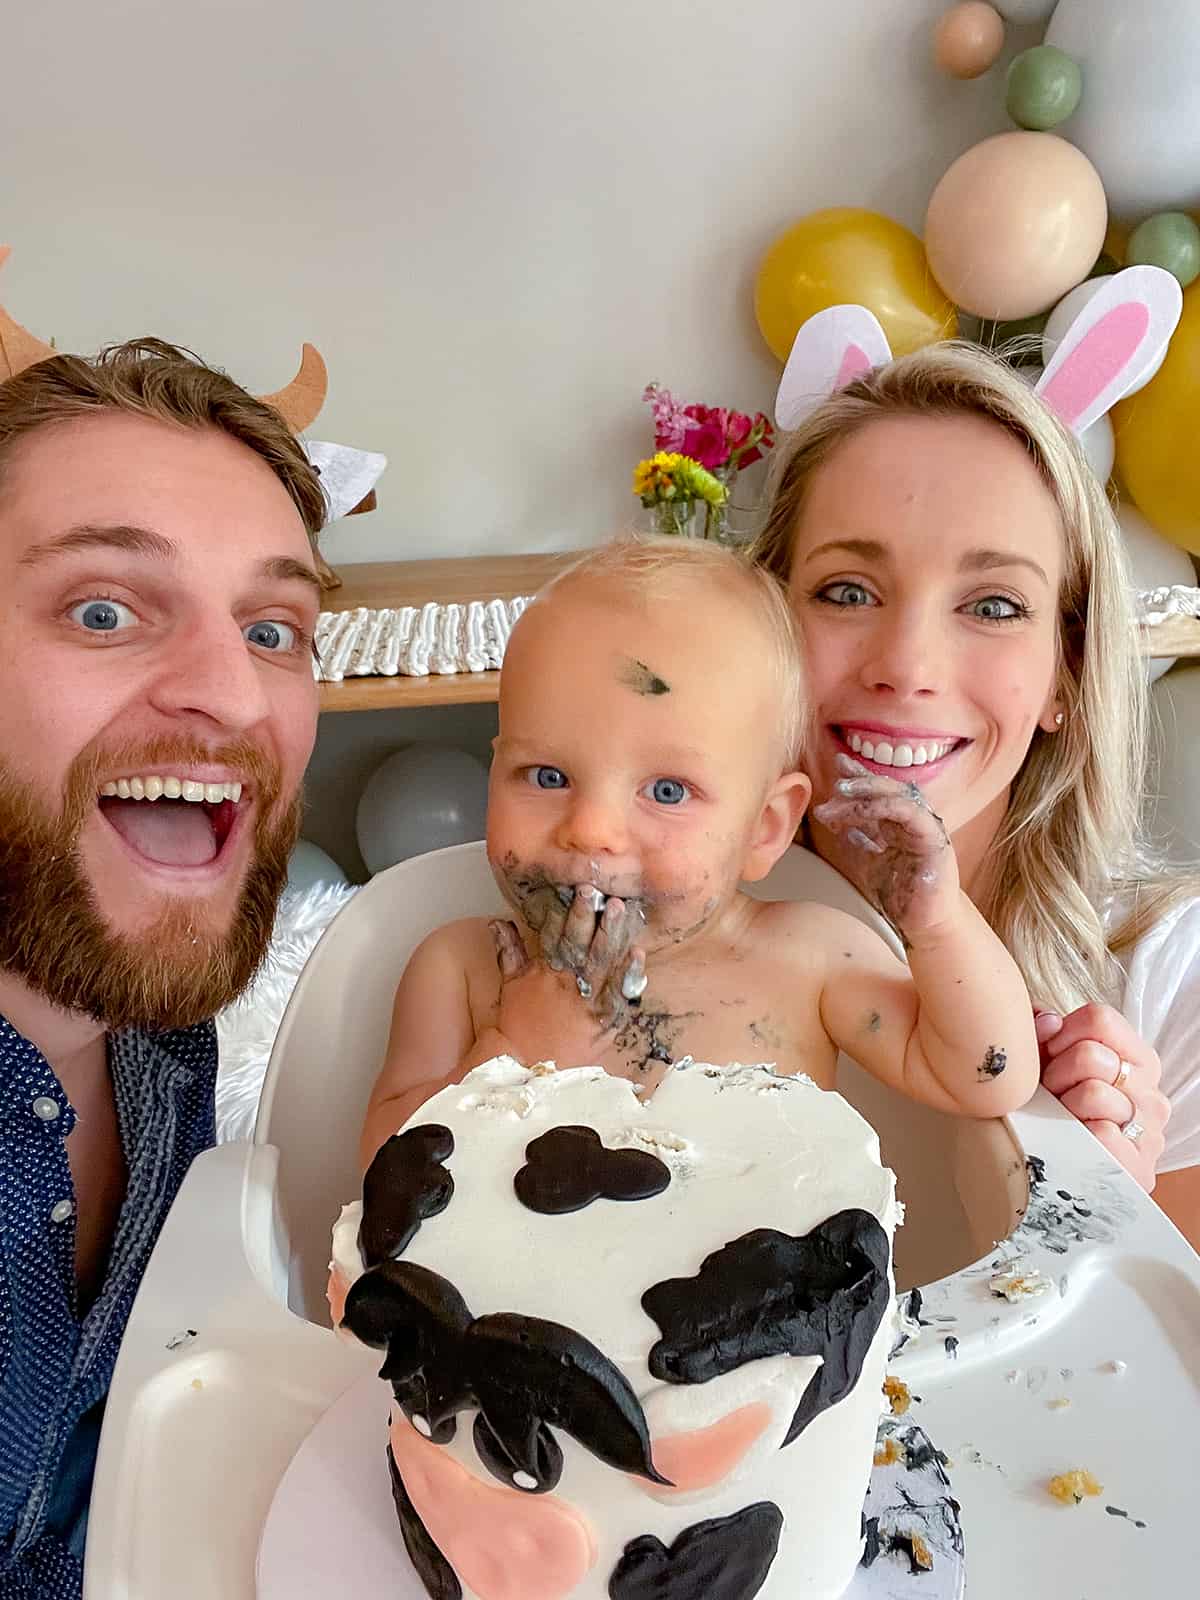
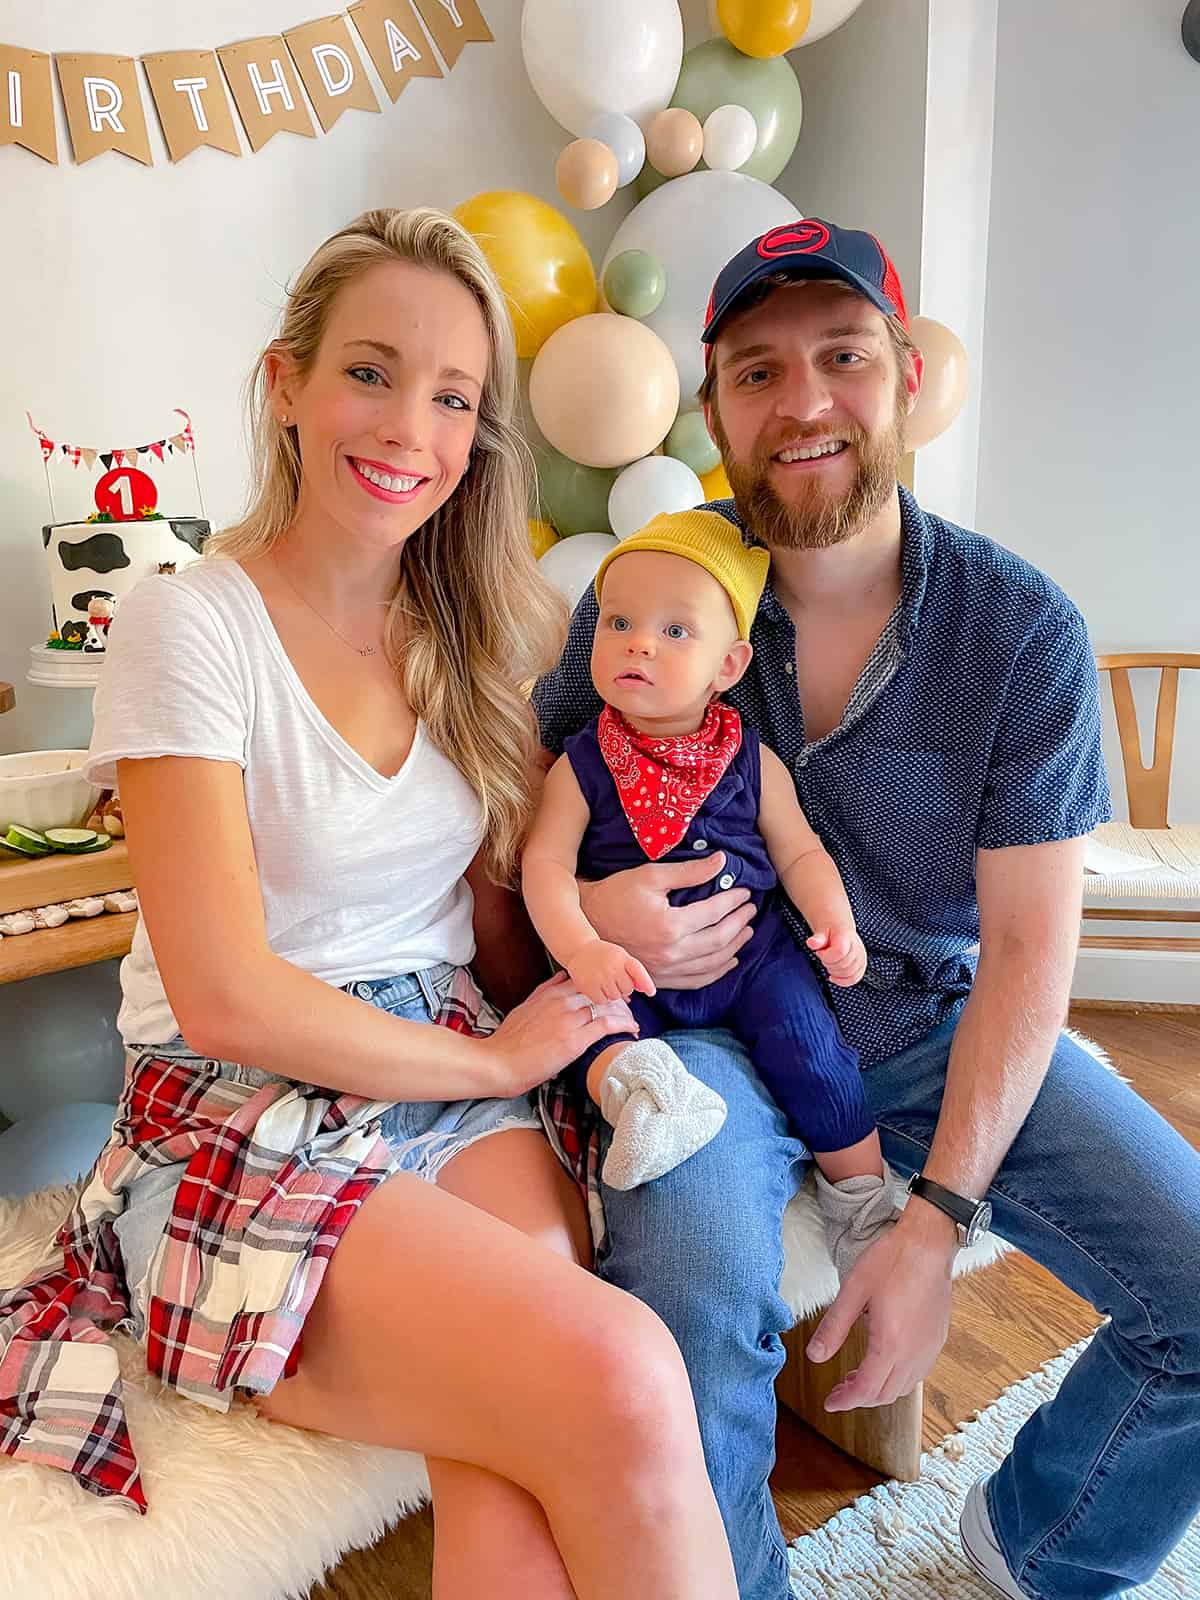
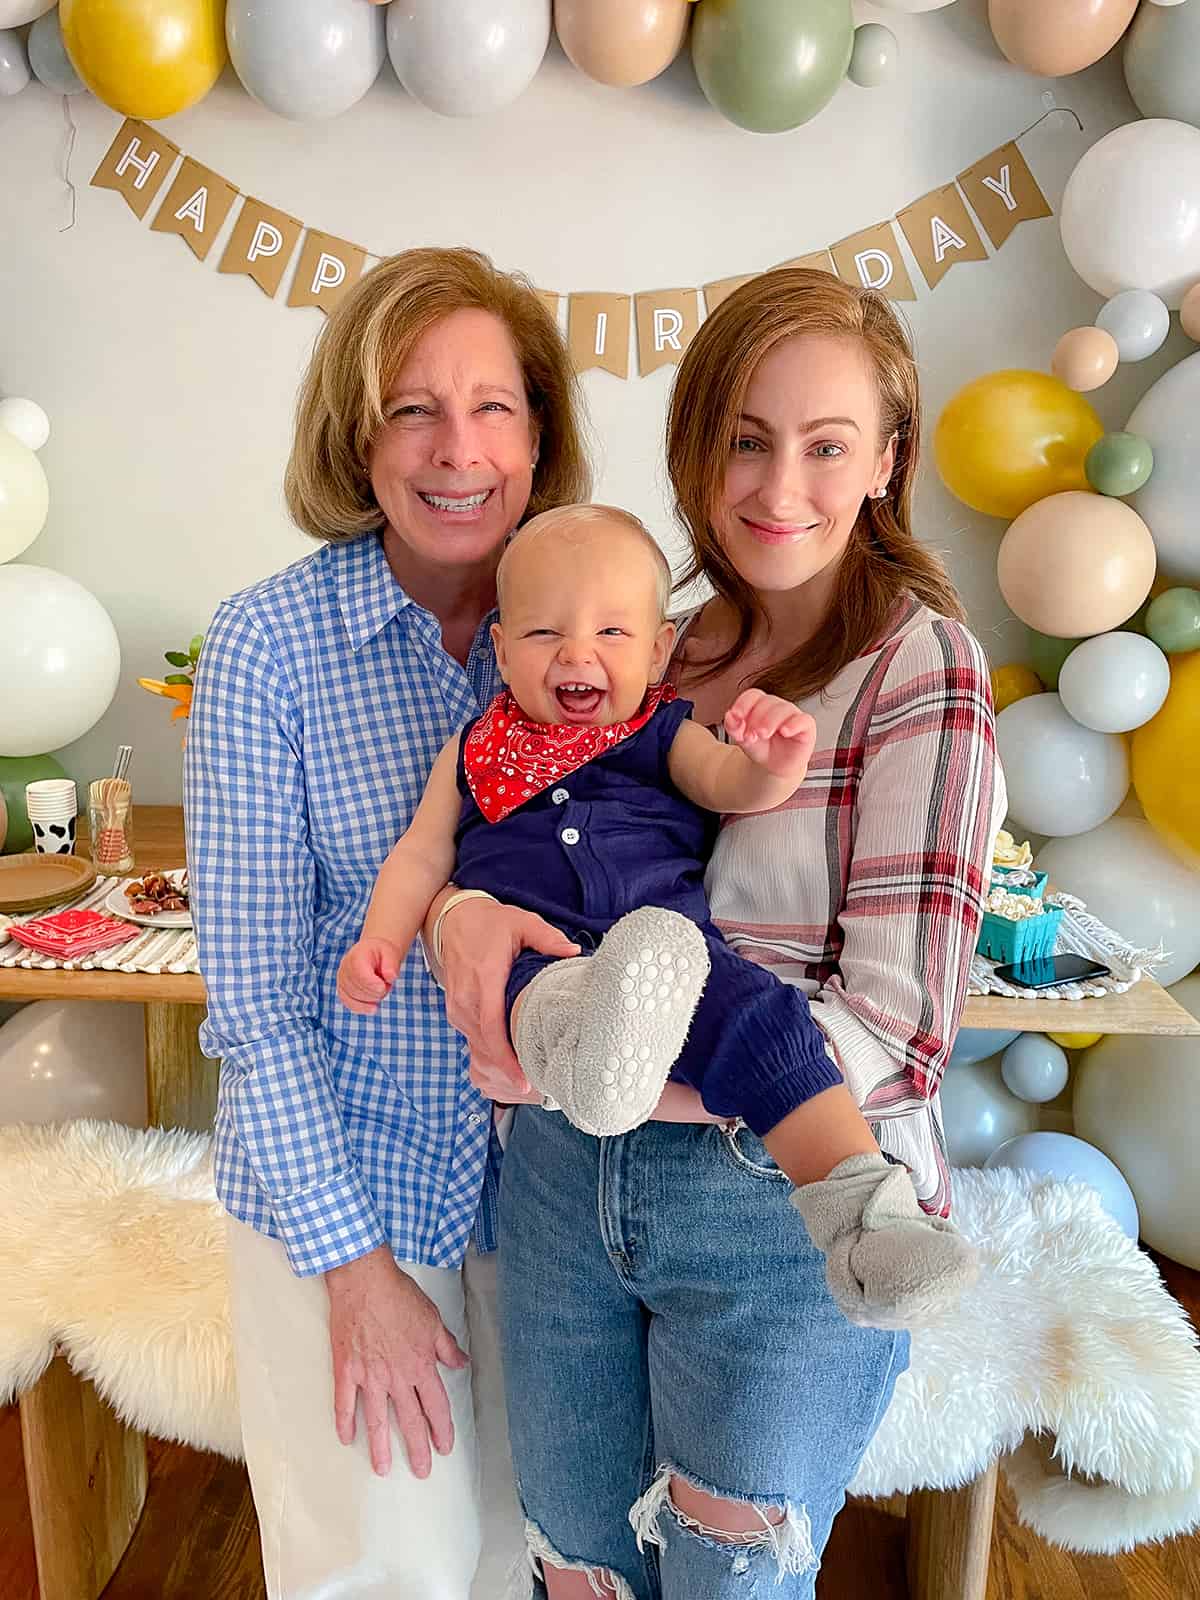
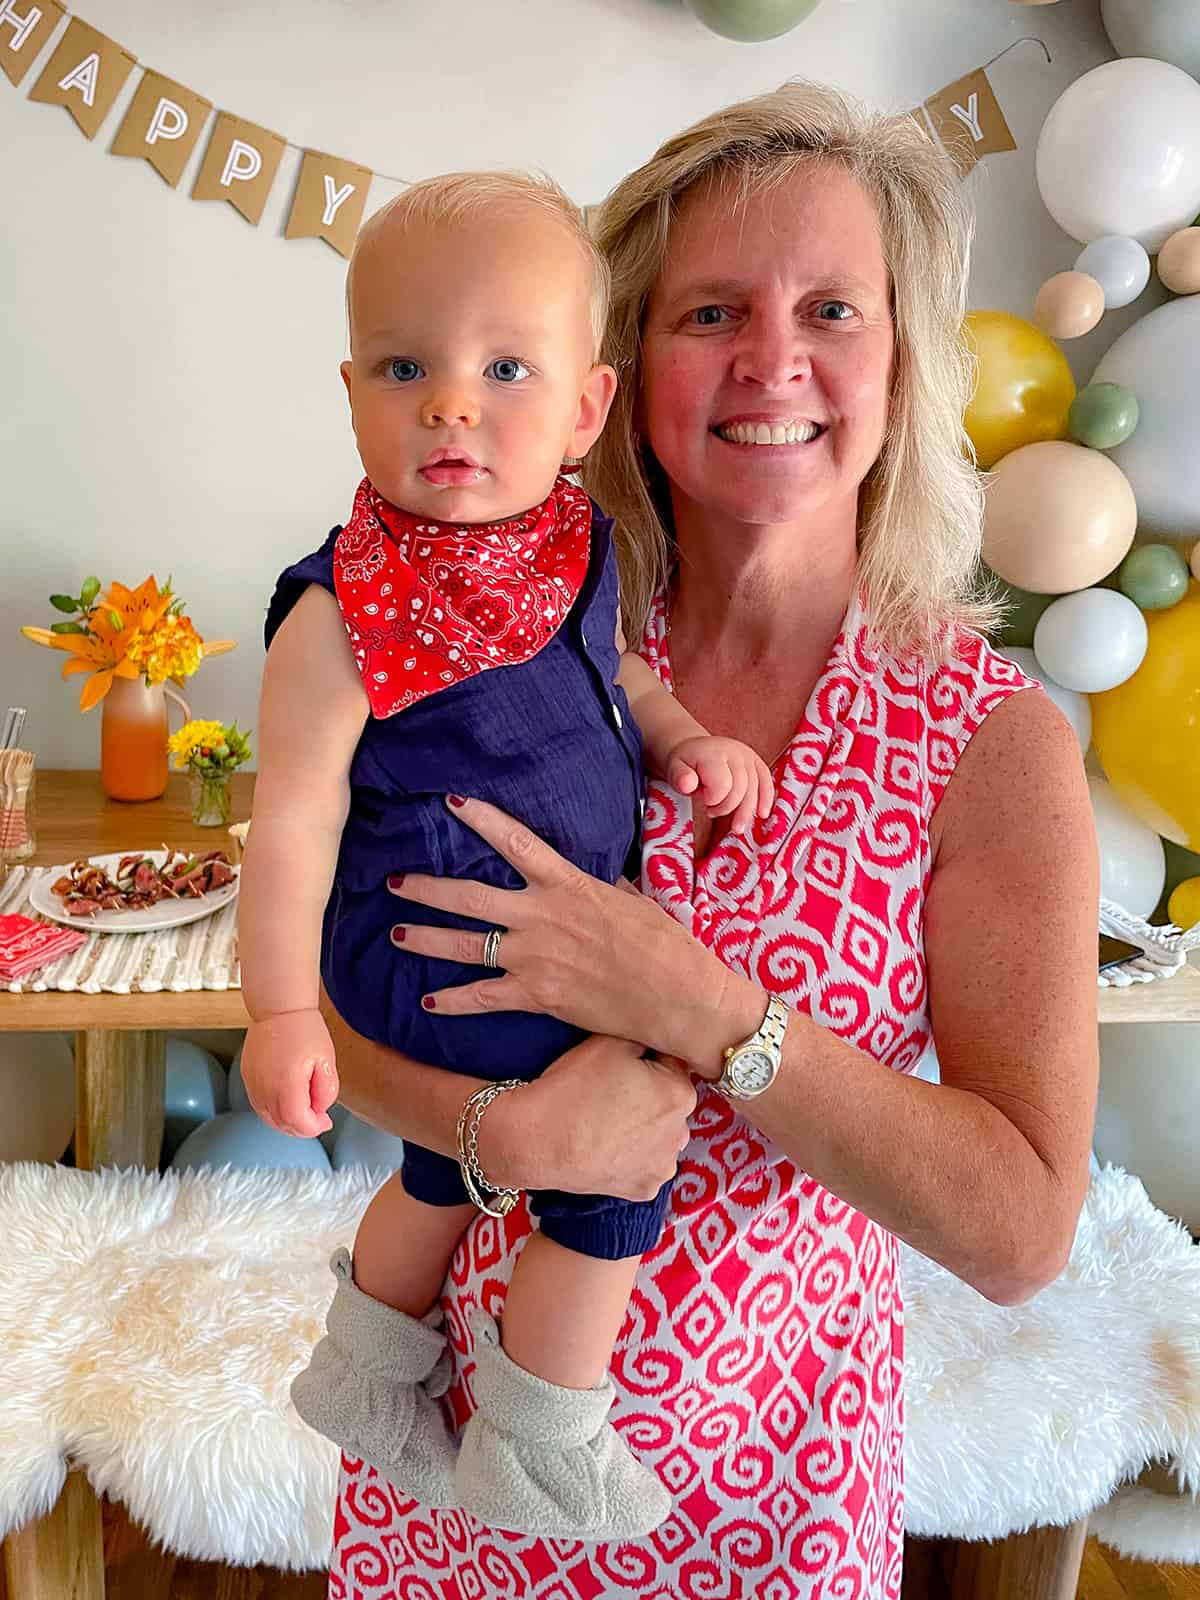
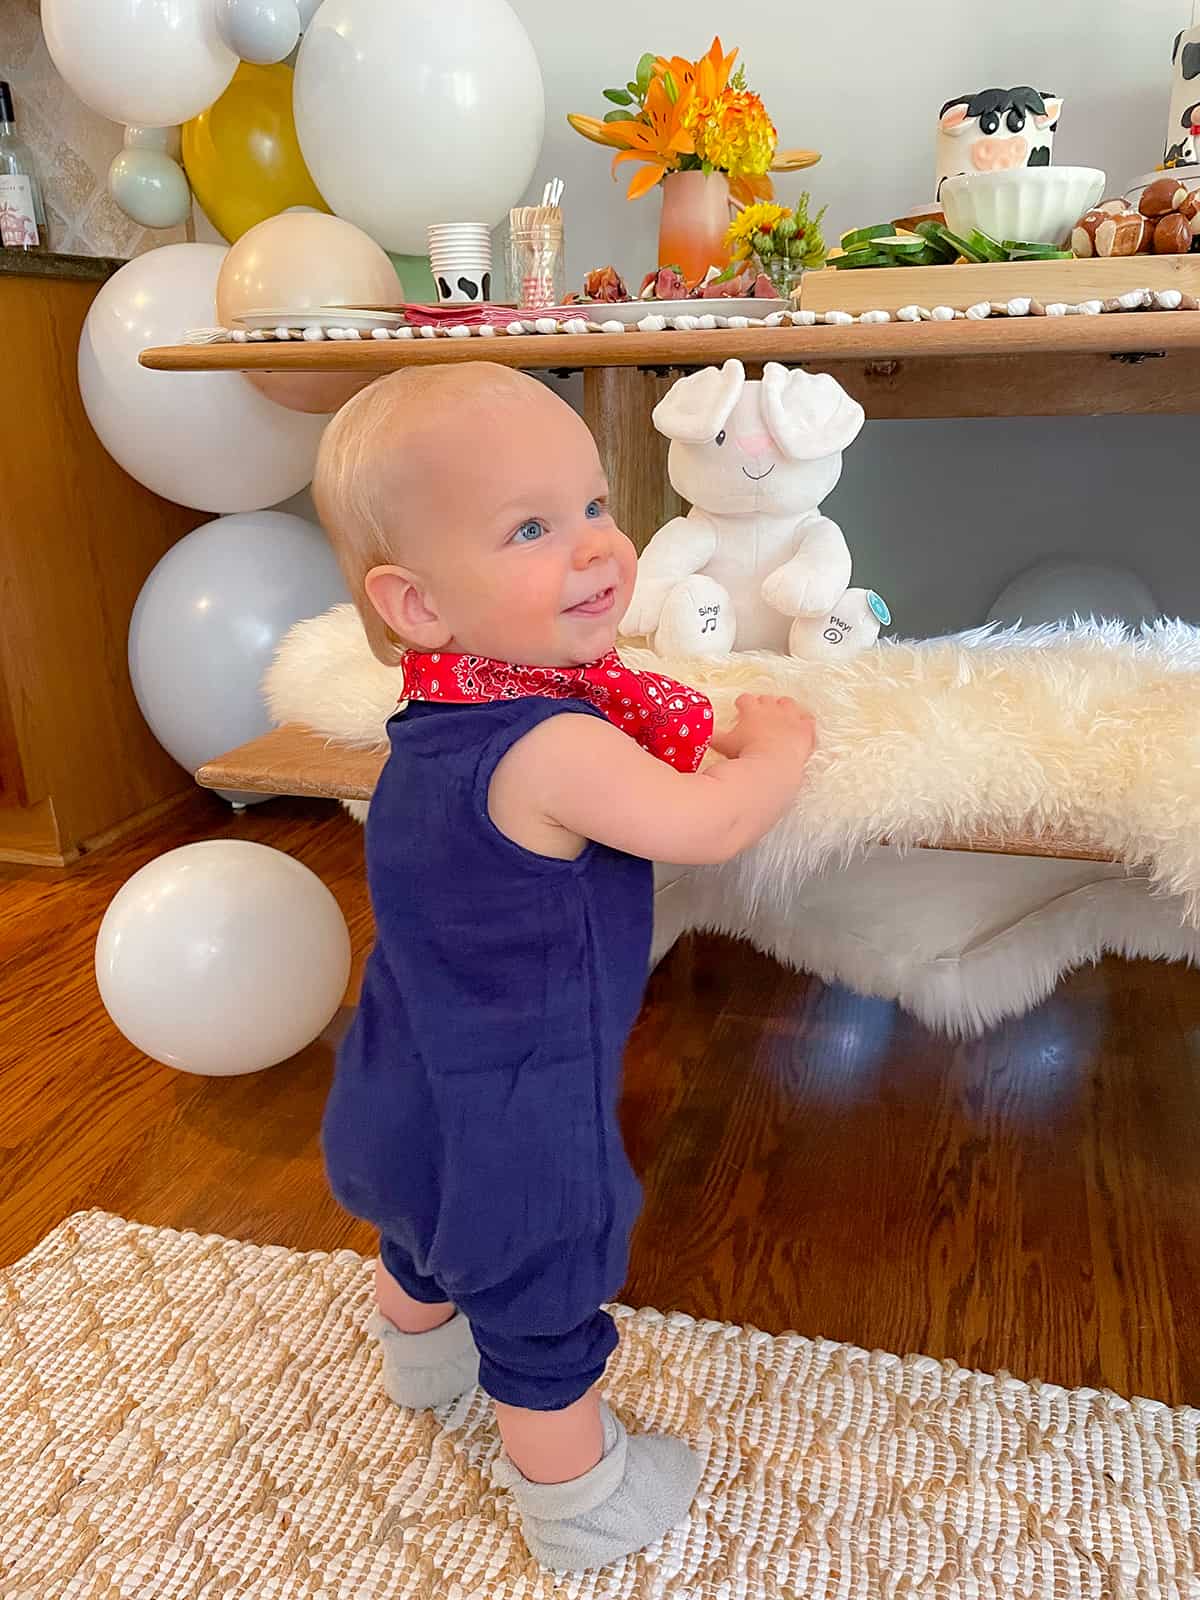
I still cannot believe my baby is ONE. The past twelve months went by sooo quickly, but at the same it feels like Nate has been a part of our family forever. Needless to say, we are absolutely O B S E S S E D with this happy boy and are so honored we get to be his parents. To celebrate Nate's big day, we hosted a small party at our house with family and a few friends. The theme was a "Barnyard Bash" complete with a cow print smash cake, farm animal party headbands for the adults, catering from Publix and a Instagram-worthy balloon garland blown up and hung with love by Nick and myself.
The post Nate’s First Birthday Party appeared first on Katie's Bliss.
]]>
I still cannot believe my baby is ONE. The past twelve months went by sooo quickly, but at the same it feels like Nate has been a part of our family forever. Needless to say, we are absolutely O B S E S S E D with this happy boy and are so honored we get to be his parents.
To celebrate Nate’s big day, we hosted a small party at our house with family and a few friends. The theme was a “Barnyard Bash” complete with a cow print smash cake, farm animal party headbands for the adults, catering from Publix and a Instagram-worthy balloon garland blown up and hung with love by Nick and myself. You can watch us in action creating it below.
View this post on Instagram
It was the perfect afternoon and Nate had a ball! Keep scrolling for more pictures and details from the day!
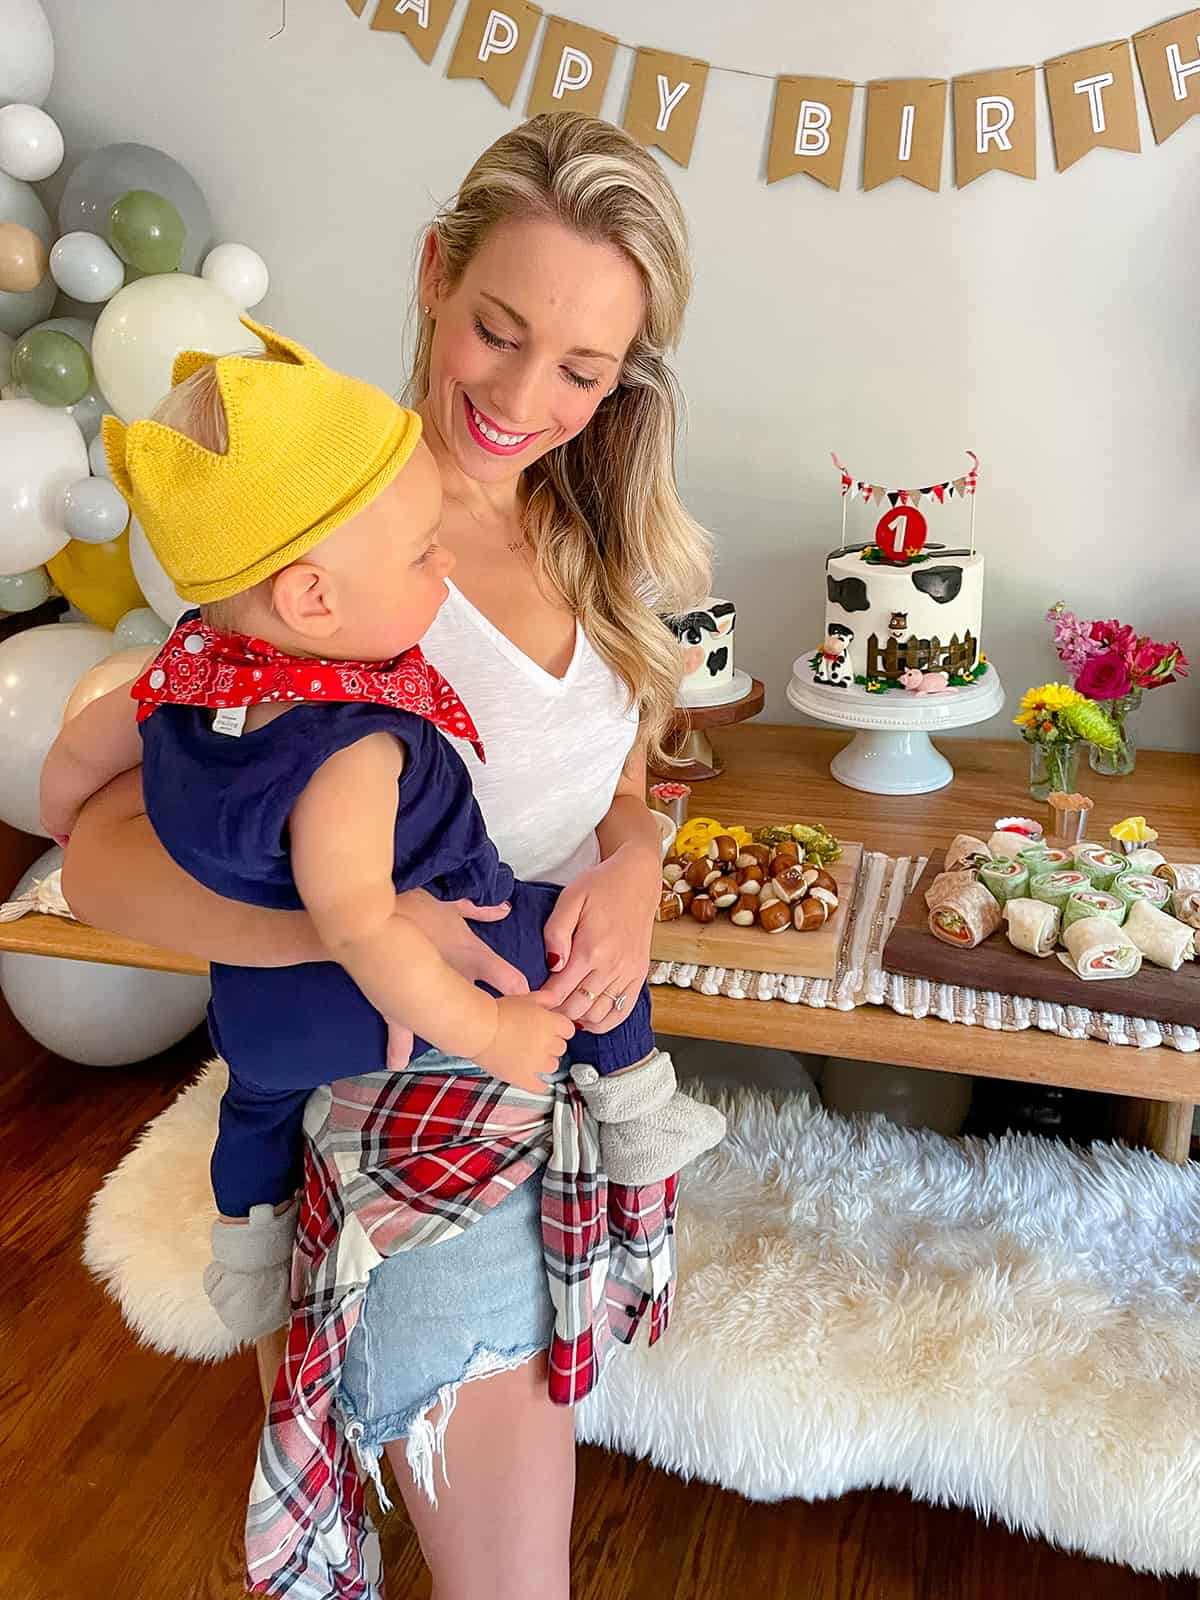
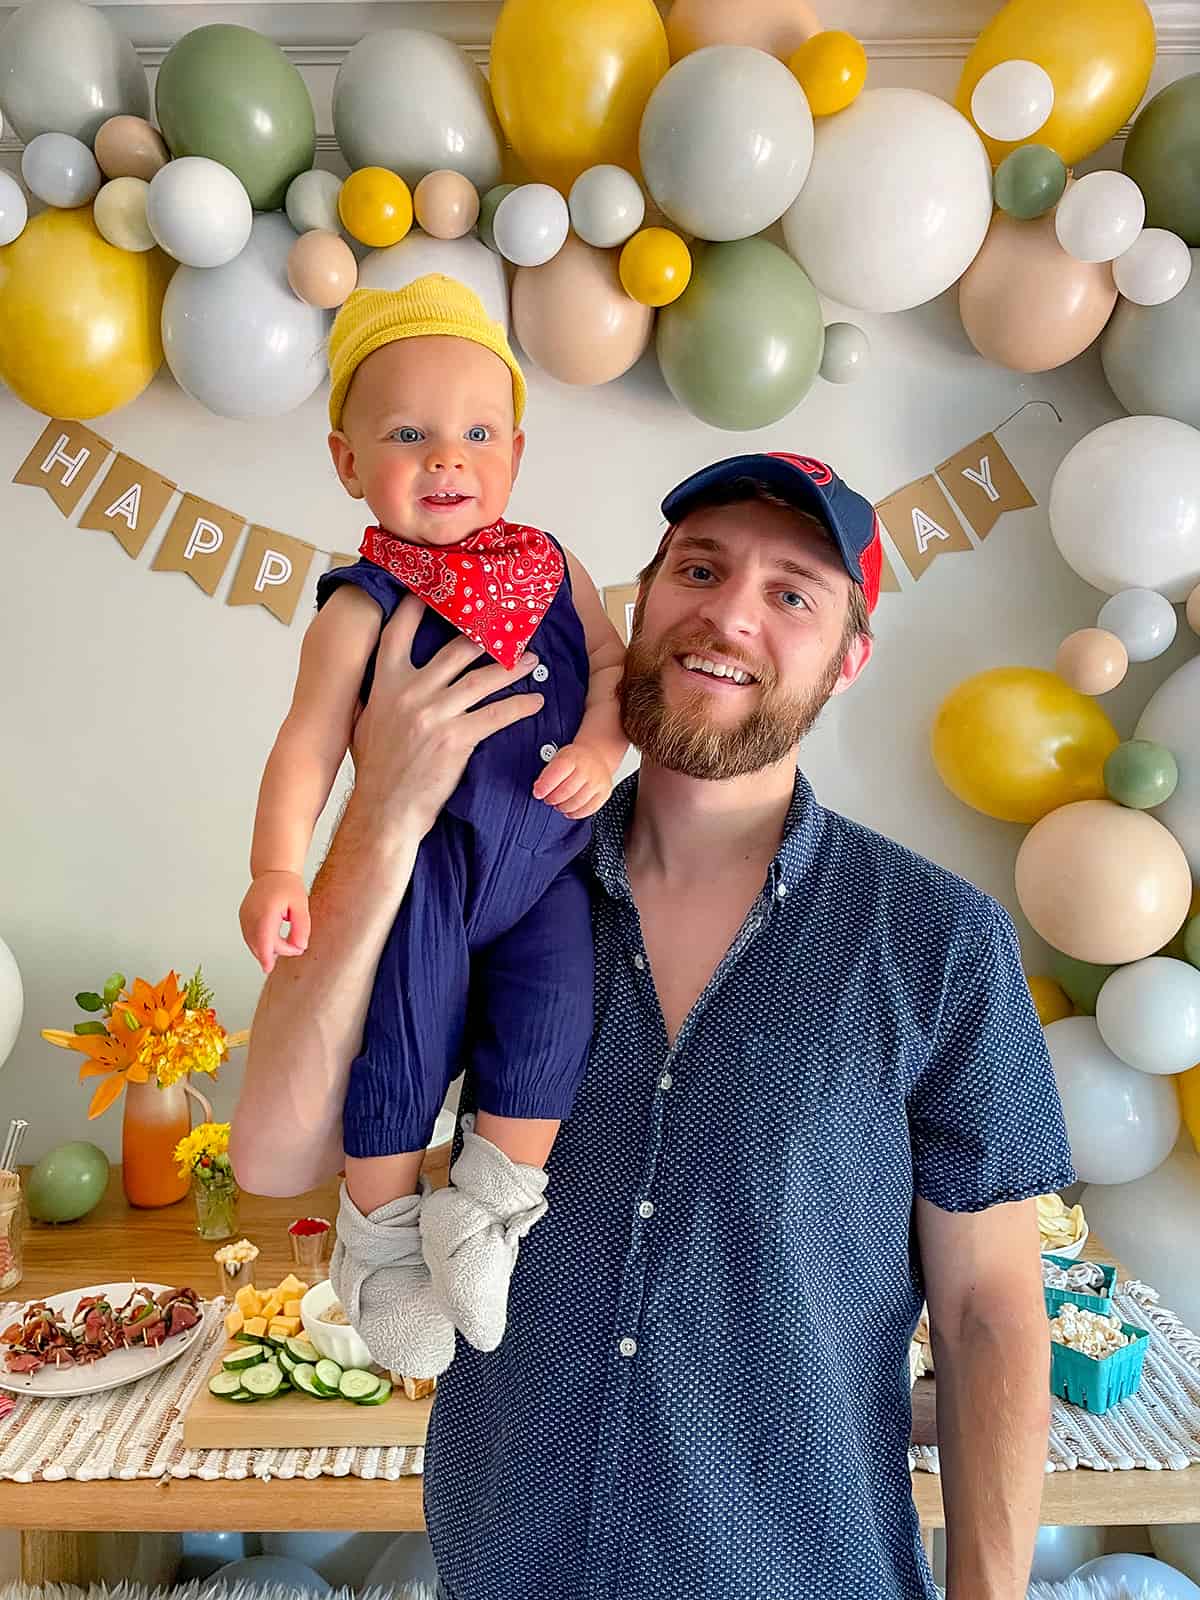
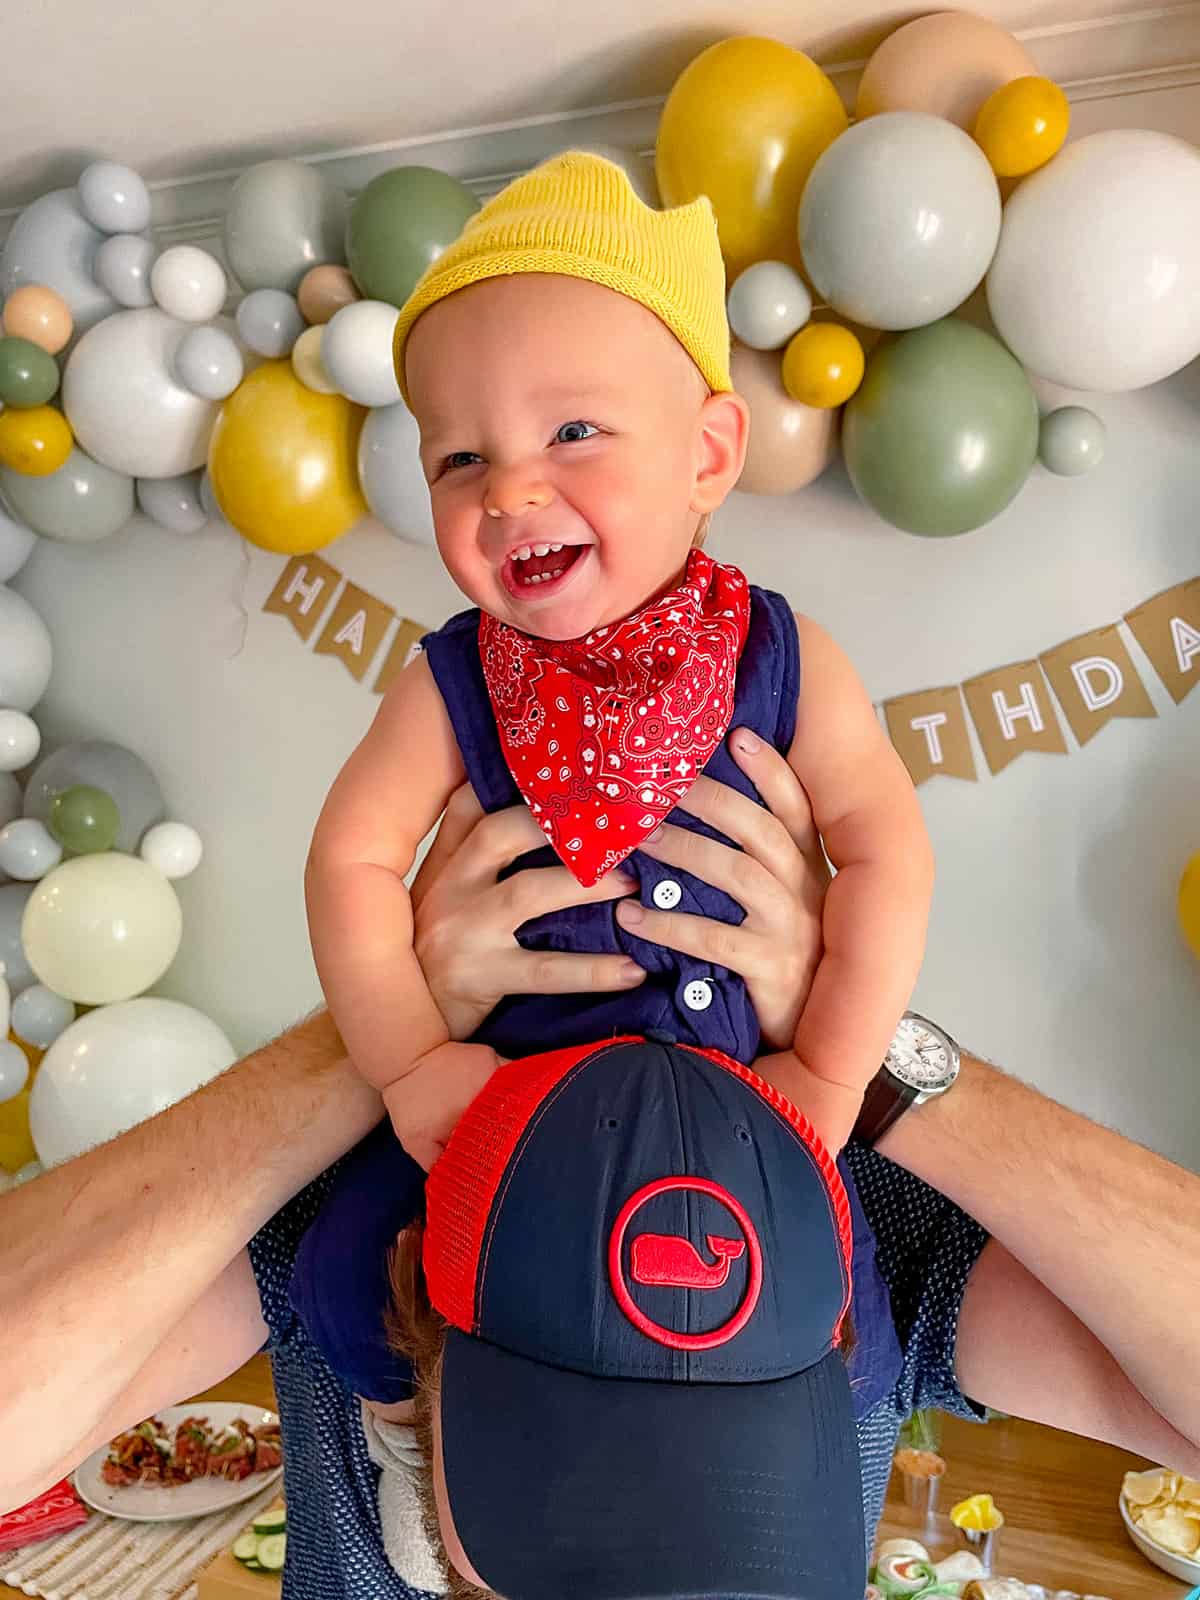
NATE’S OUTFIT // Linen Jumpsuit (avail in lots of colors/sizes) | Party Crown | Booties | Red Bandana

DIY BALLOON GARLAND // Balloon Garland Kit (we used size 10-12ft) | Sticky Glue Dots (the kit came with these but we ended up using them all so I’d recommend having more on hand) | Electric Air Pump (HIGHLY recommend one of these– you do not want to have to blow up that many balloons with a hand pump!)

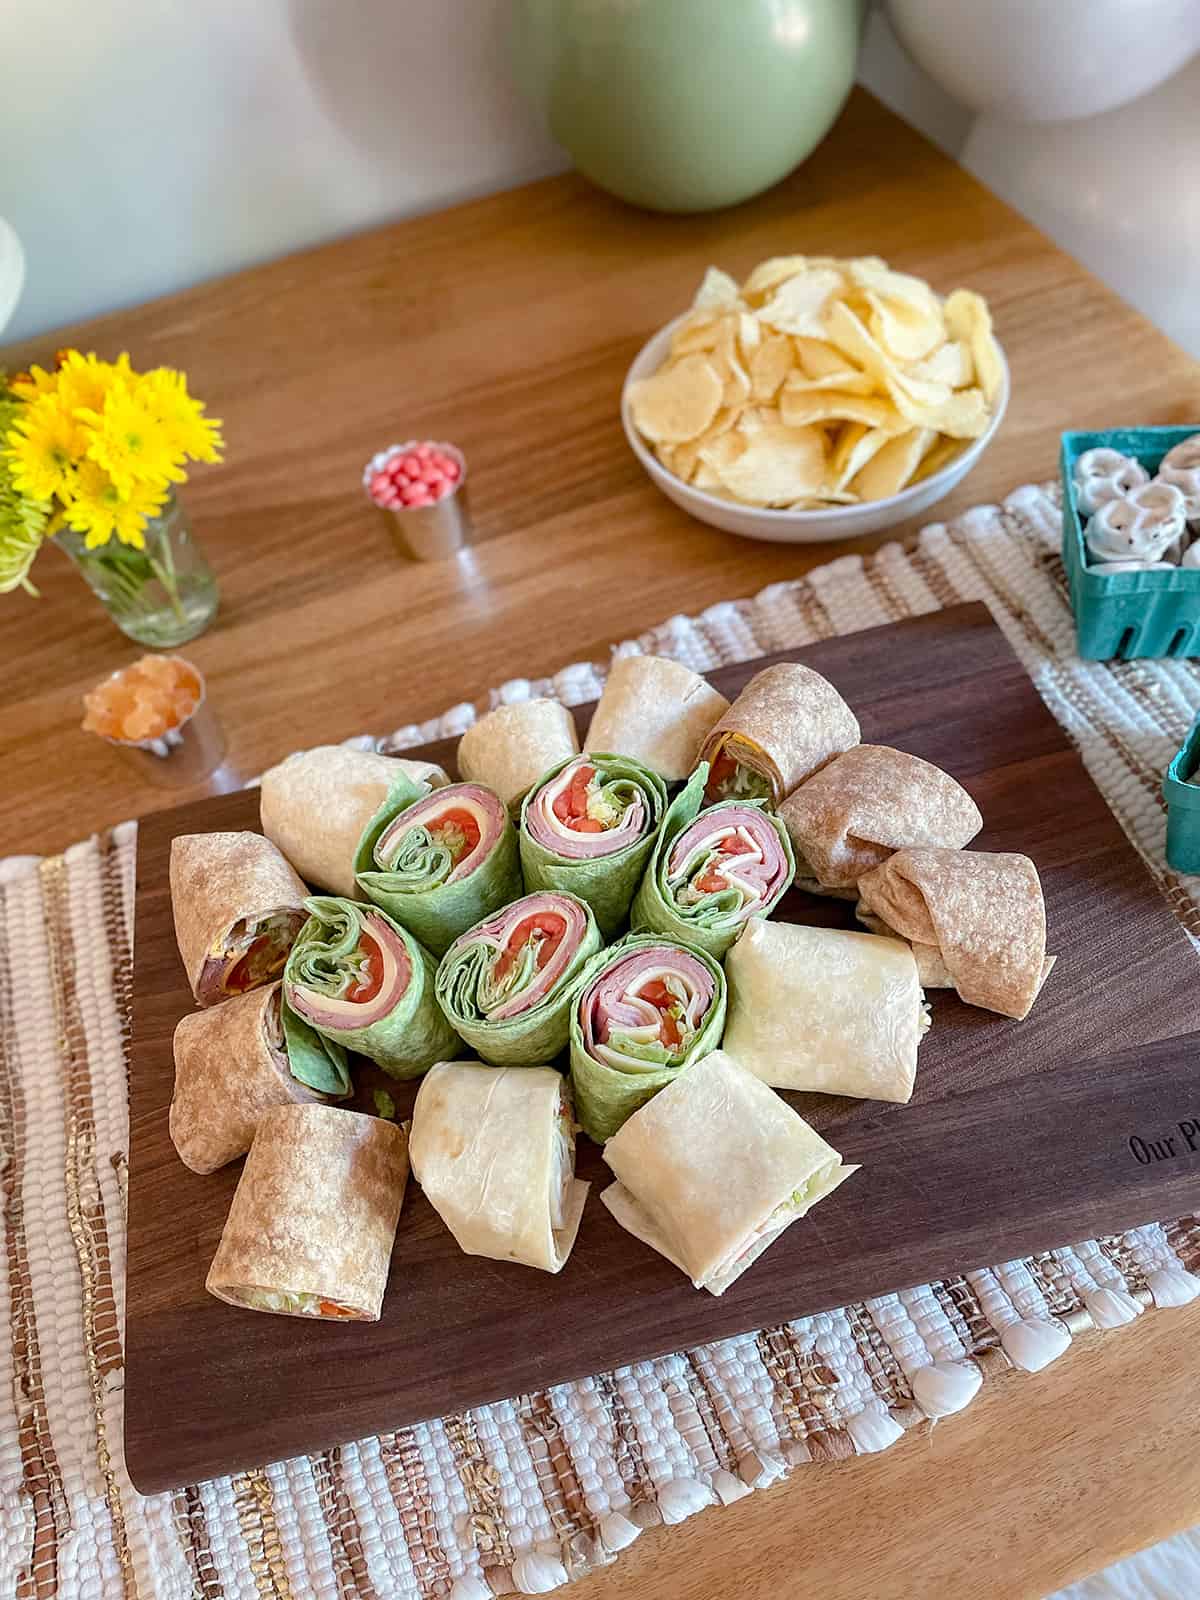
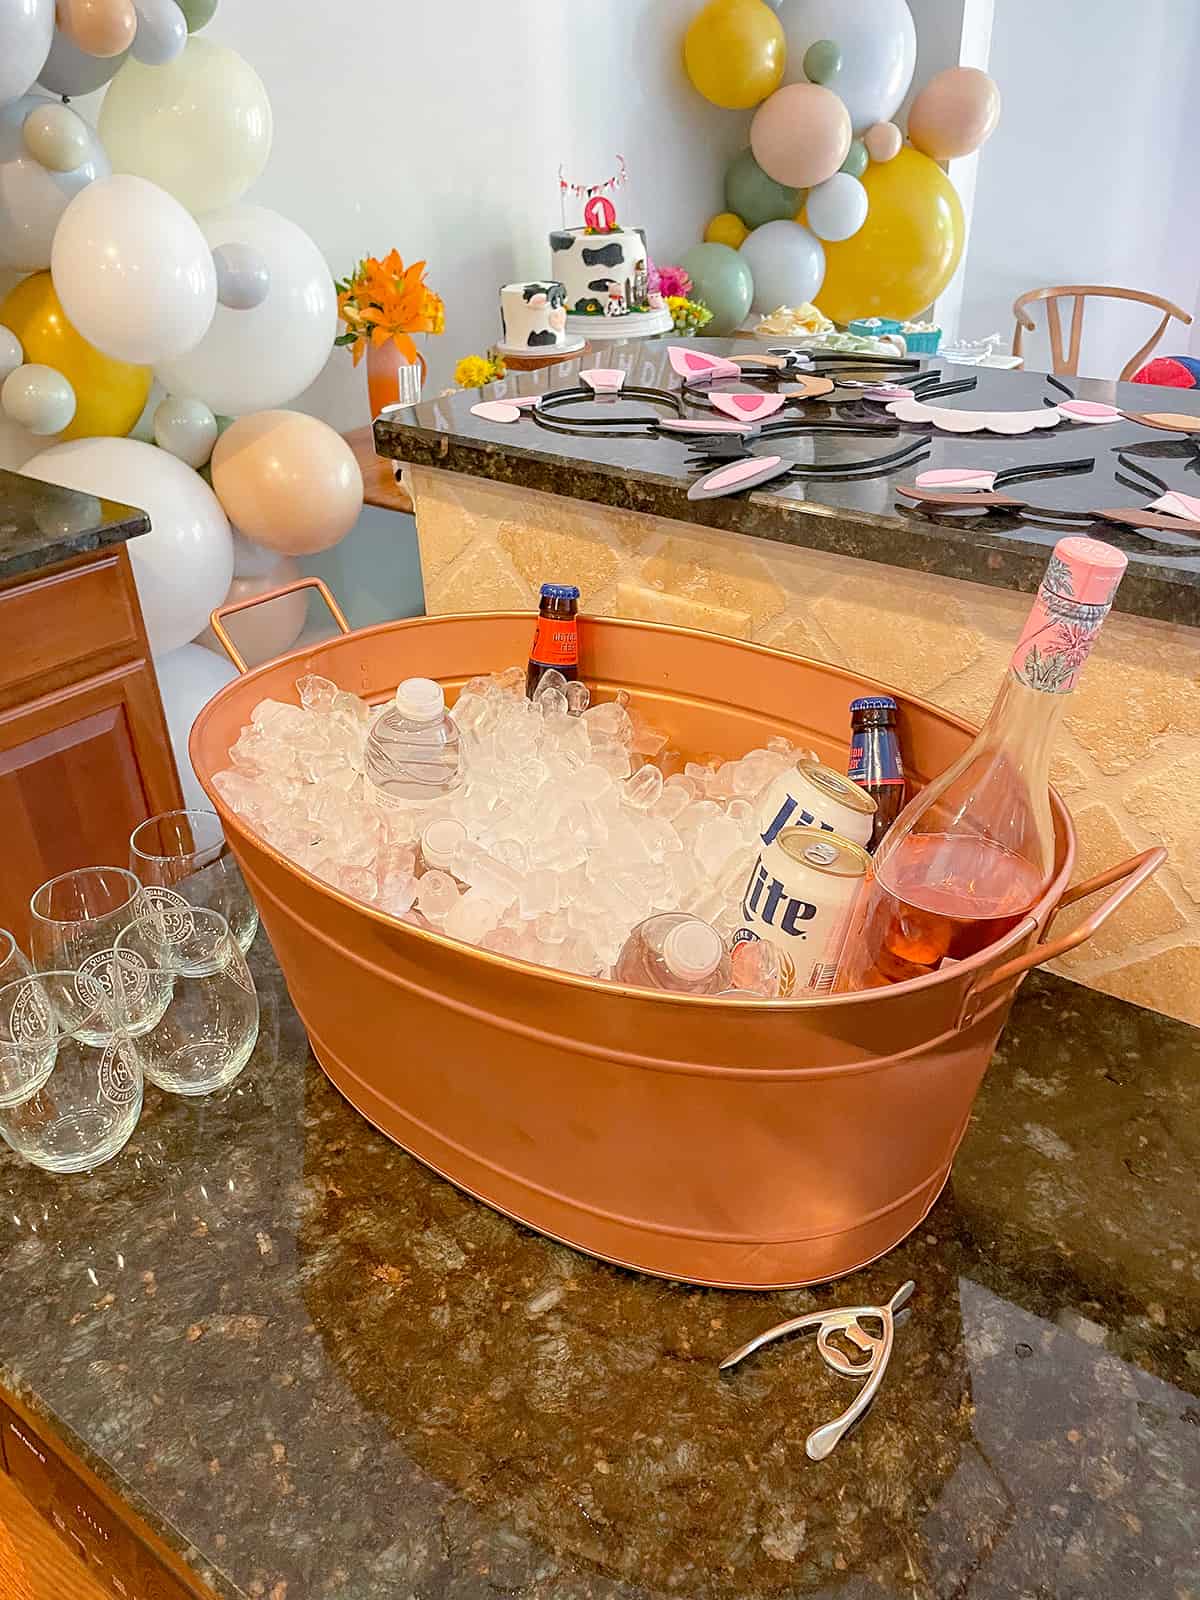
PARTY DECOR + BUFFET TABLE DETAILS // Barnyard Bash Party Kit (we used the Basics size) | Wood Serving Board (use code KATIESBLISS for 10% off) | Mint Berry Cartons (perfect size candy & snacks!) | Mason Jars | Orange Pitcher Vase | Copper Tin Drink Tub | Dining Table | Bench | Faux Sheepskin Cushion
Other than the balloon garland supplies and food, I didn’t spend a ton of money on decor. I found this fantastic barnyard-themed party kit that included dinner + appetizer plates, utensils, cups, napkins, straws, a cake topper, Happy Birthday garland, baking cups (I used these for candy) and red/black & cow print balloons (we put these on our mailbox). It made putting together a cohesive themed party buffet really simple! Not to mention, it saved me from having to buy everything separately.
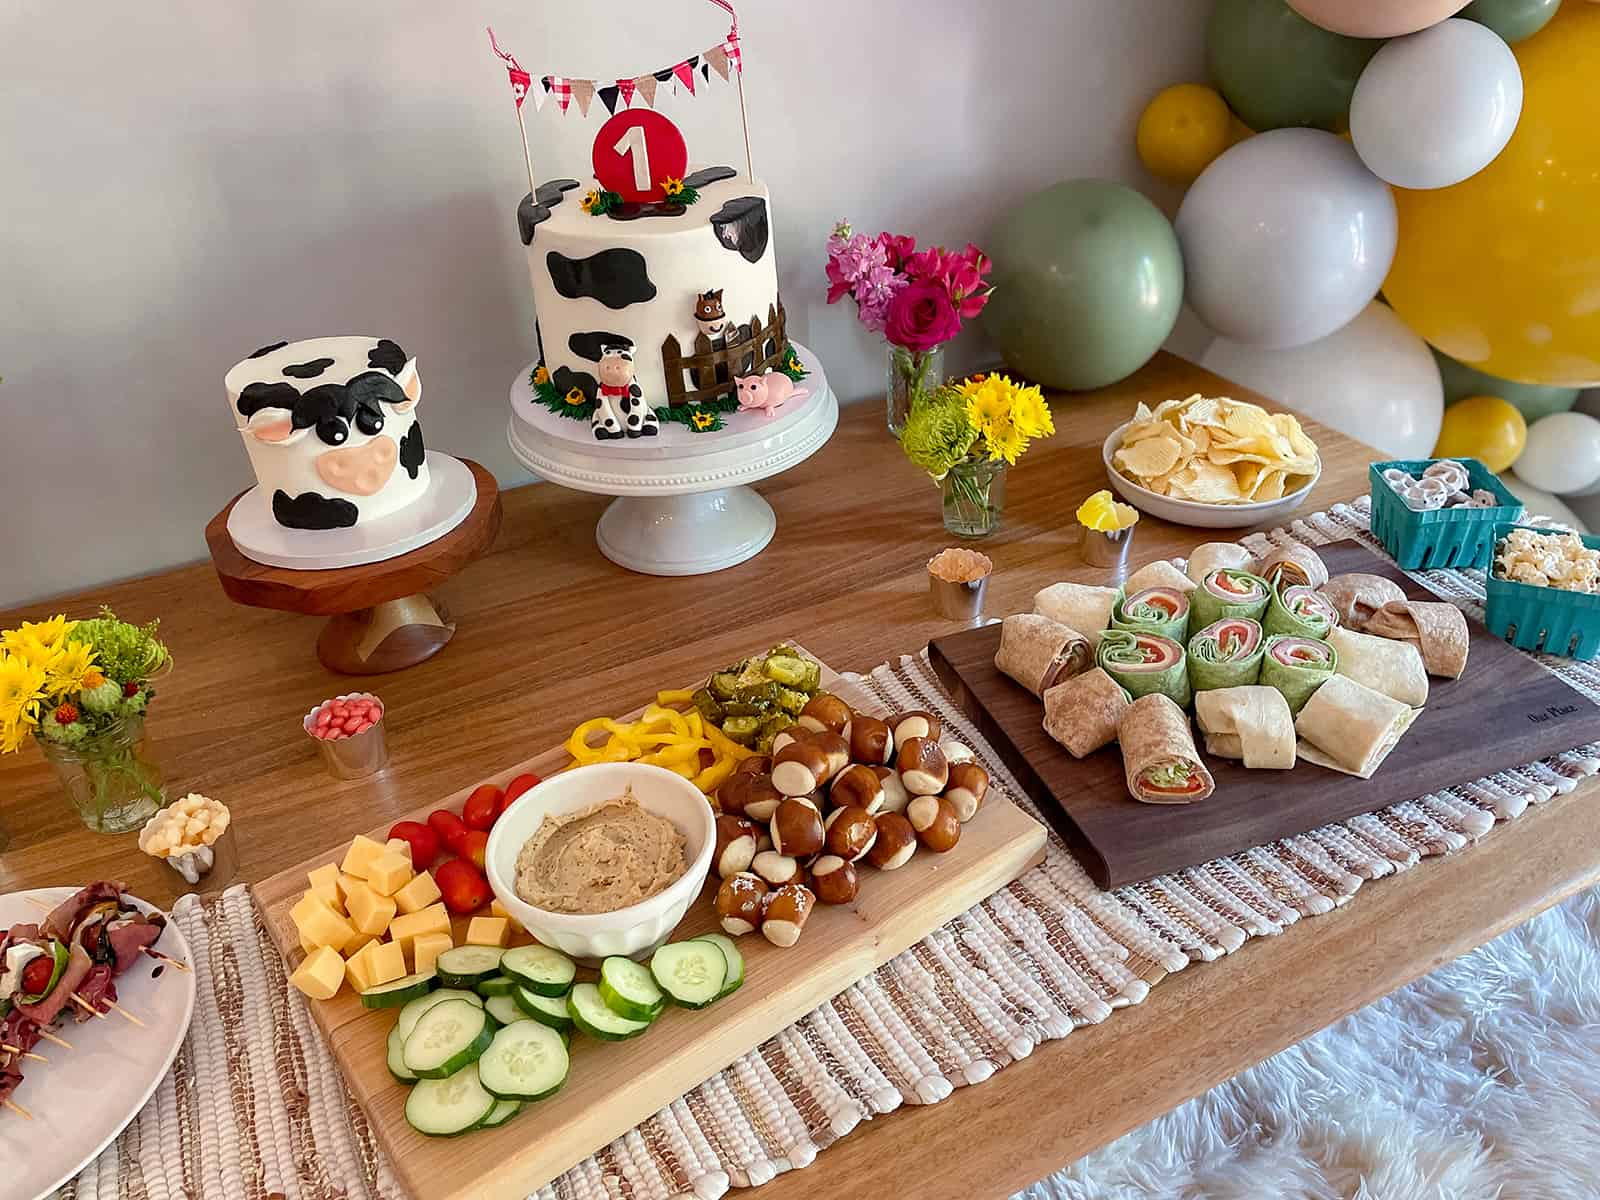
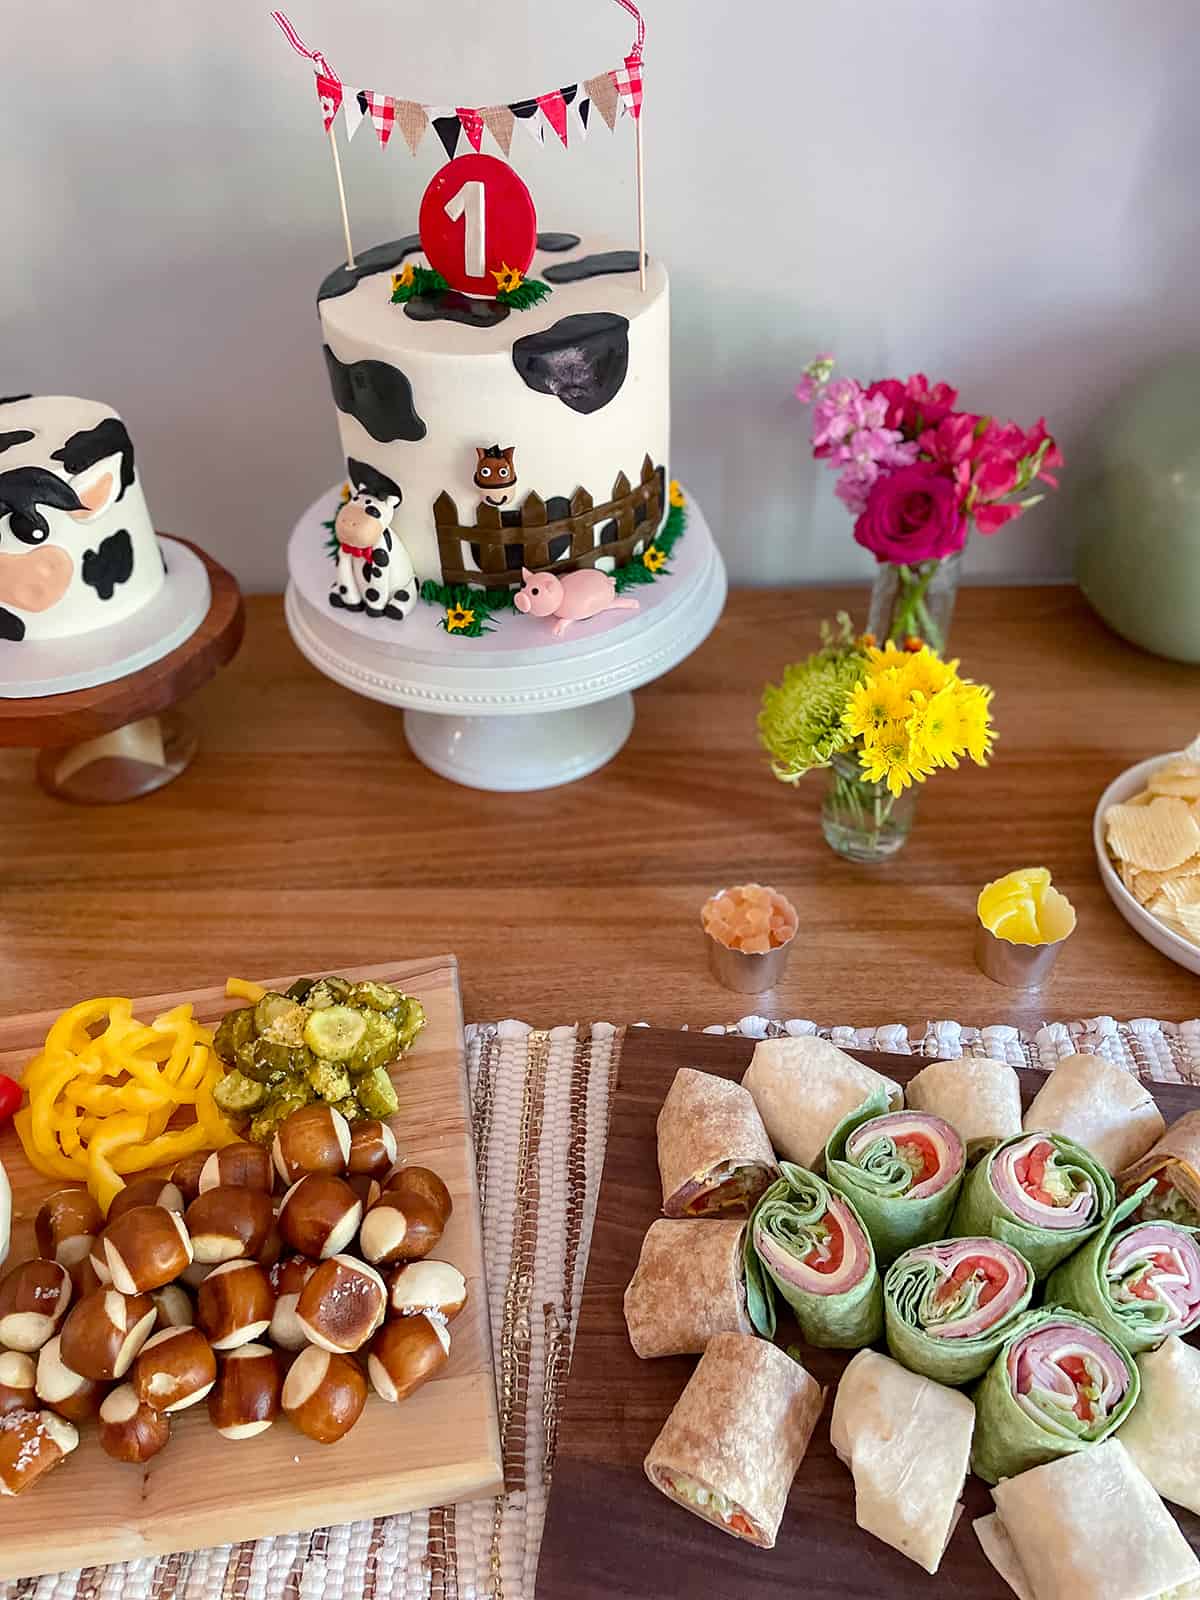
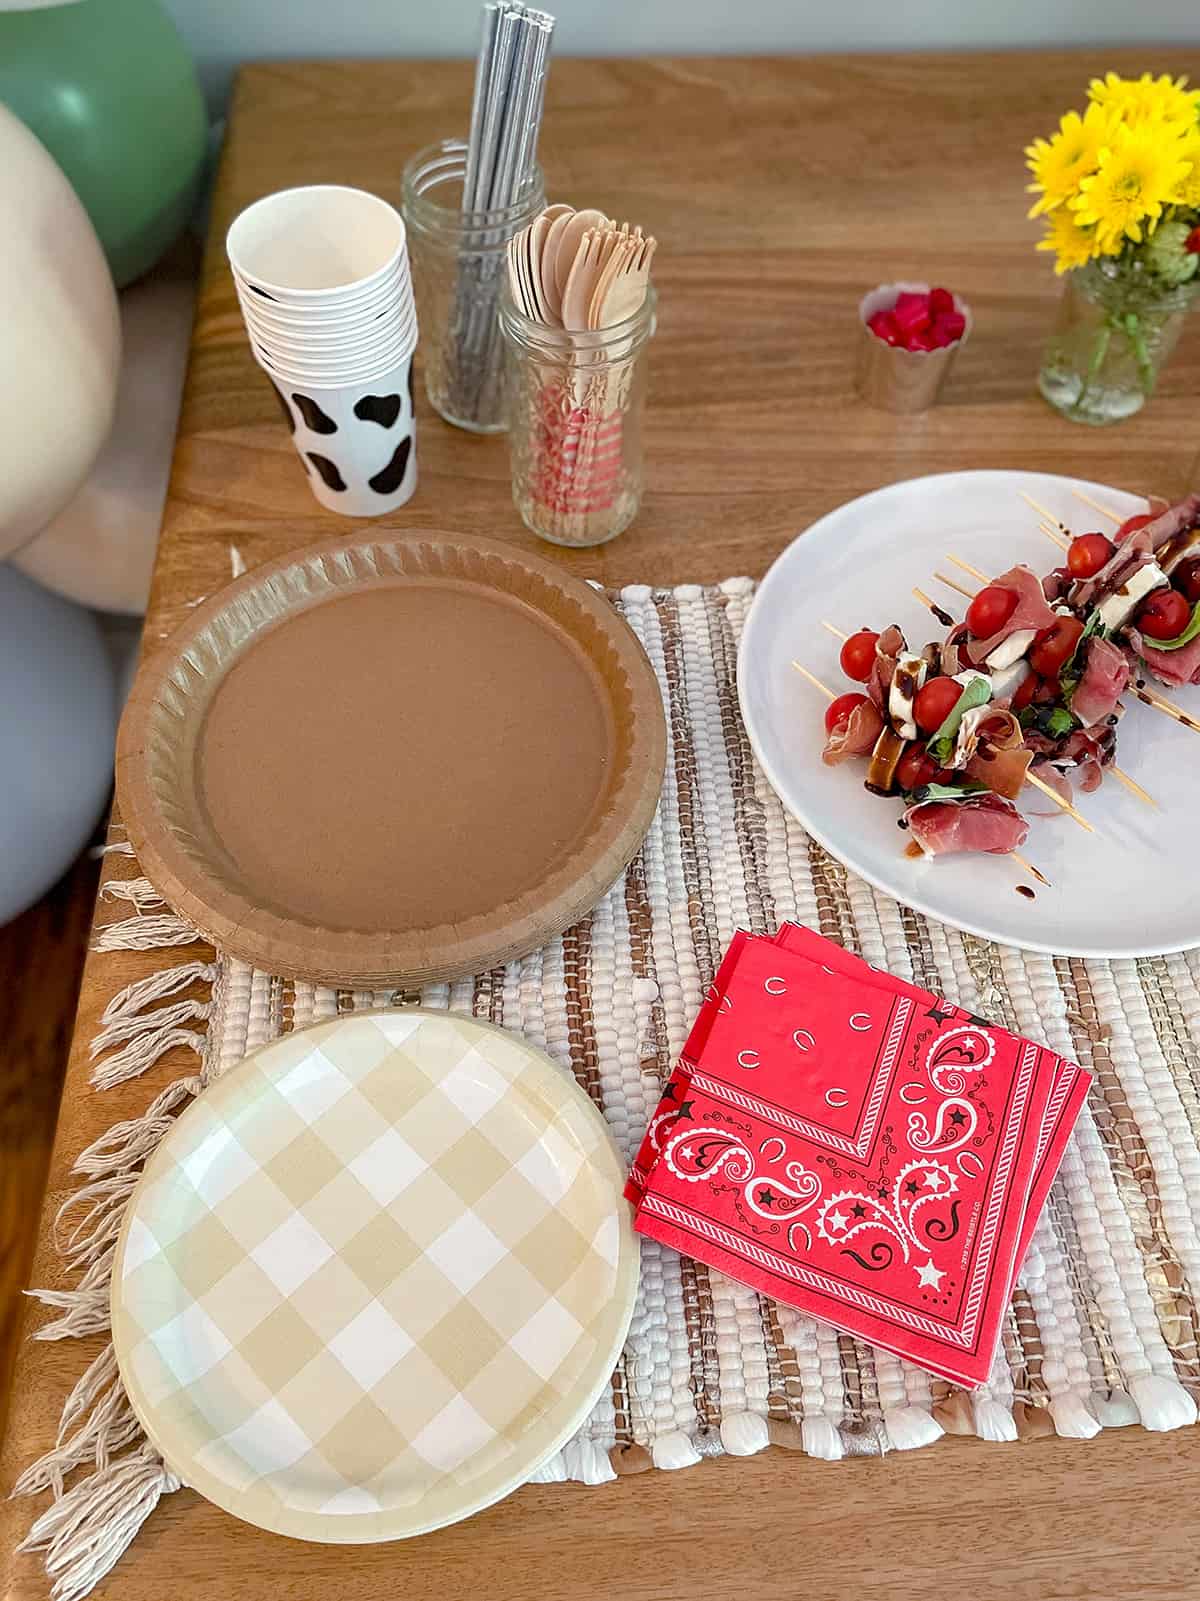
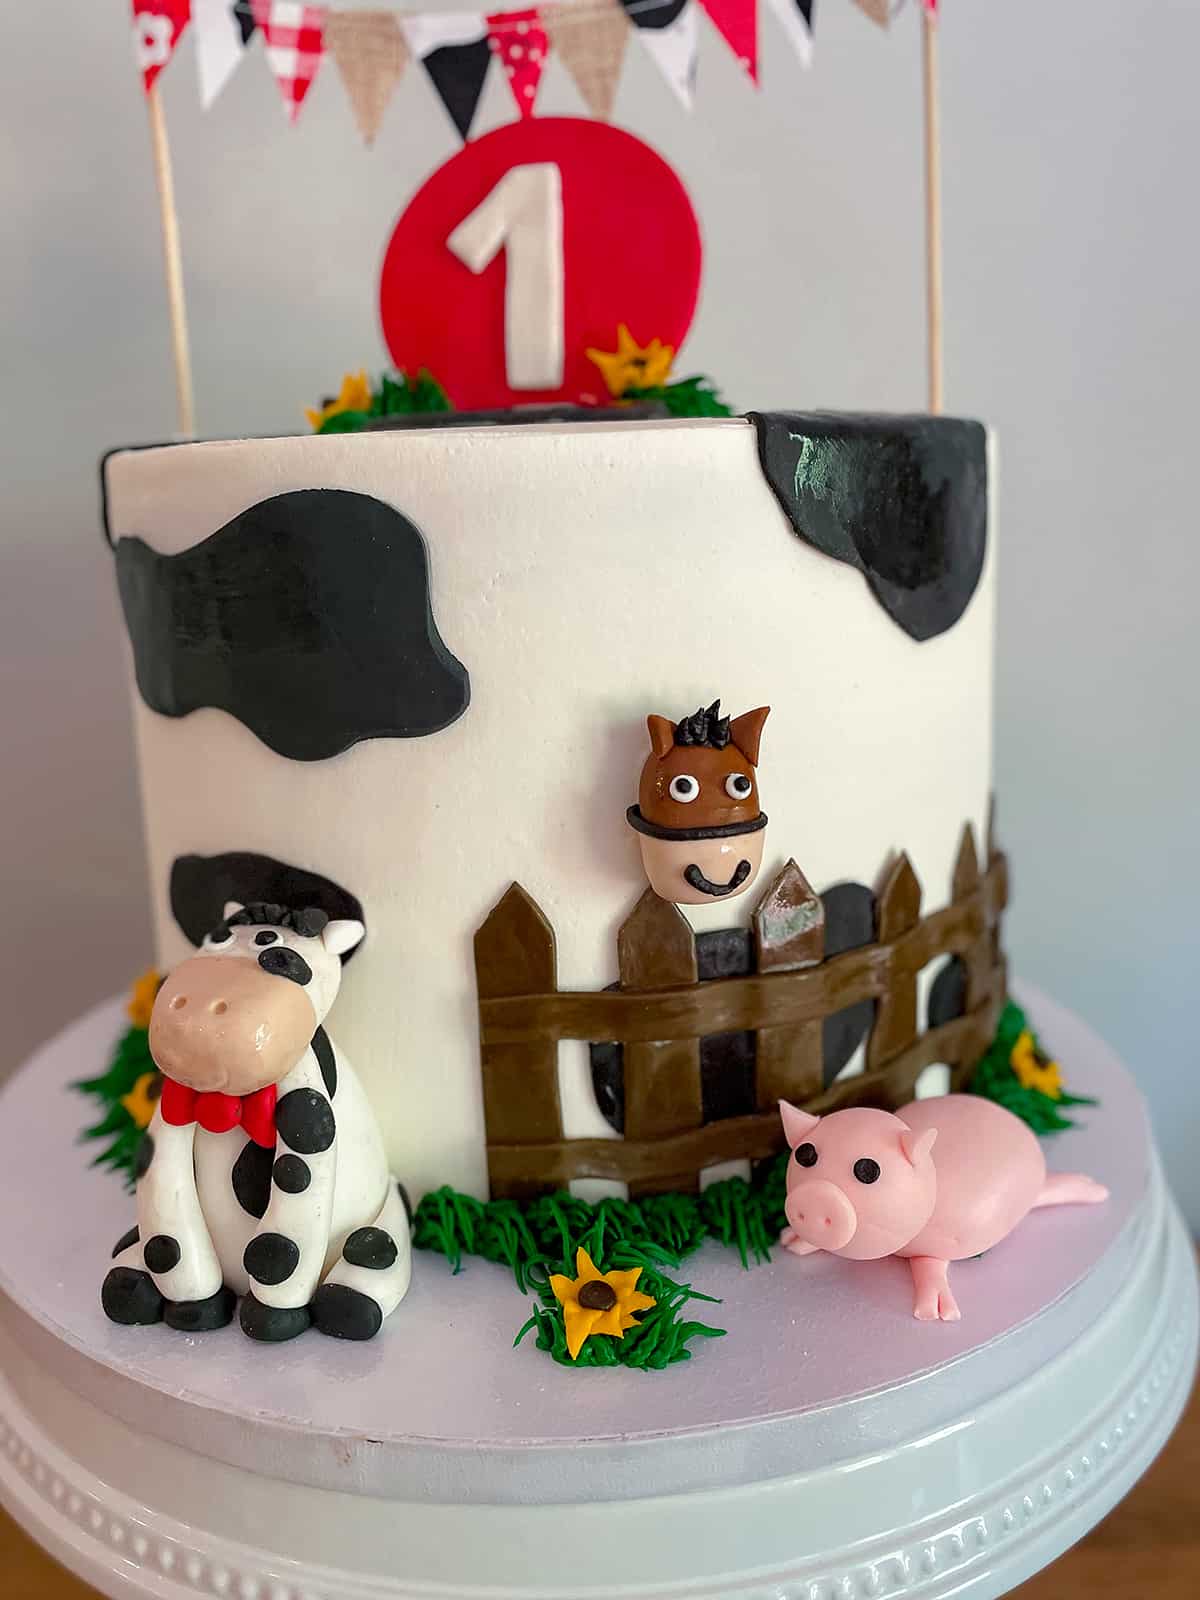
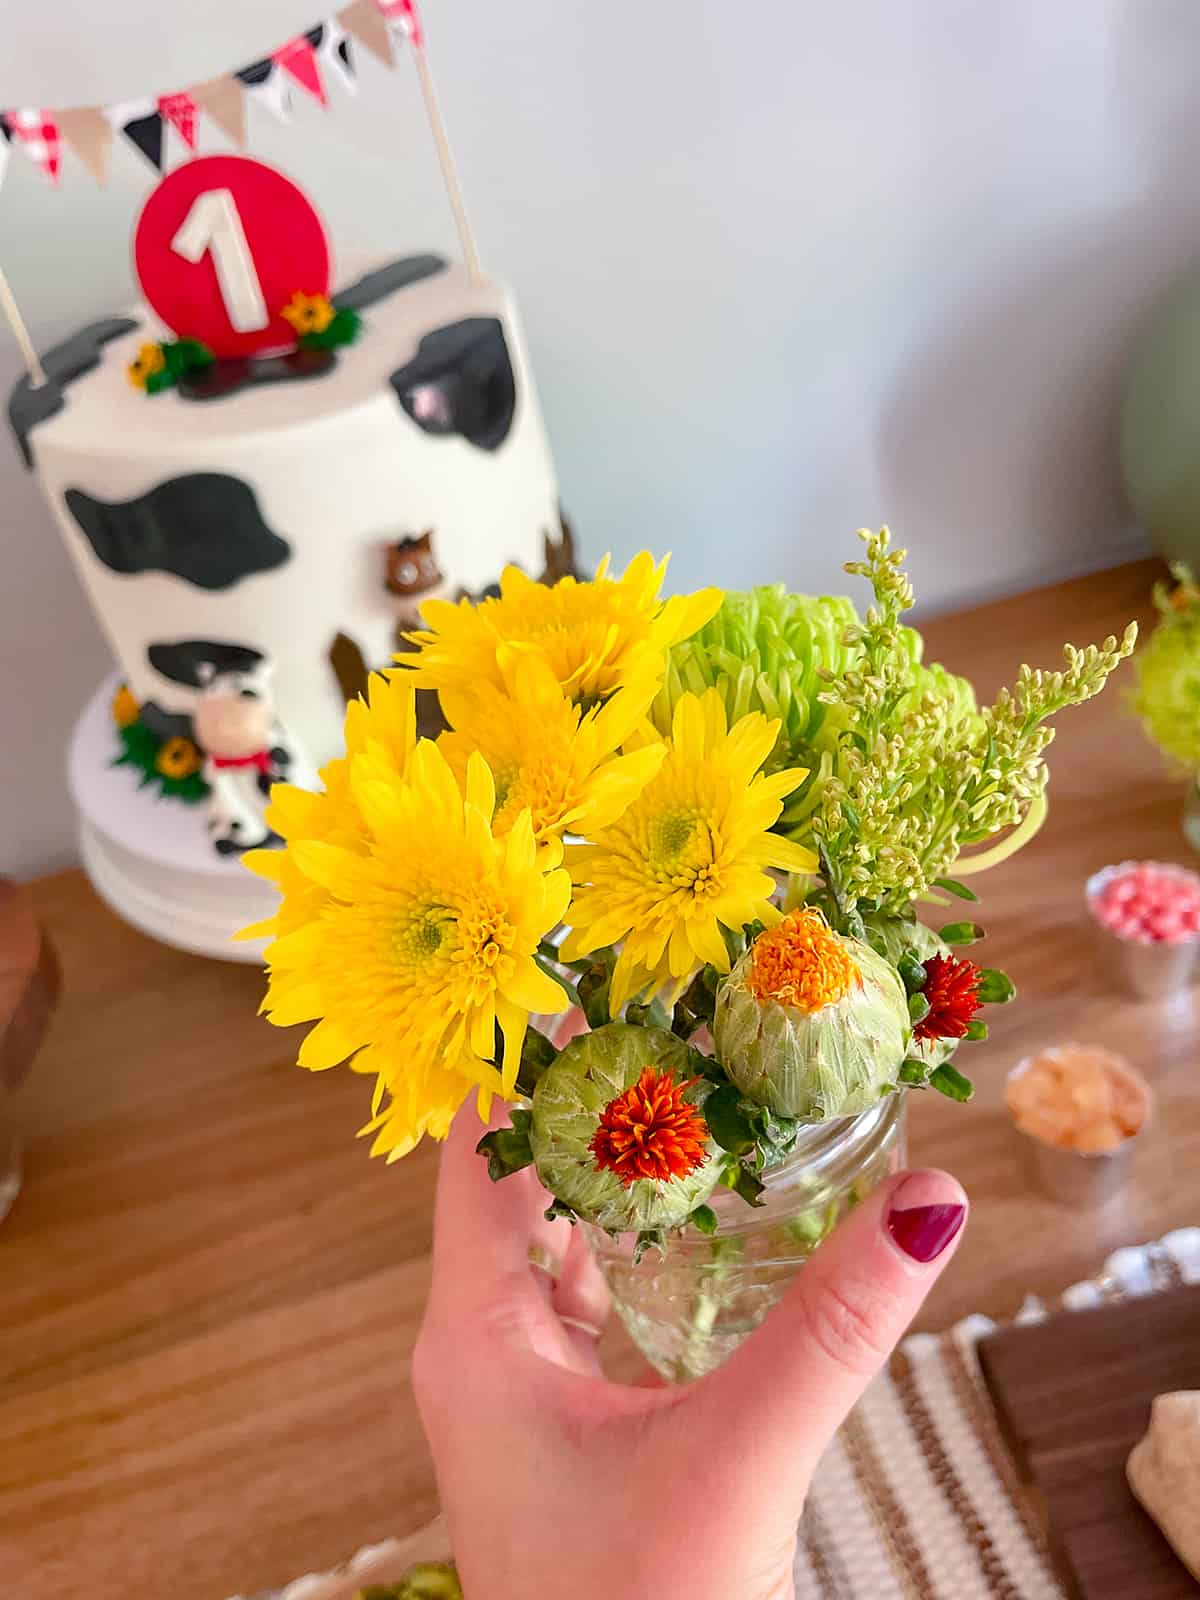


All other serving items and decor were things we already owned like our walnut cutting boards, table runner and cake stands (HomeGoods finds) and mason jar vases. I put together the flower arrangements myself using one big mixed bouquet from Kroger.
For food, we just got a few buffet-friendly catering trays from Publix (I ordered online the day before) and then the cakes were custom from Ivey Cake Bakery in Brentwood, TN. They were absolutely DELICIOUS and almost too pretty to eat!
One final note– I know there’s a big trend right now, especially on social media, to throw over-the-top kids’ parties. A few months ago I had a moment where I let myself get sucked into the pressure and started playing the comparison game. I felt terrible that his first birthday was happening just a month after our move to Nashville and we likely wouldn’t know any other families with kiddos to invite.
After talking about it with Nick, my family and a few other fellow new moms on Instagram, I quickly realized that over-the-top first birthdays were the exception– not the norm. No matter what we decided to do, all that mattered was that Nate felt loved and we could celebrate with our close family. There are plenty of years ahead to throw parties. Also, babies don’t even remember their first birthdays
As you can see, we kept Nate’s party small and sweet and honestly it ended up being the perfect day. My sister and mom came in town to celebrate, as well as my in-laws!

The post Nate’s First Birthday Party appeared first on Katie's Bliss.
]]>
Wow, I can't believe it's been four whole months since I last updated y'all on Nate's favorite products. It's crazy how much he's grown and changed since then. He's becoming such a little man!
Over the last few months, our needs in terms of products and toys have changed quite a bit. I feel like it was around the 6 month mark when he started to become more mobile, that many of the items we had used daily since bringing him home, became less necessary. We also started introducing solids too and had to invest in a whole new arsenal of baby essentials, which you'll find reviewed below. That said, there are still many products that we use daily that you'll recognize from previous posts like our UPPAbaby Vista V2 Stroller and car seat, sound machine, changing pad and bottles.
The post must-have baby essentials (8 month update!) appeared first on Katie's Bliss.
]]>
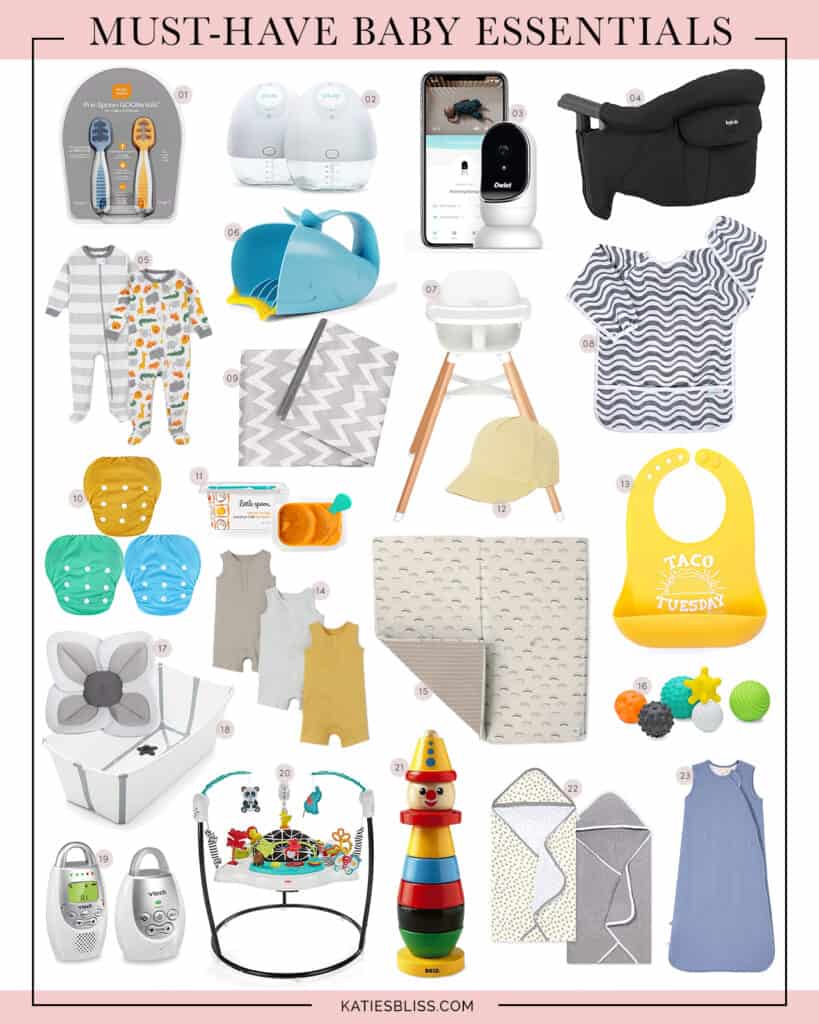
1. NumNum Pre-Spoon GOOtensils | 2. Elvie Breast Pump | 3. Owlet Baby Monitor | 4. Inglesina Clip-On Travel High Chair | 5. Gerber Footie Pajamas | 6. Skip Hop Moby Bath Rinse Cup | 7. Lalo 2-in-1 High Chair | 8. Long Sleeve Waterproof Smock Bibs | 9. Washable Splat Mat | 10. Swim Diapers | 11. Little Spoon Babyblends | 12. H&M Sun Hat + Baseball Cap | 13. Bella Tunno Silicone Bibs | 14. H&M Sleeveless Rompers | 15. Toki Mats Mega Playmat | 16. Sensory Ball Set | 17. Stokke Flexi Bath Soft Insert | 18. Stokke Flexi Bath | 19. Audio Baby Monitor (just $29!) | 20. Fisher-Price Animal Activity Jumperoo | 21. Wooden Stacking Clown Toy | 22. Hooded Towels | 23. Kyte Baby Sleep Sack
Wow, I can’t believe it’s been four whole months since I last updated y’all on Nate’s favorite products. It’s crazy how much he’s grown and changed since then. He’s becoming such a little man!
Over the last few months, our needs in terms of products and toys have changed quite a bit. I feel like it was around the 6 month mark when he started to become more mobile, that many of the items we had used daily since bringing him home, became less necessary. We also started introducing solids too and had to invest in a whole new arsenal of baby essentials, which you’ll find reviewed below. That said, there are still many products that we use daily that you’ll recognize from previous posts like our UPPAbaby Vista V2 Stroller and car seat, sound machine, changing pad and bottles.
Kyte Baby Sleep Sack – now that Nate has transitioned out of his Merlin suit (we stopped around 5 months), he’s been sleeping in these sleep sacks. The fabric is crazy soft and comfortable.
H&M Sleeveless Rompers–Nate has been living in these since we moved to Florida. Great baby wardrobe staple for the warmer months!
Gerber Footie Pajamas – we love these comfy zip-up footie pjs!
H&M Sun Hat + Baseball Cap – I’ve found lots of cute affordable caps for Nate at H&M!
Swim Diapers – if you’re planning on taking your baby to the pool or beach this summer, then I highly suggest getting some swim diapers! Nate was required to wear these in his ISR swim lessons and they worked well. Just be aware that swim diapers in general only hold in #2
Long Sleeve Waterproof Smock Bibs – these do an awesome job at protecting baby’s clothes when they’re eating. Once he’s done, I just throw in the wash on gentle cycle and hang to dry!
Bella Tunno Silicone Bibs – these bibs are genius! They catch all dribble and are dishwasher safe. Absolute must-have for starting solids!
Inglesina Clip-On Travel High Chair – this is an awesome high chair solution for travel or if you live in a small space. We used this in our apartment before we moved and it worked great and easily clipped on to our dining room table. The seat cover is removable and machine-washable!
Lalo 2-in-1 High Chair – this is the high chair we now use in our home and we love it for a number of reasons. It’s easy to clean and has a removable tray (dishwasher-safe) and seat cushion (washer/dryer-safe). So many high chairs are eye sores so I like how the design complements our dining area furniture and decor. It also comes with a second set of short legs to convert into a toddler chair once baby gets bigger. The only thing to be aware of is the footrest. Nate is 8.5 months and his feet aren’t able to reach it yet, so Nick had do a little DIY action to make it higher up (literally with an old drawer organizer + masking tape.)
Washable Splat Mat – we keep this inexpensive washable mat under Nate’s high chair to protect our dining room carpet from crumbs and spills.
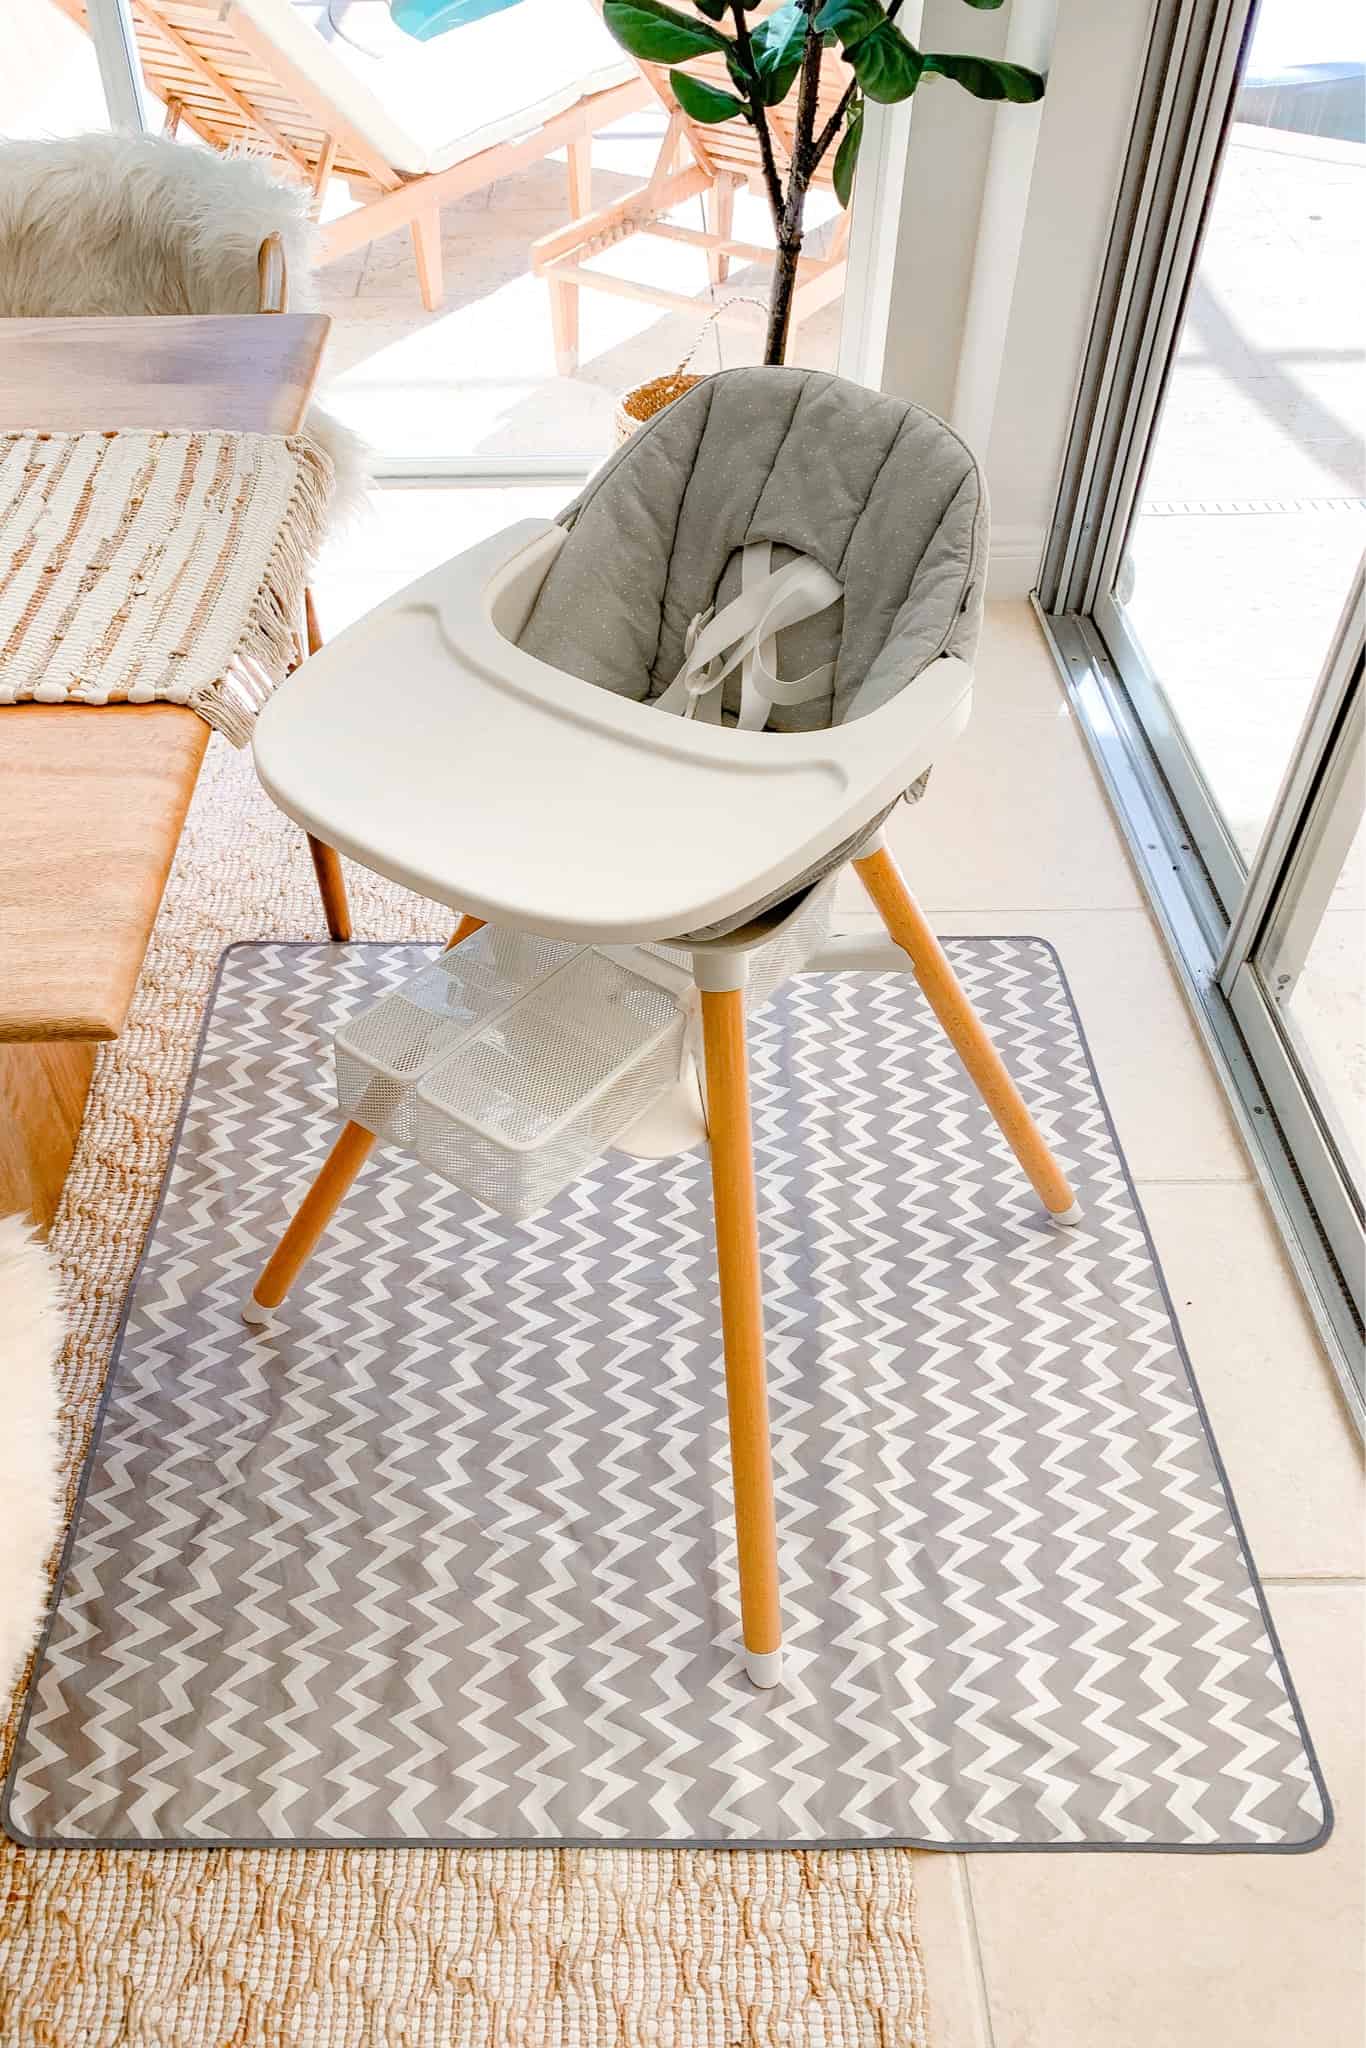
ITEMS PICTURED // Lalo 2-in-1 High Chair + Washable Splat Mat
NumNum Pre-Spoon GOOtensils – if you’re doing baby led weaning, these are great introductory utensils!
Little Spoon Babyblends – even though we’re primarily doing baby led weaning, I still like to give Nate blended food too just to expose him to different flavors and make sure he’s getting in adequate nutrition. We’re a big fan of Little Spoon Babyblends! They have a ton of tasty flavors, use all organic ingredients and deliver right to your door. These make my job a breeze especially on days when I don’t have time to prepare Nate’s solids from scratch. You can use code KATIEG25 for $25 off your first order!
Toki Mats Mega Playmat – we just got this mat for our living room and so far we love it! Now that Nate is so mobile and beginning to crawl, we needed something larger to cover our living room carpet. It’s made from natural materials, has a machine-washable cover and comes in lots of different designs. We got the mega size with the organic insert.
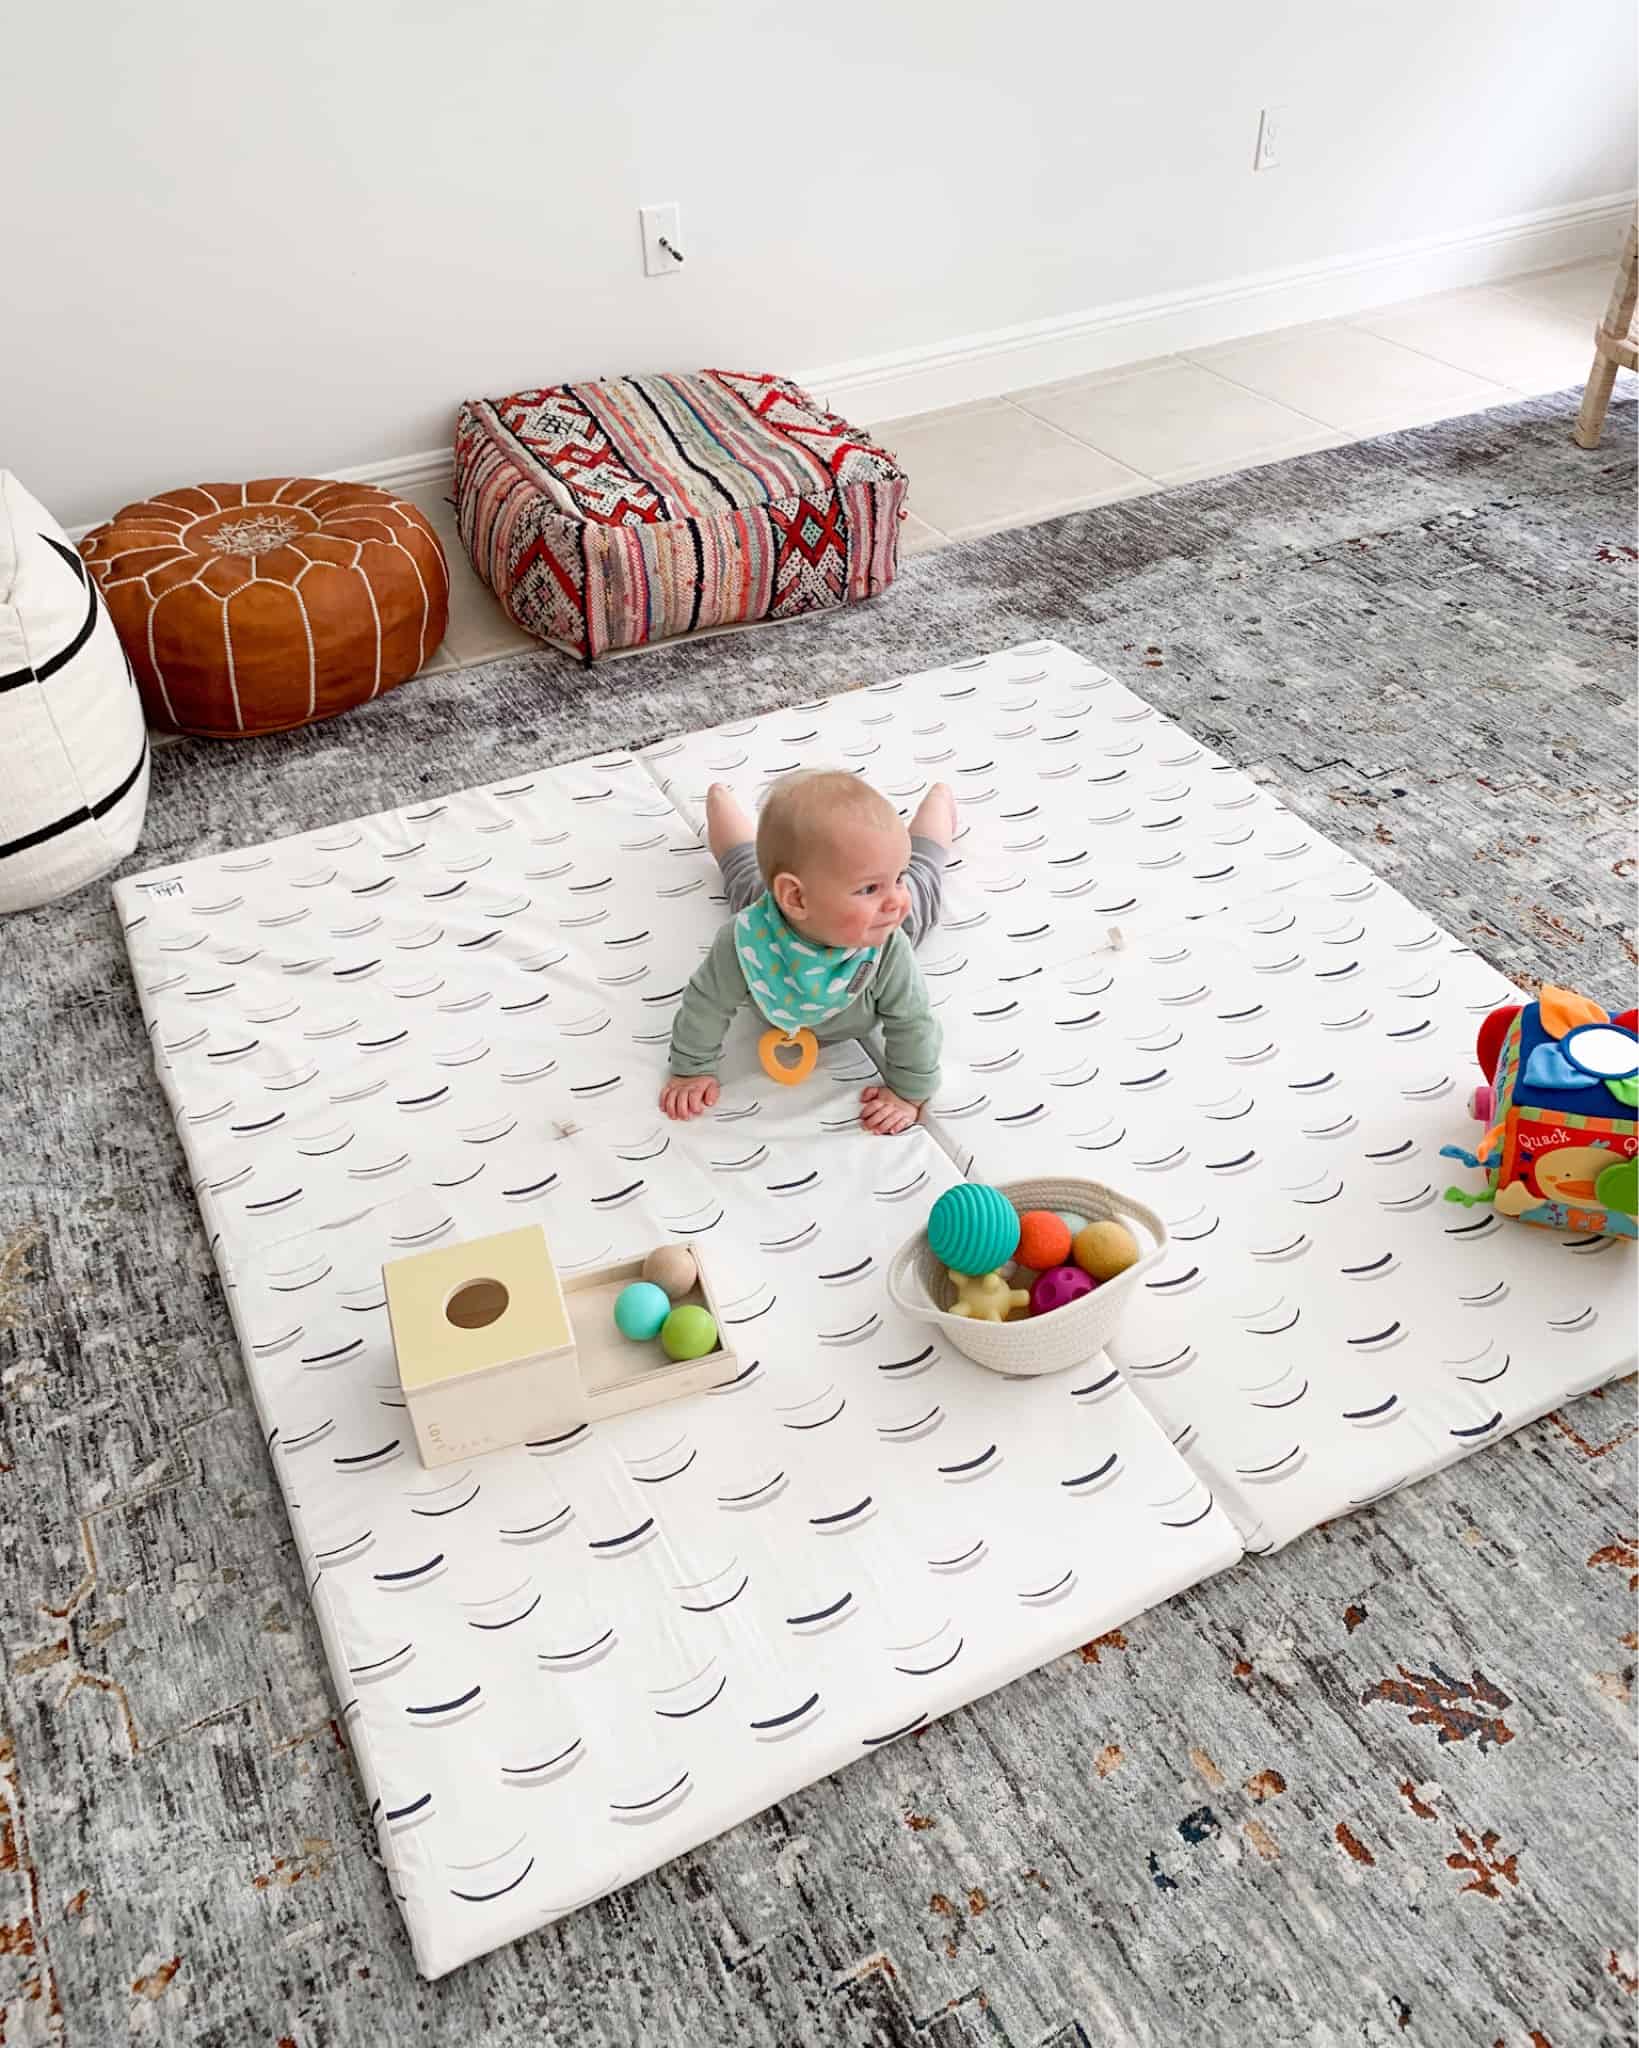
ITEMS PICTURED // Toki Mats Mega Playmat + Sensory Ball Set
Wooden Stacking Clown Toy – I’m pretty sure this toy is meant for age 1+ but he gets such a kick out of it! He can’t actually put it together yet himself, but he loves knocking it over and banging the wooden pieces together. He also cracks up at the clown’s “googly eyes.”
Sensory Ball Set – these are easily one of Nate’s top-used toys! I keep them in a little soft basket on his playmat and he has the best time dumping them out and grabbing and chewing on them.
Fisher-Price Animal Activity Jumperoo – we got Nate this jumperoo around 6 months shortly after we moved into our house just for another play option and he’s obsessed! I like to put him in it if I’m cooking or busy cleaning because it allows him to bop around on his feet and stay entertained, while staying safely contained.
Owlet Baby Monitor – this is the monitor we’re currently using in Nate’s nursery. It was easy to mount on the wall and I like how it also monitors the temperature in the room.
Audio Baby Monitor (just $29!) – in addition to the Owlet, we also have this old school audio baby monitor that we keep in our bedroom. We wanted something simple that would always be playing and didn’t require us to open an app on our phones. It gets the job done!
Stokke Flexi Bath – we’ve been using this bath tub since the beginning and love it! When Nate was a newborn we used it with this soft insert, but now that he is growing into quite the chonk I can just plop him in and he sit up himself. In our new house we have a large walk in shower so I actually set up his tub right in the shower with me so we both wash up at the same time. I love how it folds in half and is easy to clean and store away.
Skip Hop Moby Bath Rinse Cup – this rinse cup is awesome for bath time and is designed to keep water out of baby’s eyes.
Hooded Towels – these have come in extra handy these last two months not only at bath time, but for Nate’s ISR swim classes. Very soft, absorbent and have the cutest lil hood!
Elvie Breast Pump – those of you who have followed my breastfeeding journey and read my breast bump guide are probably very confused to see the Elvie included here. While my first experience with the Elvie was unsuccessful, I decided to give it another shot two months ago when I traveled to Hilton Head for my bffs bachelorette weekend. I had to pump the entire time and really wanted a discreet option that I could easily do on the go. I began using it 1x a day in the week leading up to my trip and I was happily surprised with my output. I still get slightly less than I do with my Baby Buddha or Motif pump, but it got the job done for me while I was away.
I’ve since been using it every morning after Nate’s first feed to fully empty and I love how I can be productive and get things done around the house, while also getting in a pump session. I still would never exclusively use it as my only pump and would caution any new mom from doing so, but it’s so nice to have as a second option!
PS make sure you are using the correct size flange! It’s so important and can affect your milk supply if you aren’t using the right size. The Elvie only comes with 24mm and 28mm so I had to order my size 21mm flanges separately. Here’s a printable ruler that you can use to figure out your correct size.
Products We’re Still Using & Loving
You can find reviews to all of these products in these posts: Baby Must-Haves (4 Month Update) & Newborn Baby Essentials.
Stroller Cup Holder + Organizer

Products We’re No Longer Using Frequently
These are all items we loved that I reviewed in previous baby product posts, but have stopped using primarily due to Nate no longer having a need for them or just losing interest.
Merlin Magic Sleep Suit (we transitioned Nate from this into a regular sleep sack around 5 months)
The post must-have baby essentials (8 month update!) appeared first on Katie's Bliss.
]]>
Flying with your new baby for the first time? Wondering how to pack and carry on breastmilk or formula for a flight? Here’s what you need to know! Lap infant or buy baby a seat? I’ve flown both ways with Nate and each had its pros and cons. When baby flies as a lap infant they are essentially traveling for free since they are sitting on your lap and don’t require
The post Travel Tips | How To Fly With A Baby + Pack Breastmilk & Formula For Flights appeared first on Katie's Bliss.
]]>
Flying with your new baby for the first time? Wondering how to pack and carry on breastmilk or formula for a flight? Here’s what you need to know!
Lap infant or buy baby a seat?
I’ve flown both ways with Nate and each had its pros and cons.
When baby flies as a lap infant they are essentially traveling for free since they are sitting on your lap and don’t require their own seat. Nate flew as a lap infant on his first flight at four months and it went really well. We had an early morning flight so I wore him in his carrier the entire time we were in the airport (he thankfully snoozed!), breastfed him during takeoff and then held him while he slept for the rest of the flight.
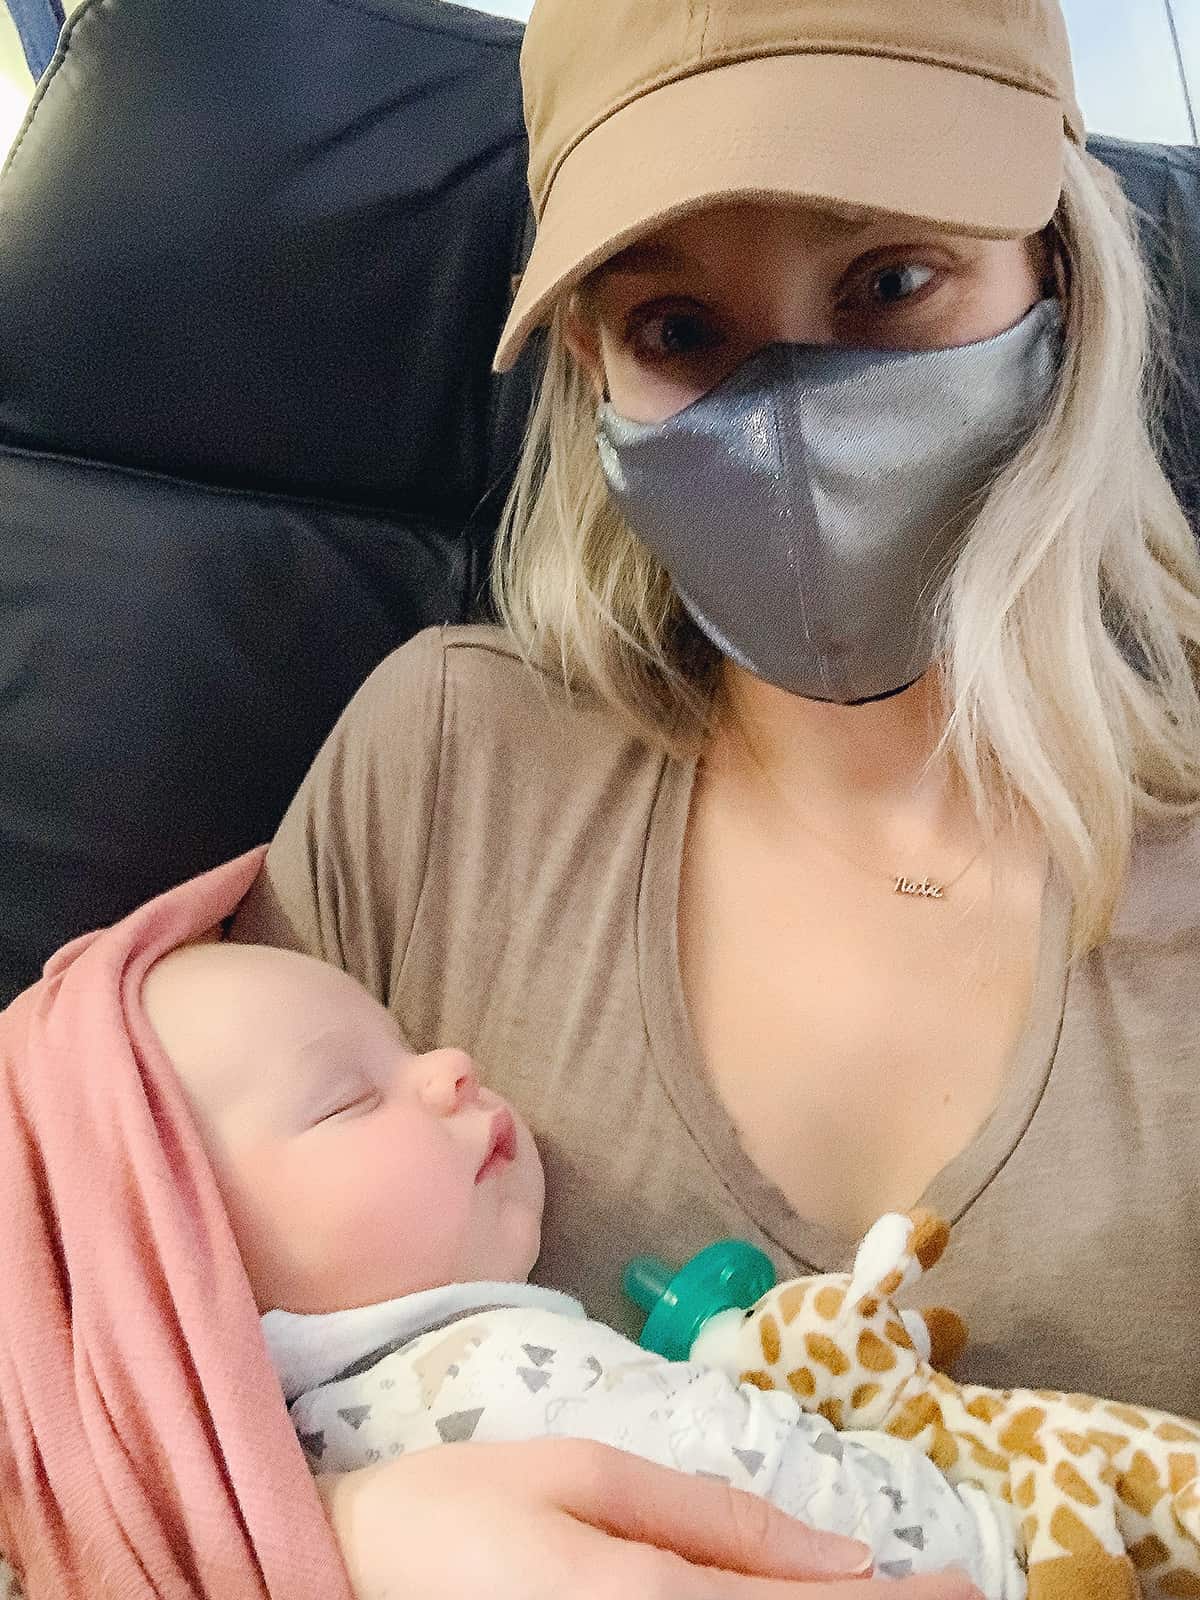
There were two major downsides: 1) Since I checked his stroller and car seat as baggage I did not have a place to put him down. This meant taking him into the restroom with me and having to carry our things while also holding him. Thankfully the woman I was seated next to was incredibly sweet and helpful. She offered to hold him when I had to pee and helped me with my things when we were de-boarding.
2) Not as much space to spread out and less privacy when breastfeeding. I was really worried about this so I decided to splurge on a first class ticket. The larger seat made breastfeeding much more comfortable and since I was in the first class cabin, I only was seated next to one other passenger as opposed to two in economy. I also was able to board and de-board the plane first.
A note on flying first with a baby!
After I shared on Instagram that I had flown with Nate in the first class cabin, I received a few messages from mamas asking me how other passengers reacted and if I experienced any side eye from a having a baby with me.
First off it’s important to remember that flying is a form of public transportation and babies have as much right to travel by air as adults. Also in these pandemic times, I think people are even more understanding of a parent wanting to fly first with a baby– not as much close contact with strangers, closer to front of plane, etc. I personally didn’t think twice about it. I was incredibly nervous since it was 1) his first flight and 2) I was traveling with him alone. My top priorities were his comfort and my own sanity– not the opinions of strangers.
All that said, our experience was very positive! The other passengers and flight attendants were very friendly and I think everyone appreciated seeing Nate’s cute smiling face. There was one point where he fussed for a few minutes and while I did feel bad about the noise, all I could do was try my best to calm him and apologize to the folks around me. Everyone was very kind and no one made me feel bad or uncomfortable. I would definitely fly first again if the circumstances warranted.
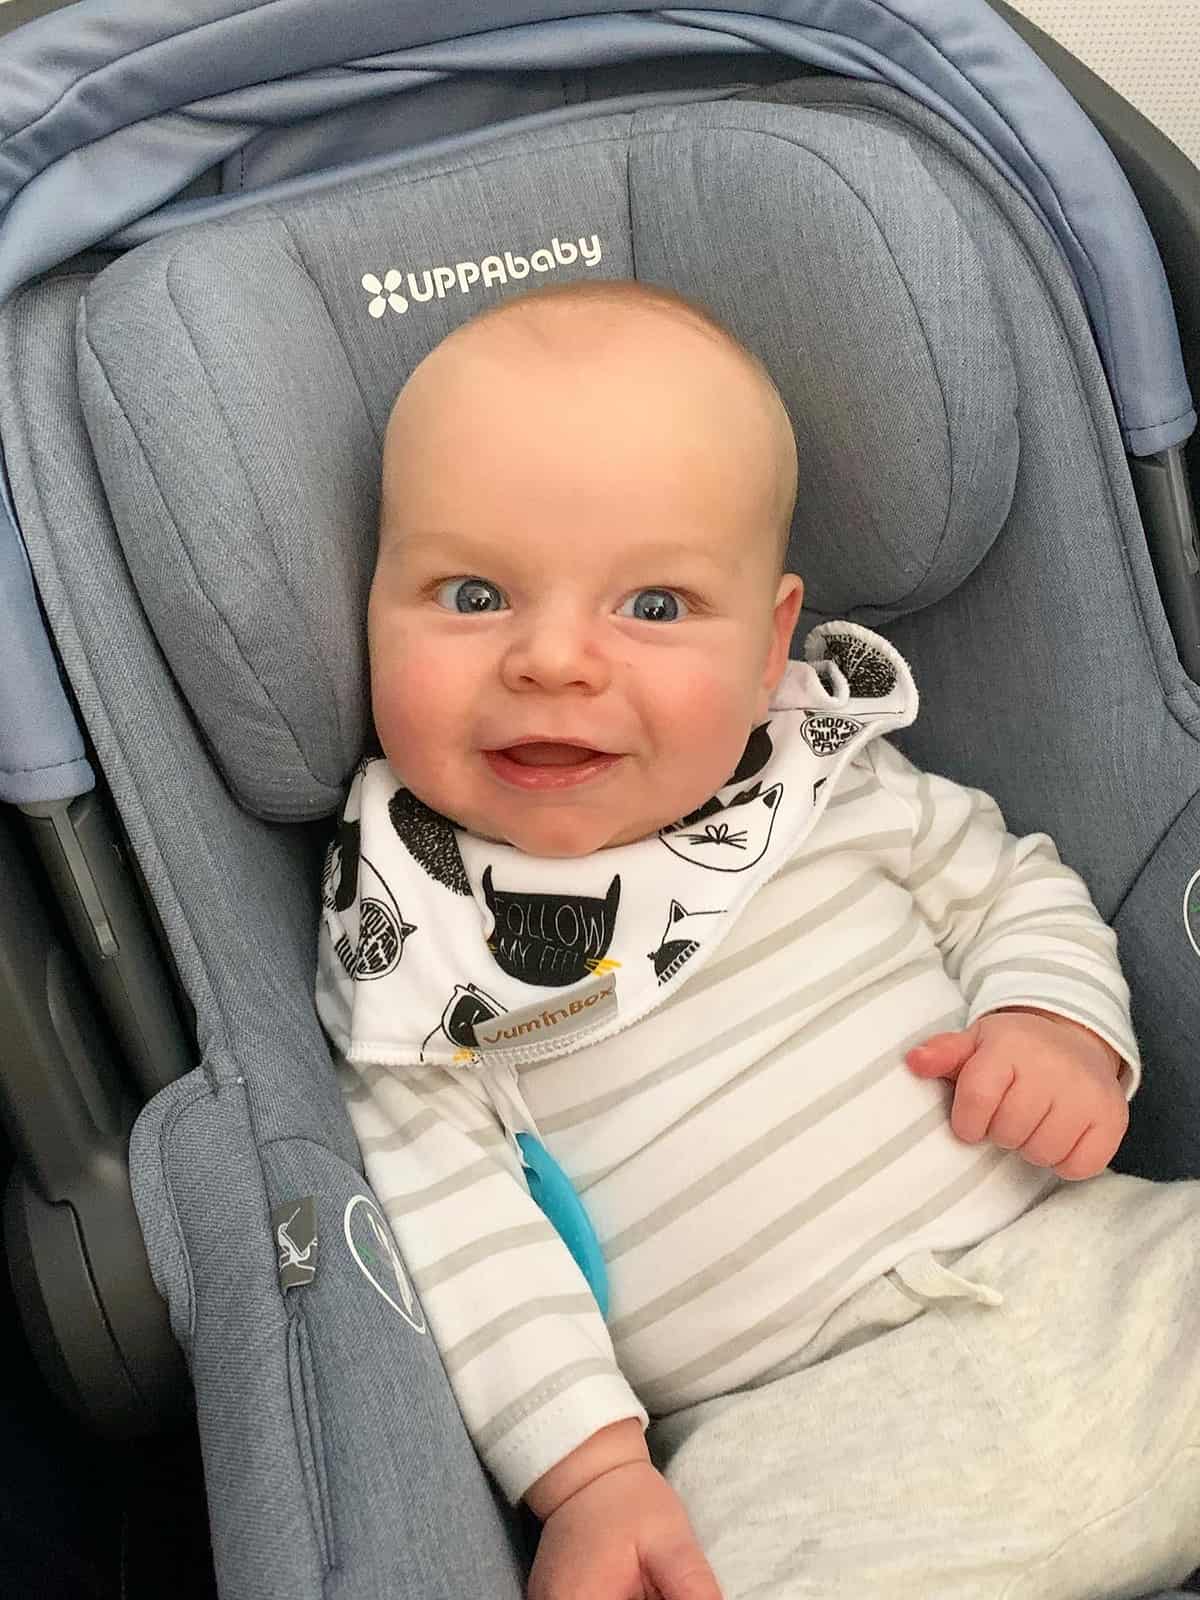
On Nate’s second flight at 5 months, I decided to buy him his own ticket and bring him on to the plane in his car seat. My first time flying with him I had been too nervous to fold up and gate check his UPPAbaby Vista stroller and car seat, but the second time around I had gained some confidence and felt like I could handle dealing with the stroller and car seat in the airport.
Similarly to my first time flying with him, everything went smoothly and better than I expected. I just tried to get to the gate as quickly as possible and not stress when it came time to pack up the stroller frame in its travel case and gate check it. Yes, I had more to deal with in the airport than I had on my first flight with Nate, but at least I had a place to put him down and could keep my purse and diaper bag in the bottom of the stroller. Getting on the plane was a slower process since I was lugging Nate in his car seat as opposed to his baby carrier, but once we got to our seats it was a comfortable experience.
At check in I had asked if there was availability to place us in our own row without a third passenger and thankfully there was! That meant I had the space of the entire row to breastfeed discreetly and was able to have him sit in his car seat for the majority of the flight. When I had to pee I just called a flight attendant and asked if she could stand with him.
Flying With a baby during covid
Did you feel safe flying during Covid? That was a common question I was asked following both of my flights with Nate.
My answer? Yes, I felt safe.
My experience in the airport and on both flights was honestly not that much different than what I had been used to in pre-Covid times. The biggest differences were actually very positive. Everyone wore a mask. All flights were boarding back to front to avoid unnecessary crowding and delays. Passengers could only approach the gate when their row was called. The airport and plane was incredibly clean.
I know for a while many airlines were blocking middle seats (Delta still is as of March 2021), however when I flew in January 2021 both United and Allegiant had returned to filling flights. I remember my United flight being nearly full and getting an alert from them saying I could switch to an emptier flight without any change fees. I opted to stay on the full flight and felt comfortable the entire time.
TSA Tips + What You Need To Know
Breastmilk, formula, juice & baby medications in liquid form are exempt from TSA carry-on limitations but will likely be tested. This means you can pack quantities greater than 3.4 ounces or 100 milliliters in your carry-on baggage and these do not need to fit within a quart-sized bag. I would recommend keeping them packed separate from your other carry-on items in a clear zip lock bag and alerting TSA agents right away that you have liquids over 3.4oz packed for your baby. Also be prepared for TSA to test any liquids that you bring through security.
On my first flight with Nate, the TSA agents did not test the 8oz bottle of breastmilk I had in my diaper bag– despite me alerting them that I was carrying a liquid more than 3.4oz. However on my return flight home, the agents did remove the bottle from my bag and go through the testing motions.
Basically what they do is open up the liquid and stick a little paper test strip into it. It takes about three minutes and you can stand there to watch as they do it in the security area. To avoid any spills or confusion I would recommend putting any liquid formula or breast milk into a secure container that’s easily accessible in your bag and simple for a stranger to open and close.
I made the mistake of putting Nate’s milk in a prepared Dr. Brown’s bottle (lots of little pieces) so it took the agent a lot longer to remove the nipple + gave me a ton of anxiety seeing someone else fumble around with baby’s bottle. Moving forward I will definitely pack all liquids in a container with a screw on cap vs prepared with a nipple. TIP: you can absolutely request for the TSA agent to put on new clean gloves before handing any of your packed liquids.
Frozen breastmilk & ice packs can be packed in carry on luggage. Similar to liquids, frozen breastmilk and ice packs over 3.4oz are allowed to be carried on flights. The big difference– frozen items do NOT require any TSA testing and do not need to be removed from your luggage when going through security. Frozen items can go through the conveyer belt scanner like any normal item.
On our flight back from Florida, I carried on 15 5oz freezer bags of breastmilk in the insulated cooler compartment of this backpack with no issues. I placed all the freezer bags into a large gallon-size zip lock bag surrounded by ice packs within the backpack and they stay nearly frozen the entire time. It was about 6 hours total between leaving for the airport, the flight itself and then the drive home that my milk was out of the freezer. If possible, I would recommend storing anything frozen in a bag or container separate from other belongings to avoid having to open it up and release the cool air while you’re in transit.
CDC BREASTMILK STORAGE GUIDELINES:
Freshly expressed or pumped milk can be stored:
+ At room temperature (77°F or colder) for up to 4 hours.
+ In the refrigerator for up to 4 days.
+ In the freezer for about 6 months is best; up to 12 months is acceptable. Although freezing keeps food safe almost indefinitely, recommended storage times are important to follow for best quality.
+ Breast milk can be stored in an insulated cooler bag with frozen ice packs for up to 24 hours when you are traveling. Once you arrive at your destination, milk should be used right away, stored in the refrigerator, or frozen.
More breastmilk facts + tips can be found at CDC.gov here.
Sign up for TSA PreCheck. I’ve had TSA PreCheck and Global Entry for years and can’t speak highly enough about the perks. You get to go in a separate faster line and don’t have to remove your shoes, belts or layers when going through the scanner. You also don’t have to remove liquids from your baggage if 3.4oz or under. Having it makes the security experience significantly less stressful. PS children 12 and under get to enjoy all the perks of TSA PreCheck if they are traveling with an adult that has the indicator on their boarding pass.
Be prepared to take baby out of their car seat or carrier to walk through scanner. For Nate’s first flight I actually wore him in his Artipoppe carrier the entire time through security. I had no idea what to expect, but surprisingly the agents were incredibly chill and did not ask me to take him out or make me put the carrier through the luggage scanner. On his second flight when I brought his car seat + stroller, I did have to unstrap him and push the stroller through the scanner while holding him in my arms.
tips for before the airport
Book a window seat. You’ll naturally have more privacy, can control incoming light and have a place for yourself to lean against and relax.
Practice folding/taking apart your stroller. Whether you’re planning to check your stroller as baggage or at the gate make sure you know how to fold it up/take it apart. We have the UPPAbaby Vista and while I’ve been a pro at folding it and throwing it in the trunk of our car for months, flying was the first time I had ever needed to take off the wheels and pack it in its protective travel case— highly recommend getting one to prevent damage. I brought the travel case with me in the bottom of the stroller through the airport and then packed it away at the gate. I practiced a few times at home in advance and took photos of what the stroller looks like packed up just so I had for reference.
Make sure your car seat is FAA approved. If you are going to bring baby on the plane in their car seat it has to be FAA approved. Most car seats have this certification, however make sure to check first just in case. Typically there will be a big sticker somewhere on the bottom or side of the seat that will say it is certified for use in aircraft. We have the UPPABaby Mesa.
Diaper bags do not count towards your carry-on luggage allowance. Check your airline’s policy first, but to my knowledge most carriers allow passengers to bring on a diaper bag free of charge in addition to whatever carry-on luggage is allowed per their ticket. So if you normally travel with a small rolling suitcase and a large purse, you can also bring on a third bag with your baby’s necessities without incurring an additional fee.
Car seats and strollers do not count as baggage. Again check your airline’s policy, but to my knowledge most carriers allow passengers to check a car seat and stroller at the gate or as checked baggage free of charge.
Give yourself extra time. As parents, we already know that everything takes longer with children. The same applies to airports and flying so plan accordingly!
See if your airport has a mother’s lounge or nursing pod. Lots of airports have private areas just for mamas to breastfeed and change baby. Worth looking into if you have a long layover or a delay!
tips for at the airport
Bring a copy of baby’s birth certificate. Check your airline’s policy because some require you to show a birth certificate as a form of identification when flying with an infant. I think it’s also smart to have in case airport or flight staff question your baby’s age since children 2 and under are not required to wear masks. I brought a copy of Nate’s with me in my purse, however I was never asked to show any type of documentation for him on either flight (so far we’ve flown United and Allegiant.)
Ask for a boarding pass for baby at check-in– even if they’re a lap infant. When I flew with Nate as a lap infant, he still needed his own boarding pass. It wasn’t sent to me when I did the normal online check in for myself so I had to ask for it when I dropped off my bag at the airport check in.
Break down your stroller before heading to the gate. If possible, fold and pack up your stroller before heading down to the gate. This way you can just quickly carry on baby in their car seat or carrier and not have to scramble to do it while other passengers wait behind you.
Do not be afraid to ask questions or request help. Remember: most people in this world are KIND. Do not be afraid to ask a question or seek out help. Folks are very sympathetic to parents traveling with small children, especially solo. On my two flights with Nate, I got multiple offers from airport staff, the flight crew and other passengers to help me with my bags and to hold him. I also had no shame in asking for help when I needed it.
tips for on the plane
Nurse, bottle-feed or give baby paci during landing & takeoff. Doing this will help relieve any possible ear discomfort due to cabin pressure and altitude changes.
If breastfeeding, wear a nursing-friendly top + easy layers. I highly recommend Kindred Bravely nursing tops and bras. So comfortable! I also used this nursing cover on both of my flights with Nate.
Bring a back-up bottle. I nurse Nate for all of his daytime feedings, however he is very prone to getting distracted so I packed a bottle of pumped milk with me just in case he needed a top off to fill his belly. He was still a little fussy after nursing both times that I’ve flown with him, so I did end up giving him the bottle and homeboy PASSED out. You know your baby best, so I would just pack what they need to have a full belly and restful sleep on the plane.
Have entertainment! I’d suggest have a favorite toy or two + have some Netflix or YouTube shows downloaded on your phone in case baby gets antsy and needs a distraction.
Don’t stress. Easier said than done of course, but just remember you’re in a unique situation. Do not stress about sticking to a nap or feeding routine. Do what you need to do to make yourself and baby comfortable, whether that’s screen time with Cocomelon or giving baby an extra feeding to help them settle.
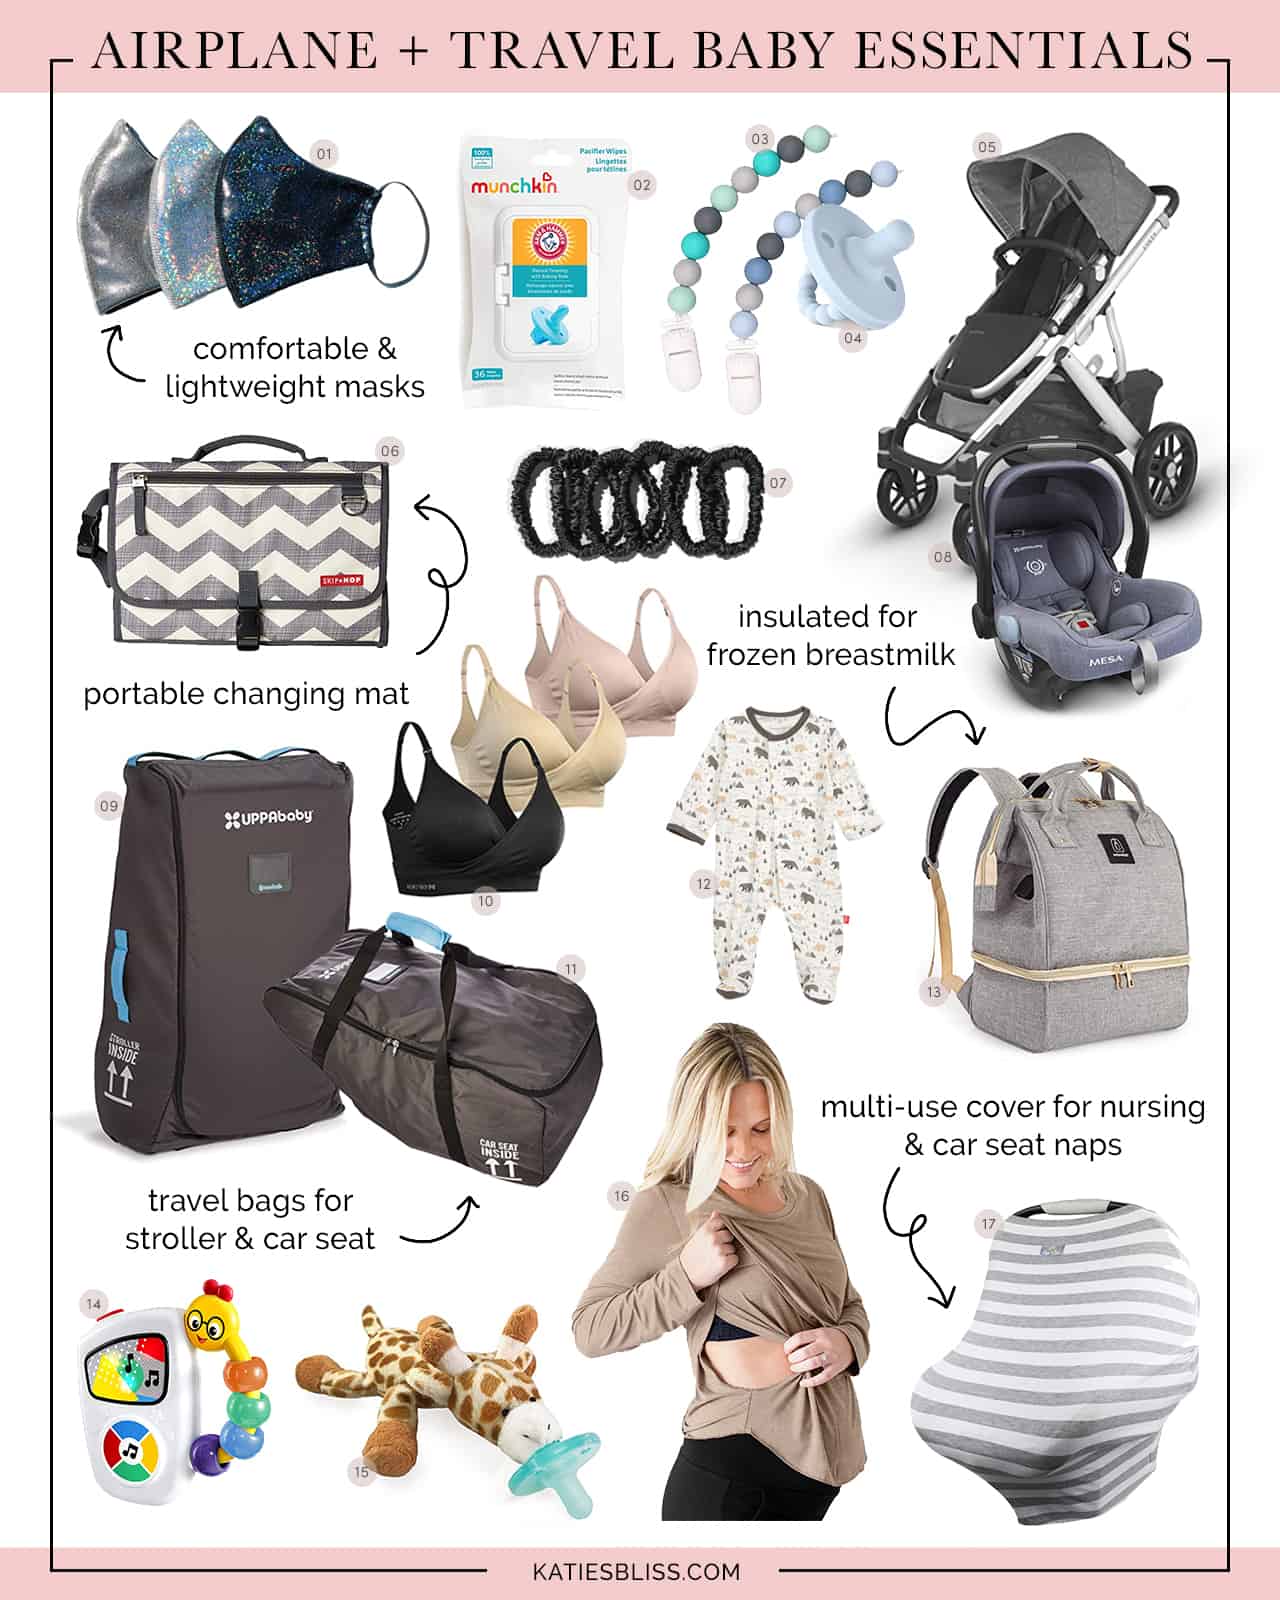
1. Face Masks | 2. Sanitizing Wipes | 3. Pacifier Clip | 4. Pacifier | 5. UPPAbaby Vista | 6. Portable Changing Mat | 7. Hair Ties | 8. UPPABaby Mesa | 9. UPPAbaby Vista Travel Bag | 10. UPPAbaby Mesa Travel Bag | 11. Nursing Bras | 12. Magnetic Onesies | 13. Insulated Cooler Backpack | 14. Music Toy | 15. Wubbanub Pacifier |16. Nursing Friendly Top |17. Nursing/Car Seat Cover
Pack These Things In Your Diaper Bag!
Portable Changing Mat (I changed Nate in the airport before/after each flight and used this pad as a clean surface on top of the pad in the airport bathrooms)
Milk/Formula/Feeding Supplies
Sanitizing Wipes (Nate’s paci fell on the floor at one point so I used these to clean it)
Zip Lock Bags (to store any dirty clothes, drool-soaked bibs, etc. away from the other items in your diaper bag)
Hair Tie or Scrunchie (necessary for me when I breastfeed)
Nursing Pads (if you’re breastfeeding and have a strong let down)
Extra Change of Clothes (I packed an extra onesie/pair of pants for Nate JUST in case of a blowout. If baby is a messy eater/prone to spitting up, you may want to bring an extra top for yourself too.)
Light Blanket (for covering baby during naps)
Comfortable Face Mask (for yourself– these are my favorite)
The post Travel Tips | How To Fly With A Baby + Pack Breastmilk & Formula For Flights appeared first on Katie's Bliss.
]]>
It's so true when people say that even though the days may seem long, the weeks and months after having a baby pass by so quickly. I feel like I just blinked and all of a sudden Nate is almost five months old! Everyday has been such a joy since he joined our little family. I don't know how we ever lived without him! Back in October I posted a roundup of our most-used newborn products and got great feedback from y'all, so I thought it would be helpful to share an update on which of those items we're still loving, along with the other products that we've found most useful in the 2-4 month stage.
The post Must-Have Baby Essentials (4 Month Update!) appeared first on Katie's Bliss.
]]>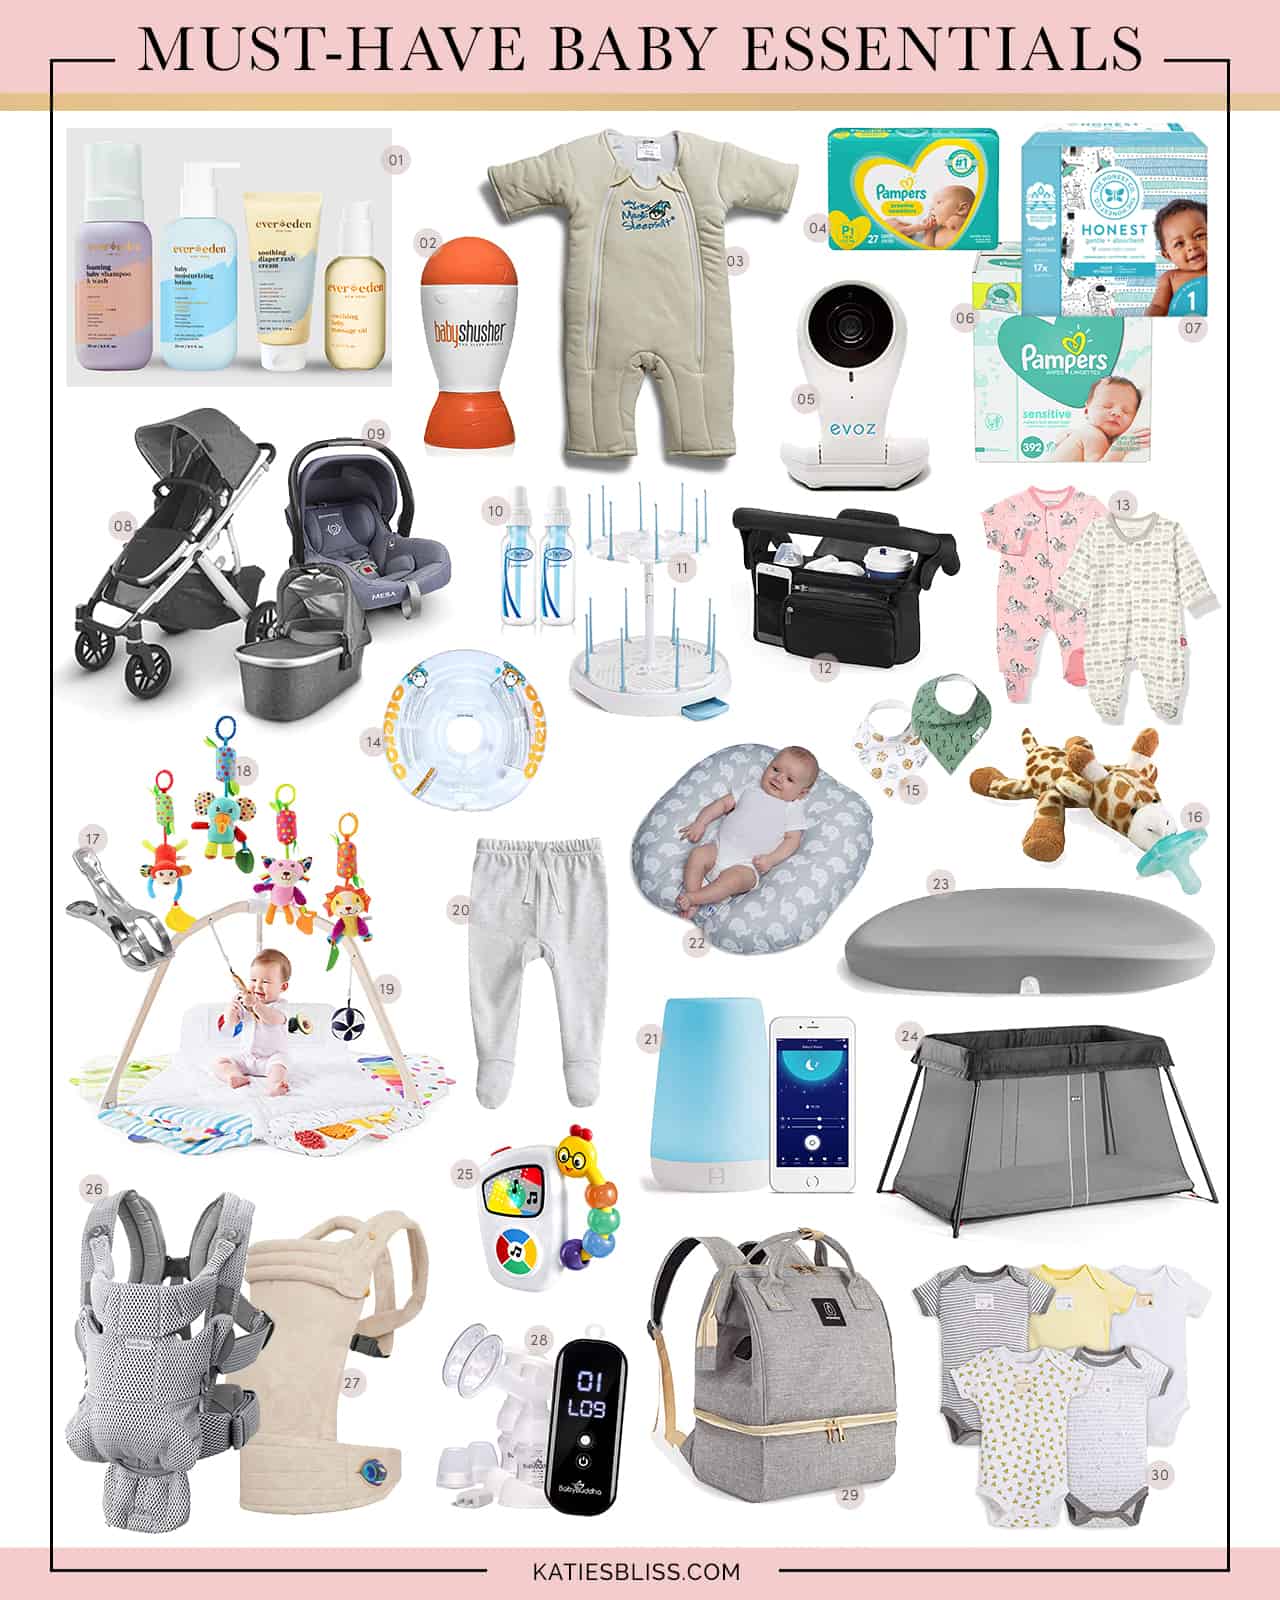
1. Ever Eden Skincare Bundle | 2. Baby Shusher | 3. Merlin Magic Sleep Suit | 4. Pampers Sensitive Baby Wipes | 5.Video Baby Monitor | 6. Pampers Swaddlers | 7. Honest Diapers | 8. UPPAbaby Vista V2 Stroller | 9. UPPAbaby MESA Car Seat | 10. Dr. Brown Bottles | 11. Bottle Drying Rack | 12. Stroller Cup Holder + Organizer | 13. Magnetic Me Footie | 14. Otteroo Lumi Baby Neck Float | 15. Bandana Drool Bibs | 16. WubbaNub Pacifier | 17. Large Clips | 18. Hanging Rattle Toys | 19. Play Gym by Lovevery | 20. Baby Joggers | 21. Hatch Baby Sound Machine | 22. Boppy Lounger | 23. Hatch Baby Smart Changing Pad | 24. Travel Crib | 25. Take Along Tunes | 26. BABYBJORN Carrier | 27. Artipoppe Carrier | 28. BabyBuddha Breast Pump | 29. Breast Pump Backpack | 30. Burts Bees Onesies
It’s so true when people say that even though the days may seem long, the weeks and months after having a baby pass by so quickly. I feel like I just blinked and all of a sudden Nate is almost five months old! Everyday has been such a joy since he joined our little family. I don’t know how we ever lived without him!
Back in October I posted a roundup of our most-used newborn products and got great feedback from y’all, so I thought it would be helpful to share an update on which of those items we’re still loving, along with the other products that we’ve found most useful in the 2-4 month stage.
SLEEP SUIT
I can’t remember exactly when we stopped swaddling Nate (I want to say it was around 2.5 months–we loved these swaddles btw!) but since then he’s been wearing the Merlin’s Magic Sleep Suit for all of his naps and nighttime sleep. It’s a great transition product for babies because helps contain their startle reflex similar to a swaddle, but allows them to move their arms and legs a little more freely. It’s also very cozy and cushy! I wish they made them in adult size!
Sound machines
We still regularly use both the Baby Shusher and Hatch Baby Sound Machine + Light from my Newborn Essentials post. The shusher is great to have on the go because it’s tiny and easy to throw into your bag for using when traveling or anywhere you need baby to nap outside of their normal sleep environment. We keep the Hatch sound machine right next to Nate’s crib for white noise and as a night light. I love how I can control the volume level and light color directly from the Hatch app on my phone!
baby monitor
Now that Nate has started taking longer naps and can fall asleep on his own, we’ve begun regularly using a baby monitor and really love this one from Evoz. It’s lightweight, easy to move around and I love how I can watch him with the app on my phone without having to be on the same wifi network as the monitor. It also has dual audio so I can talk to Nate through it! PS we also love the Owlet monitor and sock too, which we use regularly at home in our apartment, however this is the monitor that we brought with us to Florida and have been using the most often. You can’t go wrong with either!
Stroller & accessories
I can’t speak highly enough of our UPPAbaby Vista V2 Stroller! When I was pregnant it was by far the one that was recommended most to me and after nearly five months of using it I understand why. The quality and durability is just incredible. It comes with two different seating options– a bassinet for the newborn stage (we used it for 3 months) and a reversible toddler seat.
A note about the bassinet attachment! It’s sleep safe and many parents will actually use it as their baby’s primary sleep spot until it’s time to transition them to a crib. You can purchase this foldable stand and the bassinet clips right in! It’s amazing and what we used at my grandparents’ home when we visited them over Nate’s first few months. He slept just as well in it as he did in his bassinet at our apartment!
The Vista is also a stroller that can grow with your baby and be used for multiple years. I also find it incredibly easy to use– the seats clip in and out with the press of a button and the frame folds in half making it simple to store in the trunk of your car. The wheels are heavy duty and work great in all kinds of weather and temperatures.
Some other aspects I love: the huge basket underneath that’s big enough to hold multiple grocery bags, adjustable handlebar so it’s comfortable for both Nick and I to push, option to have multiple configurations and add up two additional kids.
We haven’t purchased a ton of extra stroller accessories yet, however we do regularly use this cup holder + organizer. It was just $19.99 on Amazon and attaches via velcro to the handlebars of any stroller.
car seat
It was really important to us that whatever car seat we chose was compatible with our stroller, so it was a no brainer for us to get the UPPAbaby MESA Car Seat. Similar to our thoughts on the Vista, we’ve loved our experience with the Mesa. It’s sturdy, easy to adjust as baby grows and it clips into the Vista stroller frame in seconds.
baby carriers
I’ve tried a handful of baby carriers and my two favorites are the Artipoppe Zeitgeist carrier and BabyBjörn Baby Carrier Free carrier. Both fit and wear in a similar way, however I would say the Artipoppe pouch is more cocoon-like– similar wearing your baby in a fabric wrap. I love how when I carry Nate in it he’s really nestled and cozy– for weeks it was the only way I could get him to fall asleep for naps! The BabyBjorn is more of a structured carrier and is great if you prefer your baby held a little more upright. I would also say it’s better for wearing over longer periods of time due to the built-in back and waist support.
Which is easier to put on? Both are simple to use once you get the hang of it and adjust the straps to make sense for you and your baby’s size, but off the bat the Artipoppe wins hands down. It has three simple clip ins, where the BabyBjorn has six. I also like how the Artipoppe pouch fully unclips and flaps down making it easy to transfer your baby out without having to lift them from the carrier. It’s how I would always get Nate into his bassinet without waking him up! With the BabyBjorn there isn’t a way to take your baby out without lifting them up and through the harness.
Some other key differences:
+ Artipoppe can hold up to 44lbs, BabyBjorn can hold up to 26.5lbs
+ most Artipoppe carriers are priced at $350, however some patterns and fabric are in the $700-$3,000+ range
+ BabyBjorn carriers are more budget-friendly and start at $159
baby lounger
Boppy Pillow – Nate is a little too big for this now, but from day one up until he was 3.5 months we used this lounger pillow daily! It’s the perfect spot for having a small baby relax during their wake windows and can be easily moved from room to room around your home.
pajamas
Magnetic Me Footie Pajamas – 2 words: Magnetic. Clasps. These were by far Nate’s most worn newborn pajamas and since then I’ve been buying a handful every time he’s gone up a size (he’s in 3-6 month now.) The magnetic closures make them so easy to take on and off + the fabric quality is incredible and holds up great even after countless times in the wash.
daytime clothing & bibs
Bandana Drool Bibs – Nate started drooling big time around three months so now I always like to complete his outfit with a cute bib. These are super absorbent, there are tons of patterns for boys and girls and are very easy to put on!
Burts Bees Onesies – These are the onesies Nate wears most. The prints are simple and cute and easy to mix with any pant or bottom. You can snag a pack of 5 for just $24!
Baby Jogger Pant Set – I love these baby pants because they actually have covered feet! Lots of colors and patterns available too for under $20. So many infant bottoms are open, which depending on the temperature/weather means having to put socks on wriggly baby feet. Once the temps dipped in November and December, I found myself always dressing Nate in these pants to avoid the sock step!
toys
Play Gym by Lovevery – This play mat + gym is Nate’s go-to spot after feedings. I can put him down for anywhere from 10-30 minutes and he’ll stay fully entertained looking at the various graphic cards, mirrors and jingle toys. It has a lot of cool features that promote cognitive, visual, physical and motor development and it works great for tummy time too. The mat is also machine washable! PS we added these hanging rattle toys using these beach towel chair clips for some extra fun for Nate
Take Along Tunes – this $8 impulse buy musical from Amazon is one of our most-used baby toys! I always have it in my purse to keep him distracted and entertained on car rides, doctor appointments, when we’re out and about, etc. It plays a handful of familiar tunes (just music–no vocals) and lights up. It’s surprisingly very engaging! Nate is obsessed!
Otteroo Lumi Baby Neck Float – Nate’s physical therapist recommended this neck float for using at bath time to help with relieving his shoulder and neck tension (I talk more about it here) and so far it’s been a hit! He loves the water and has the best time when we put him in this float. Usually we’ll do it for the first five minutes of his bath. I know people have mixed opinions on this product and even though we have had a positive experience with it, I would still encourage you to read reviews and do your own research first.
DIAPERS & WIPES
Over the last 4+ months we’ve tried diapers and wipes from a variety of brands and if I’m being honest– there really isn’t that much of a difference I’ve noticed between them all in terms of quality and functionality. A diaper is a diaper and a wipe is a wipe. I’m not that picky as long as my boy is leaking and his tush is clean. Lately I’ve been ordering mostly Honest diapers (they have the cutest patterns!) and Pampers Swaddlers. For wipes we’ve used and liked WaterWipes, Pampers sensitive wipes and Honest wipes.
BATH & BODYCARE PRODUCTS
EverEden is the only bath and body care brand I’ve yet to use on Nate. All of the products are 100% natural and free of sulfates, parabens, phthalates, petroletum and artificial fragrances. We’re big fans of the baby massage oil (I use this on his belly to help with constipation) the body wash, body lotion and nourishing baby face cream. PS they also make amazing products for mom too! I love the stretch mark cream and belly serum.
pacifier
I dunno if this is normal or just a Nate thing, but so far he hasn’t shown a ton of interest in pacis. When he does use one (typically on car rides) he likes the WubbaNub Pacifier! He isn’t the best at holding a paci in his mouth, so having the stuffed giraffe on the end helps him keep it in and gives him something to hold on to.
bottles & accessories
Dr. Brown Bottles – We tried a handful of different bottle brands and styles and these were the ones that ended up being the best fit for us. We started with 4oz slow flow nipple bottles before transitioning to 8oz bottles with a level 2 nipple around ten weeks. I’ll be honest– they’re annoying to clean and have a lot of little finicky parts, but they work best in terms of preventing colic, mimicking milk flow similar to a boob and optimizing tongue functionality (this was key for us in rehabilitating Nate after his tongue tie release!)
Bottle Drying Rack – only $12 and it gets the job done! I love how it’s not gargantuan and very easy to clean.
changing pad
Hatch Baby Smart Changing Pad – if you read my post about my breastfeeding journey then you already know how much I love this smart changing pad and scale. It’s a must-have if you want to track your baby’s growth yourself or do weighted feeds. Cleaning is a breeze too– you just spray it down and wipe clean! There’s also no need for any fabric cover.
breast pump
BabyBuddha Breast Pump – My favorite breast pump. It’s so powerful, yet just as small as a cell phone. You can read my in-depth review of it here.
diaper bag
Breast Pump Backpack – Due to the pandemic and the fact that we spend 99% of our time at home, I haven’t really had a need for your typical diaper bag, however we’ve gotten plenty of use out of this double layer backpack when we’ve traveled to visit family. It works great for transporting a breast pump, flanges and a few bottles of pumped milk. I love how the bottom compartment is a cooler– just add your own ice pack and it instantly locks in the cold. I used it when I flew to Florida with a Nate and was also able to fit diapers, wipes, his pacifier, a small blanket and a change of his clothes.
travel crib
Since we’ve been in Florida, Nate has been sleeping in the BabyBjörn travel crib and it’s working great for us. It took just seconds to put together, weighs only 13 lbs and comes with a travel bag and crib mattress (however I did purchase these fitted sheets for it separately!) We plan on using it for future travels and anytime we need a quick popup playpen. It can be used for newborns up to 3 years! PS if you’re looking for a traditional crib recommendation, definitely check out Nate’s nursery reveal here.
The post Must-Have Baby Essentials (4 Month Update!) appeared first on Katie's Bliss.
]]>
Can't decide on what breast pump to buy? Well you're in luck because I've tried a few! :) A little backstory! I went into my pumping journey with absolutely no previous knowledge and was completely unaware about how many breast pumps were out there or how to even use one correctly. I felt completely overwhelmed, intimidated and embarrassed by how little I knew. What are all of these buttons and what do these settings mean??!! Thanks to Google, Instagram and a lot of trial and error, I finally figured it out and was able to find a pump that fit my lifestyle and gave me the results I wanted.
The post Breast Pump Guide | BabyBuddha, Elvie, Spectra S2 & Motif Luna Breast Pump Reviews appeared first on Katie's Bliss.
]]>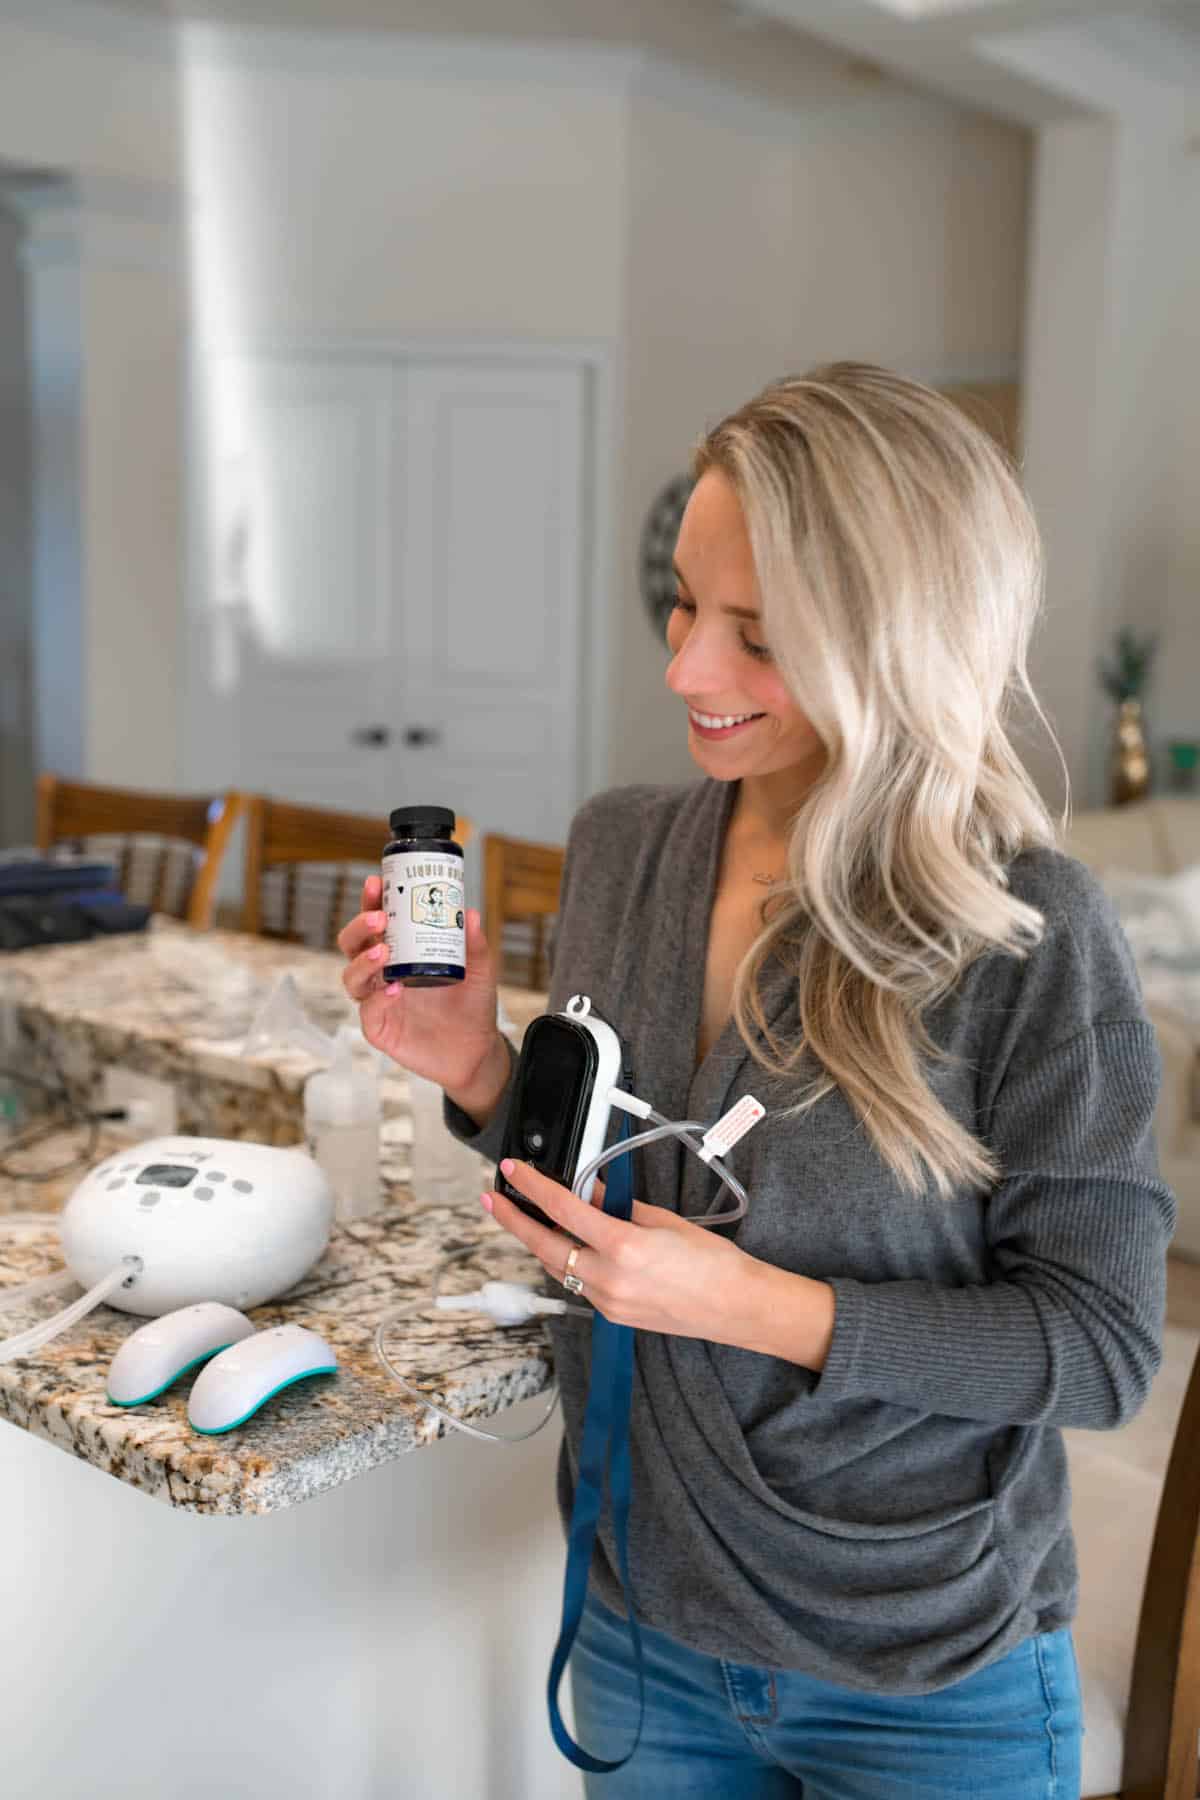
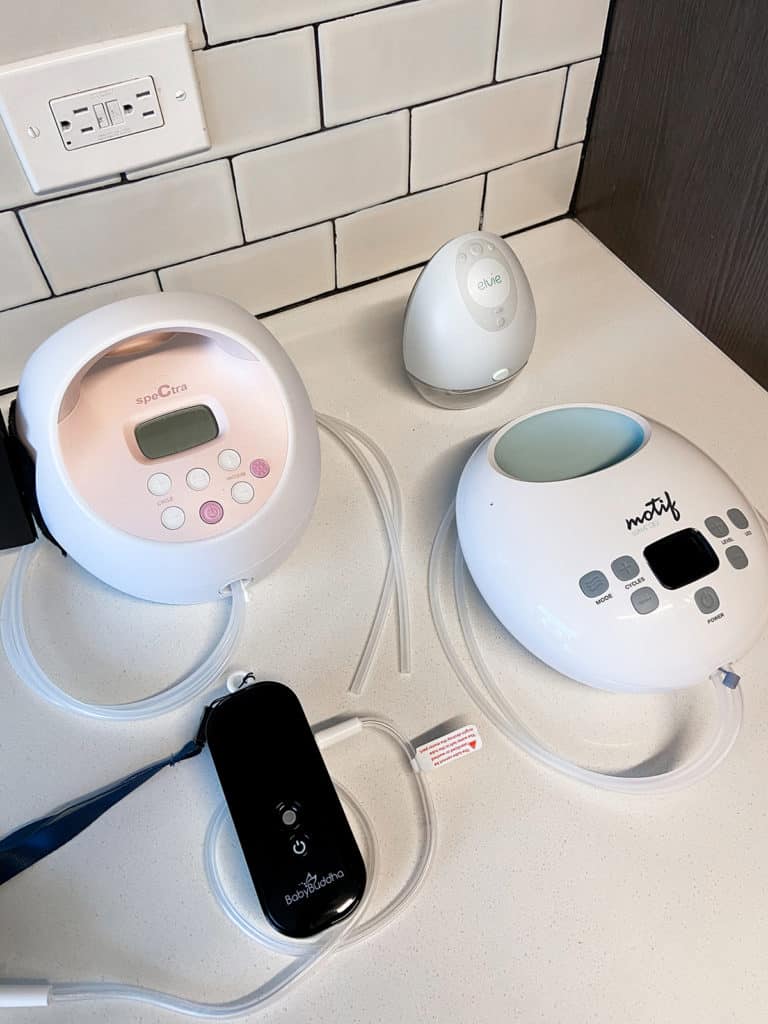
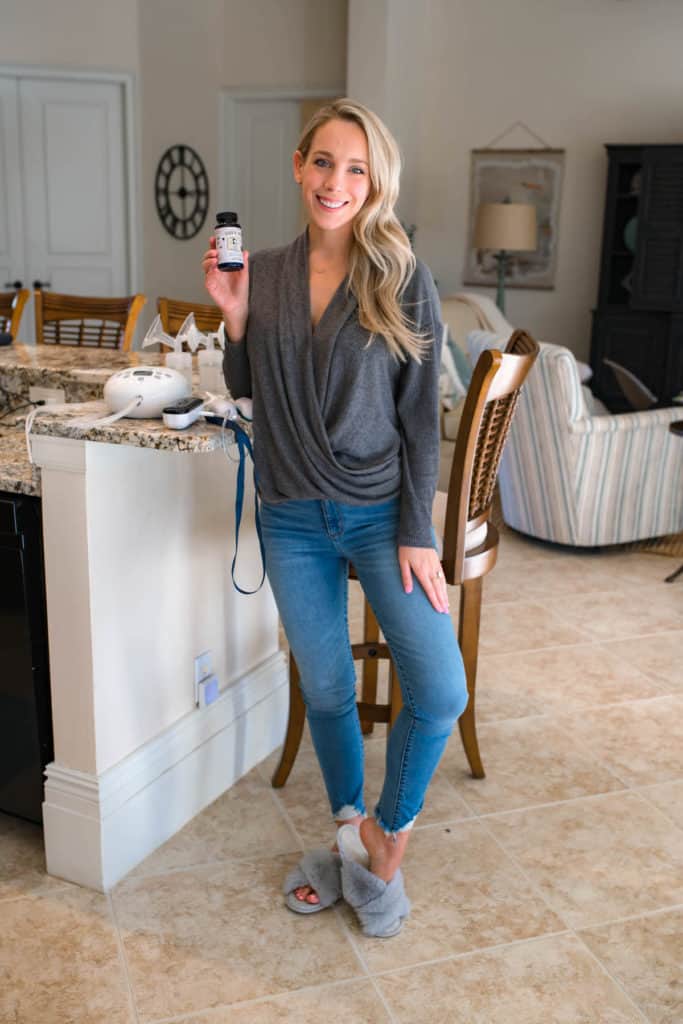
OUTFIT DETAILS // Wrap Top (pumping-friendly) | High Rise Skinny Jeans | Slippers | Legendairy Milk Liquid Gold Supplements | Warming Lactation Massage Pads | BabyBuddha Portable Breast Pump | Motif Luna Double Electric Breast Pump
Can’t decide on what breast pump to buy? Well you’re in luck because I’ve tried a few!
A little backstory! I went into my pumping journey with absolutely no previous knowledge and was completely unaware about how many breast pumps were out there or how to even use one correctly. I felt completely overwhelmed, intimidated and embarrassed by how little I knew. What are all of these buttons and what do these settings mean??!! Thanks to Google, Instagram and a lot of trial and error, I finally figured it out and was able to find a pump that fit my lifestyle and gave me the results I wanted.
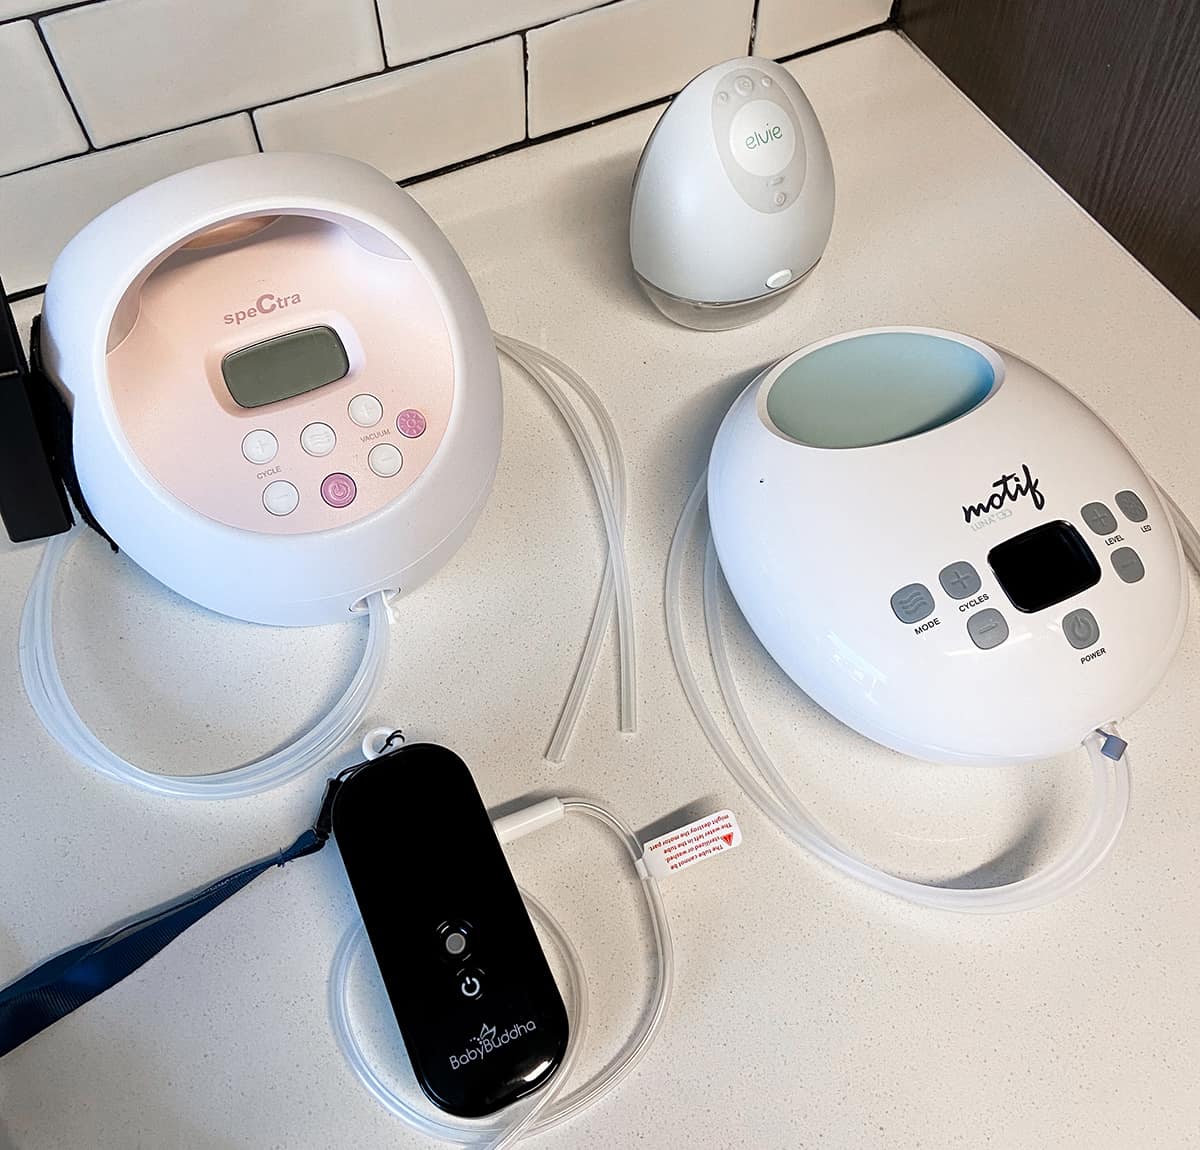
Spectra S2 Plus Breast Pump | Elvie Wearable Breast Pump | BabyBuddha Portable Breast Pump | Motif Luna Breast Pump
It’s also important to remember that there are so many factors that can impact milk production and contribute to a successful pumping session. The breast pump itself is only one part of the entire puzzle. Using the correct flange size (here’s a handy printable ruler you can use to measure yourself), being hydrated and your stress level all matter as well. In this post I explain some of the ways I increased my milk supply along with my pump schedule from when I exclusively pumped!
I’m by no means an expert, but after exclusively pumping (6-8x daily!) for most of Nate’s first few months of life, I am very familiar with the pumps you’ll see reviewed below.
Breast Pump Reviews
DOUBLE ELECTRIC BREAST PUMPS
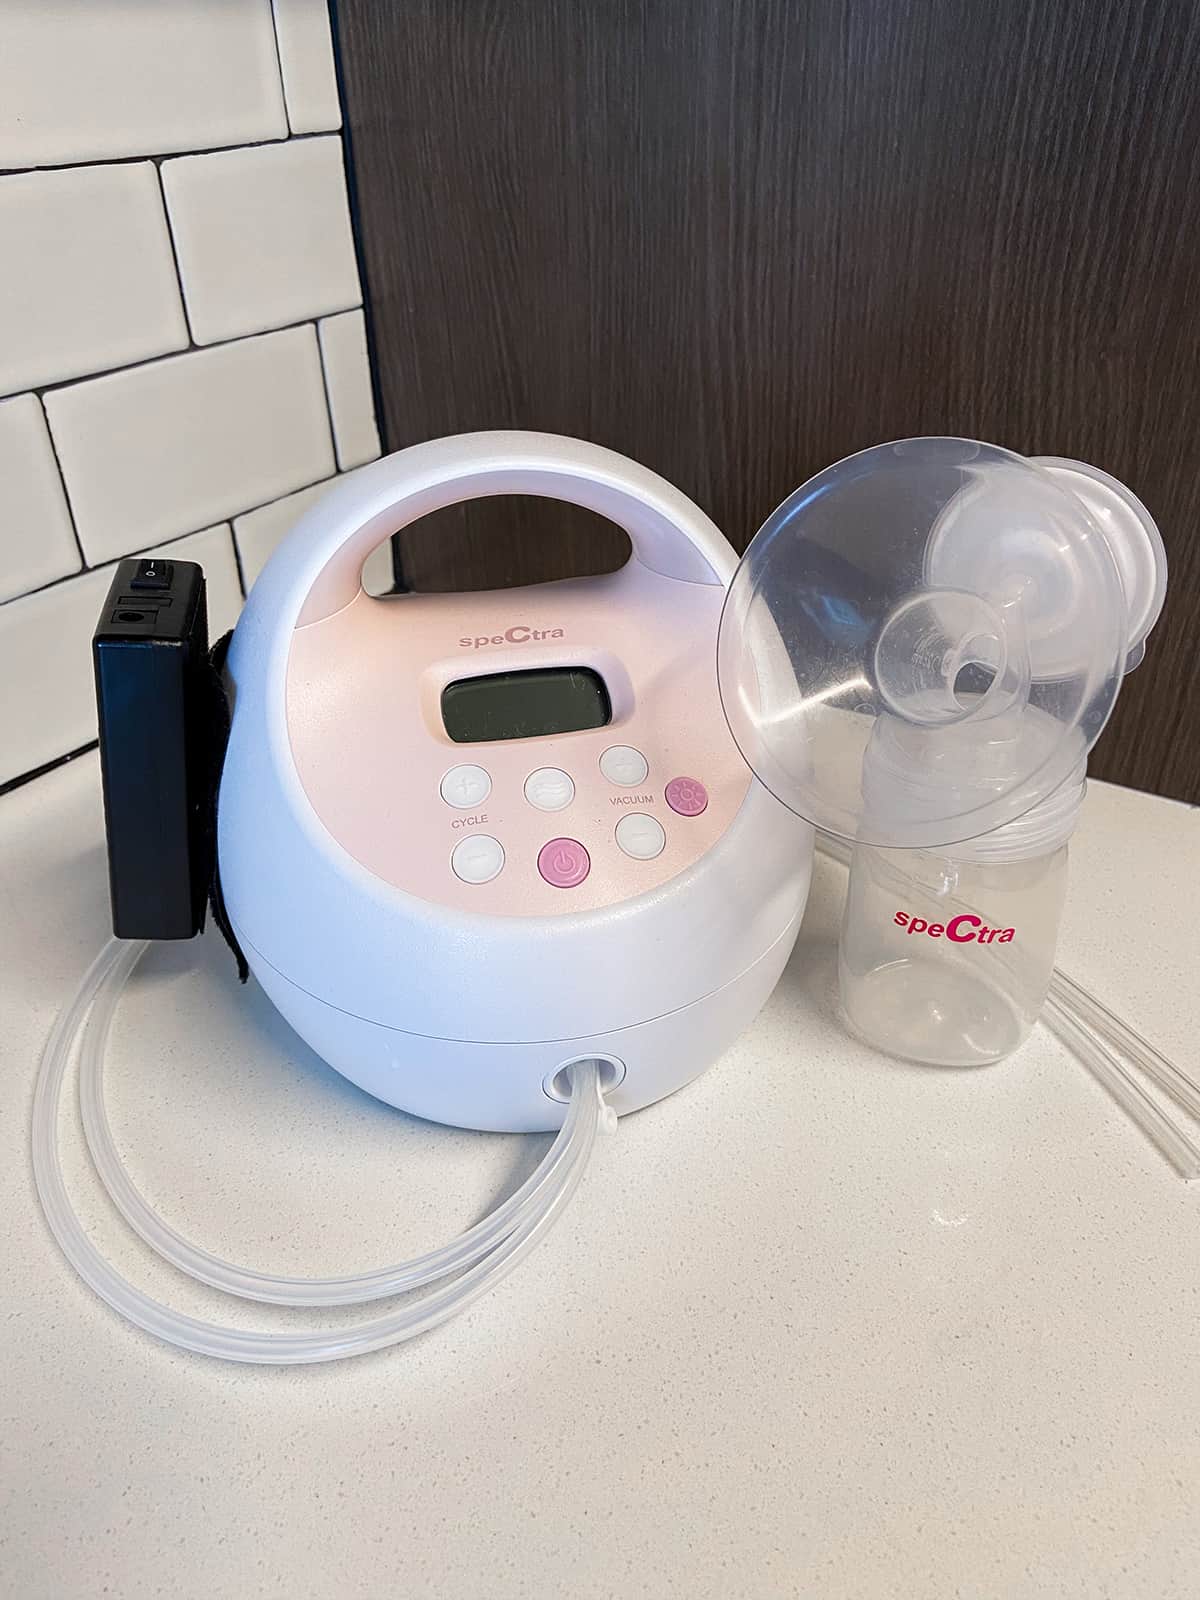
I started my breastfeeding and pumping journey with the Spectra S2 Plus breast pump. It’s one of the most popular double electric pumps on the market and has tons of in-depth positive reviews. I ordered this pump through my insurance (it was fully covered) when I was still pregnant thinking I probably wouldn’t use it very often since my goal was to exclusively breastfeed. Oye– if only I’d known!
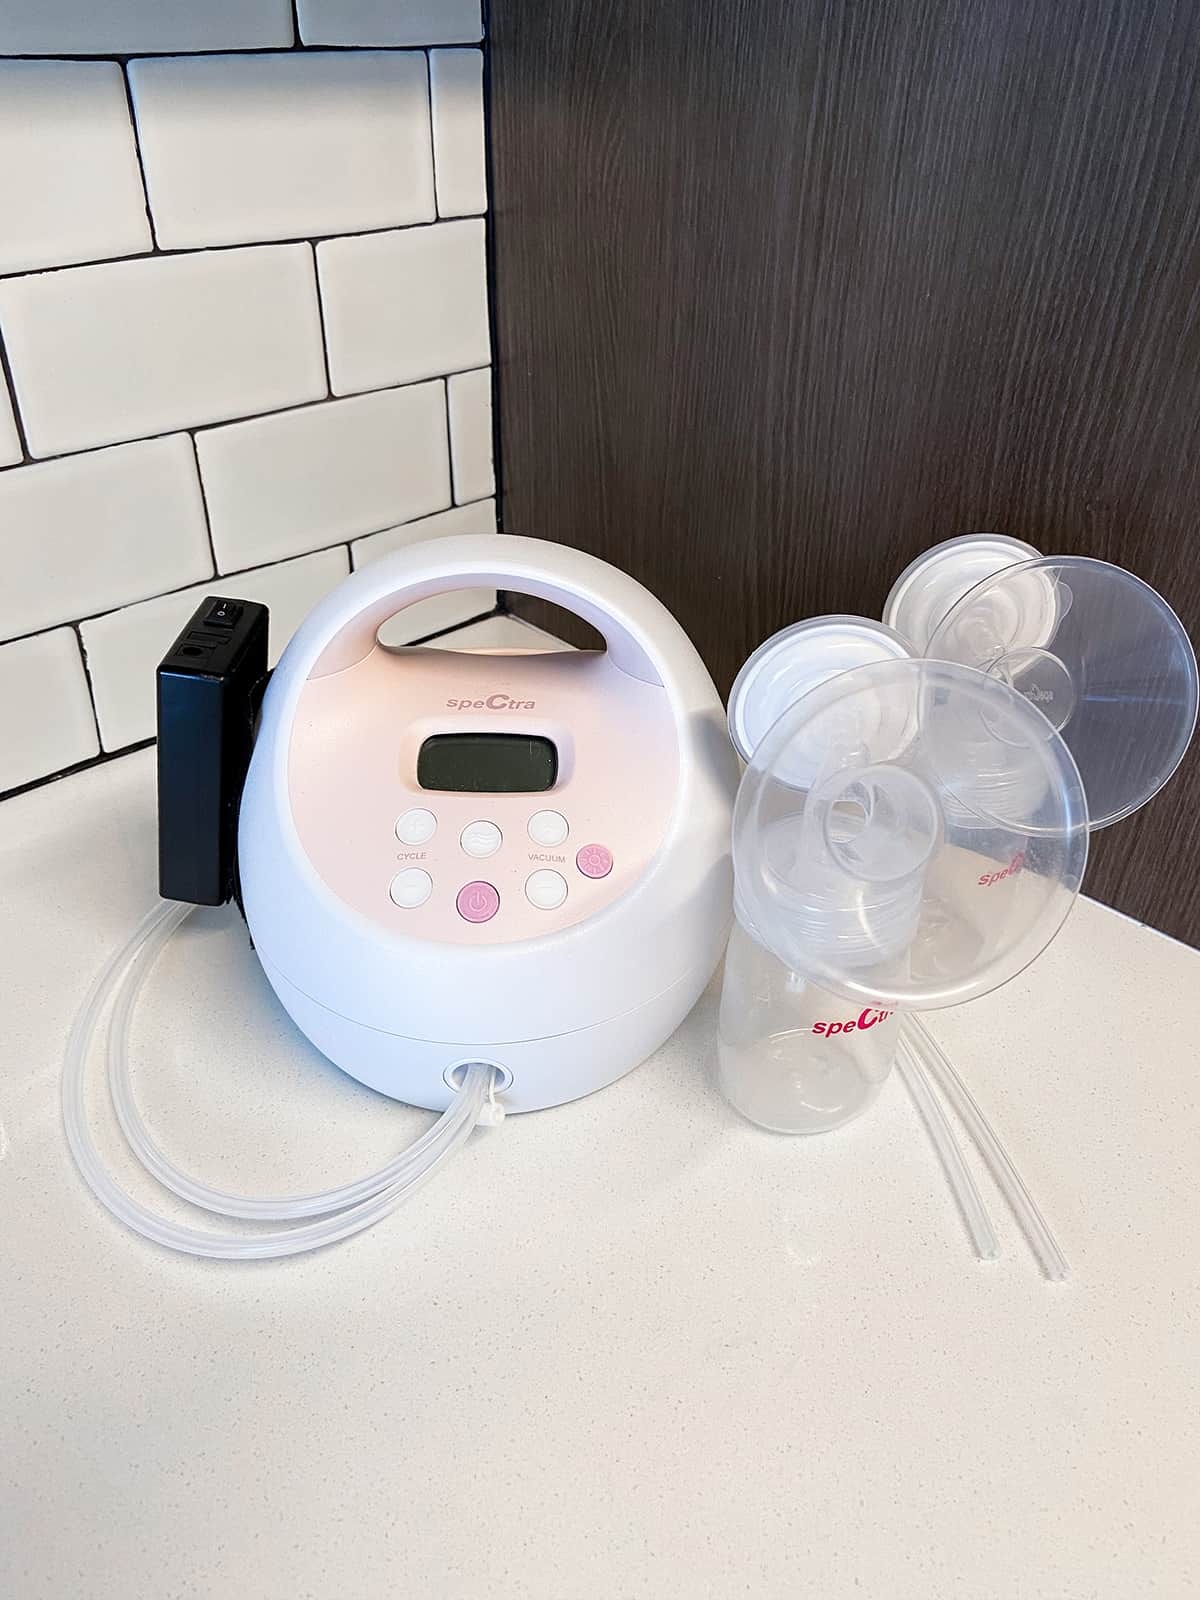
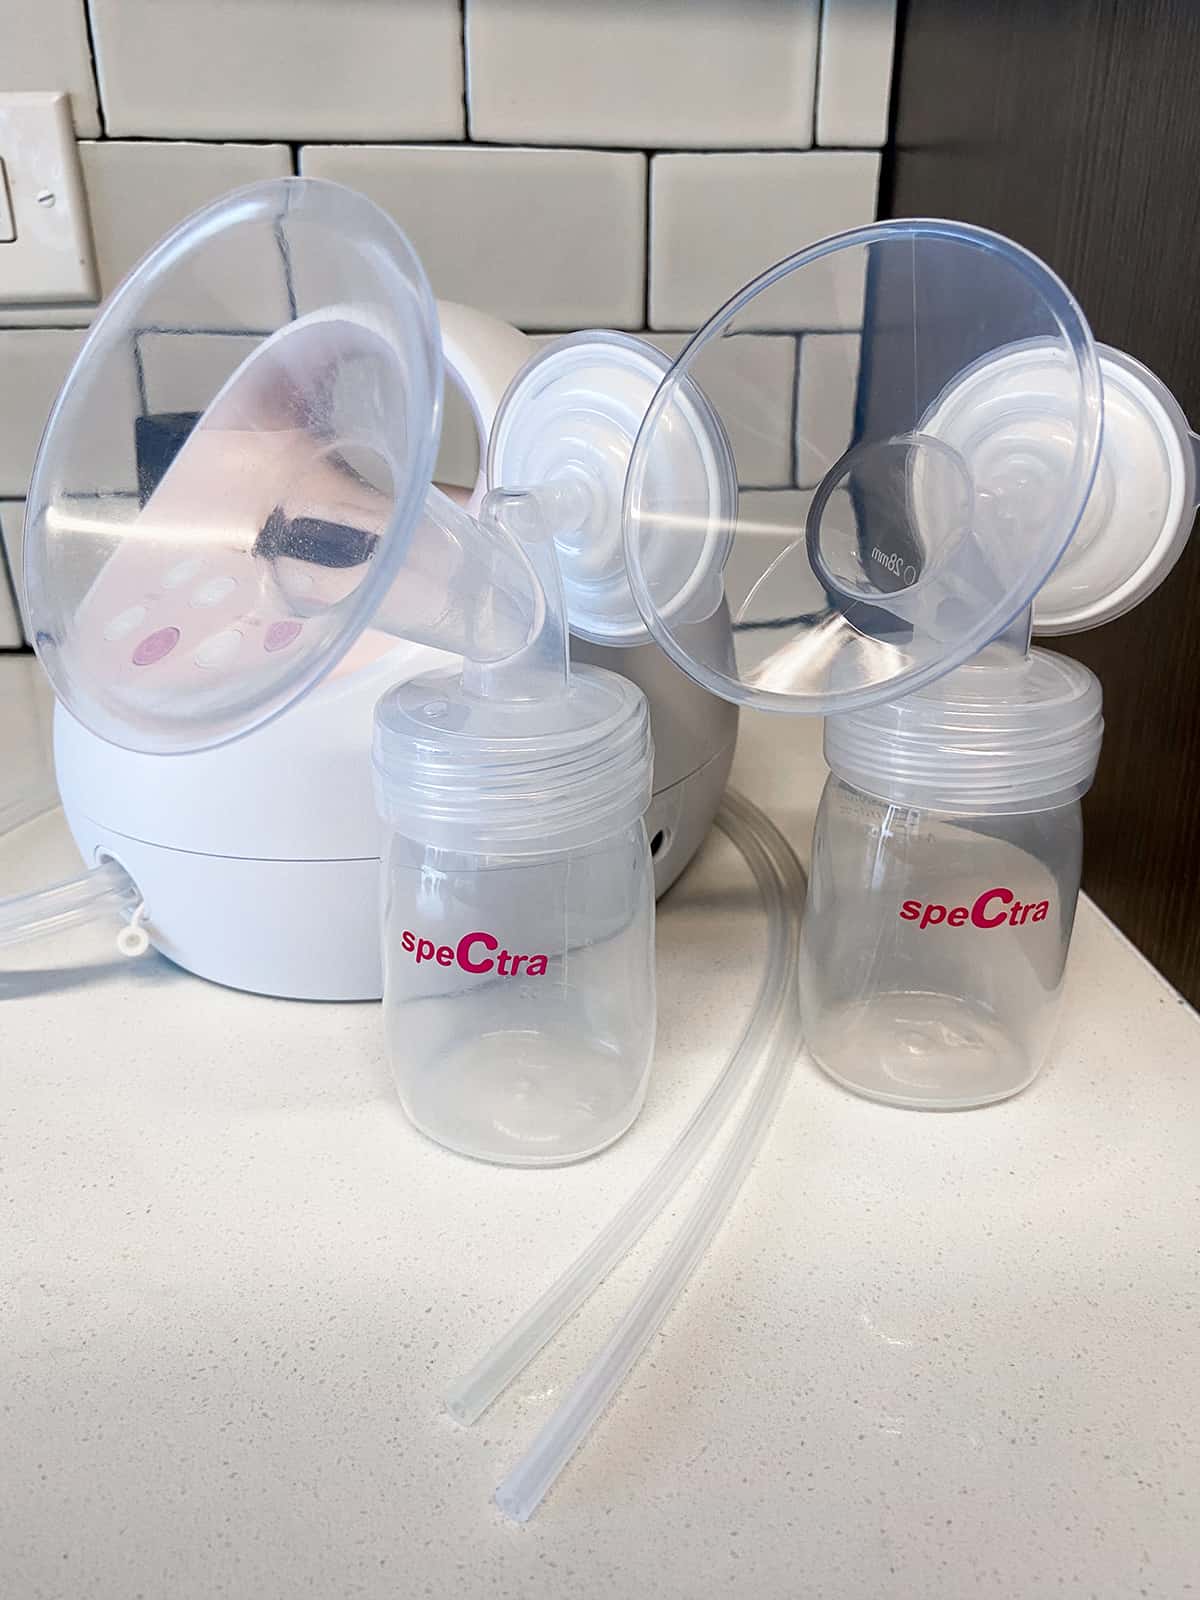
Overall it’s a great, easy-to-use pump that gets the job done, but it does have some drawbacks, which ultimately were enough for me to stop using it as my primary pump: 1) It does not have a rechargeable battery and needs to be plugged in to an outlet while in use, however I did find a way to make it cord-free with this external battery pack hack. Looking back I wish I would’ve ordered the battery-operated Spectra S1 instead. 2) It’s bulky. Traveling with it is possible (I’ve pumped in the car) but it’s cumbersome and there are other pumps out there that are easier to bring with you on the go. 3) Not as strong as other pumps. Compared to the similar Motif Luna double electric pump, I felt the Spectra S2 had weaker suction and I didn’t empty as well.
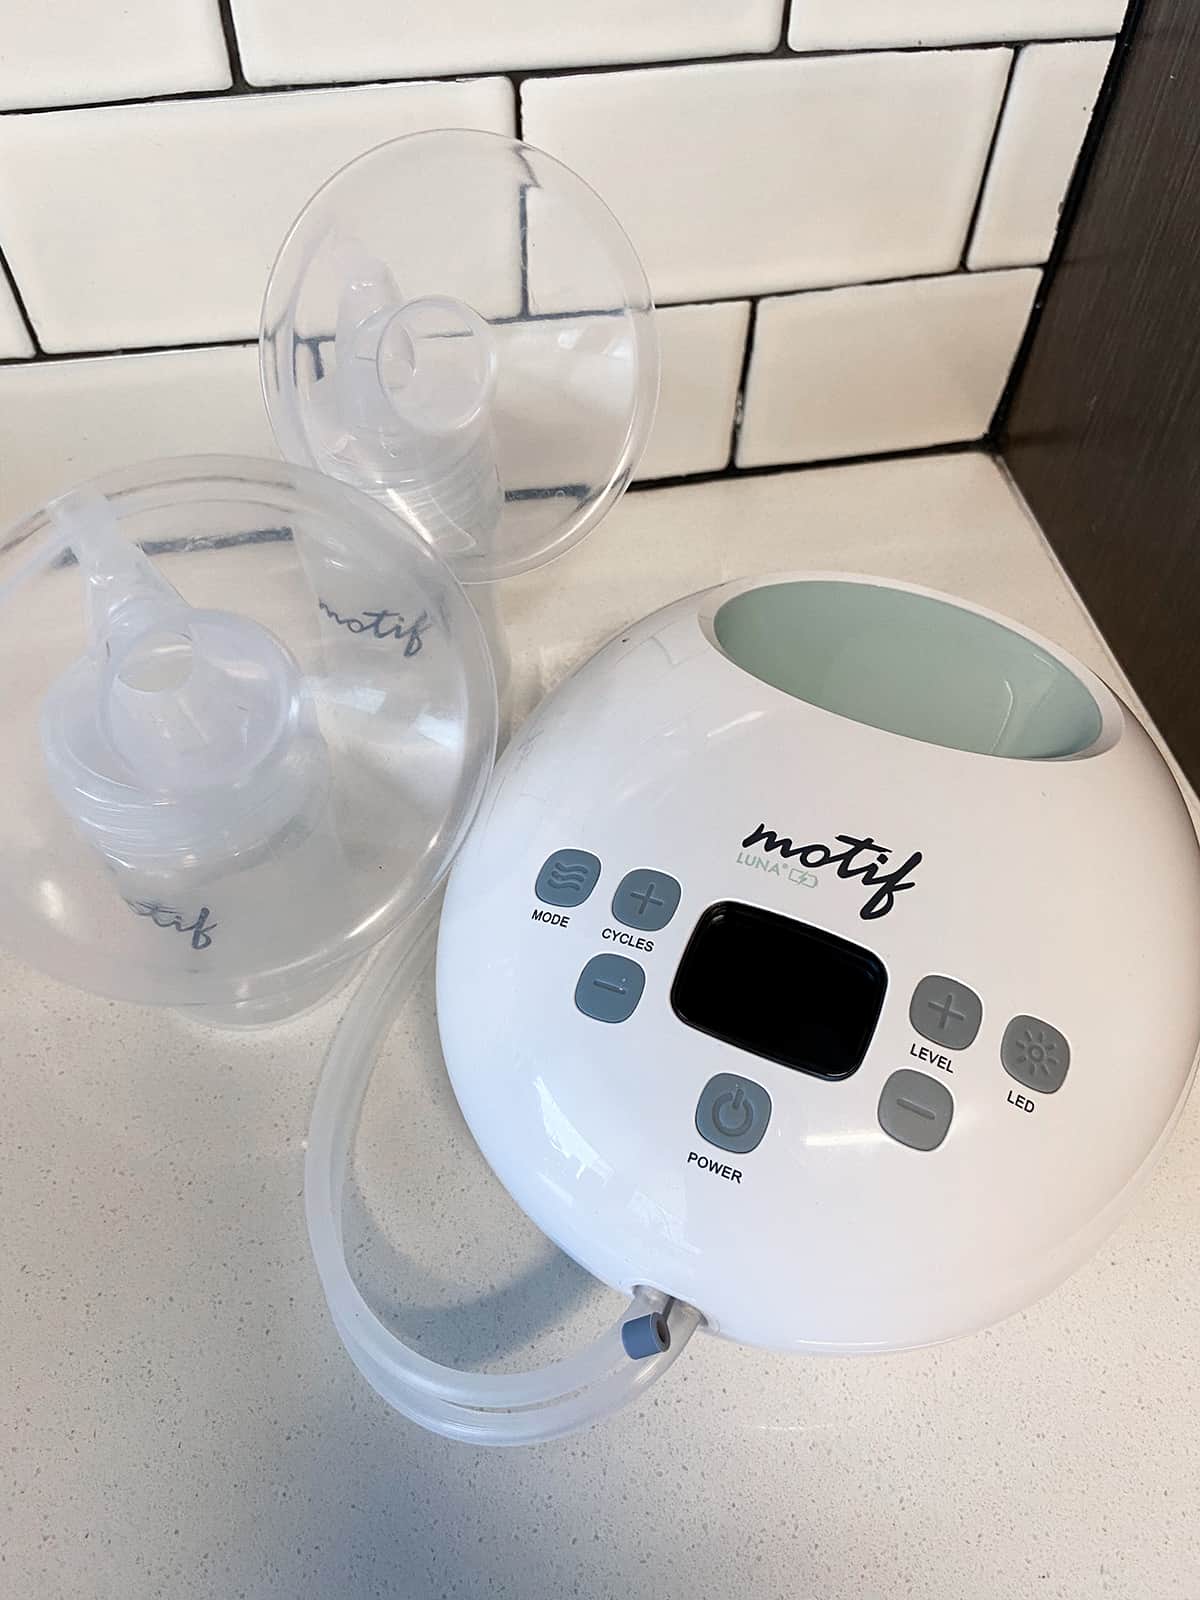
This is the pump that I would recommend first to any new mom. It has hospital-grade strength, a rechargeable battery, a quiet motor and a lightweight, sleek design. The functionality and features are very similar to the Spectra S2 pump, however I felt they were more modernized and the suction on the higher levels was much stronger and more productive. I also found the Motif Luna to be much easier to transport and hold in one hand if I had to get up to do something during a pump session.
MOBILE + WEARABLE BREAST PUMPS
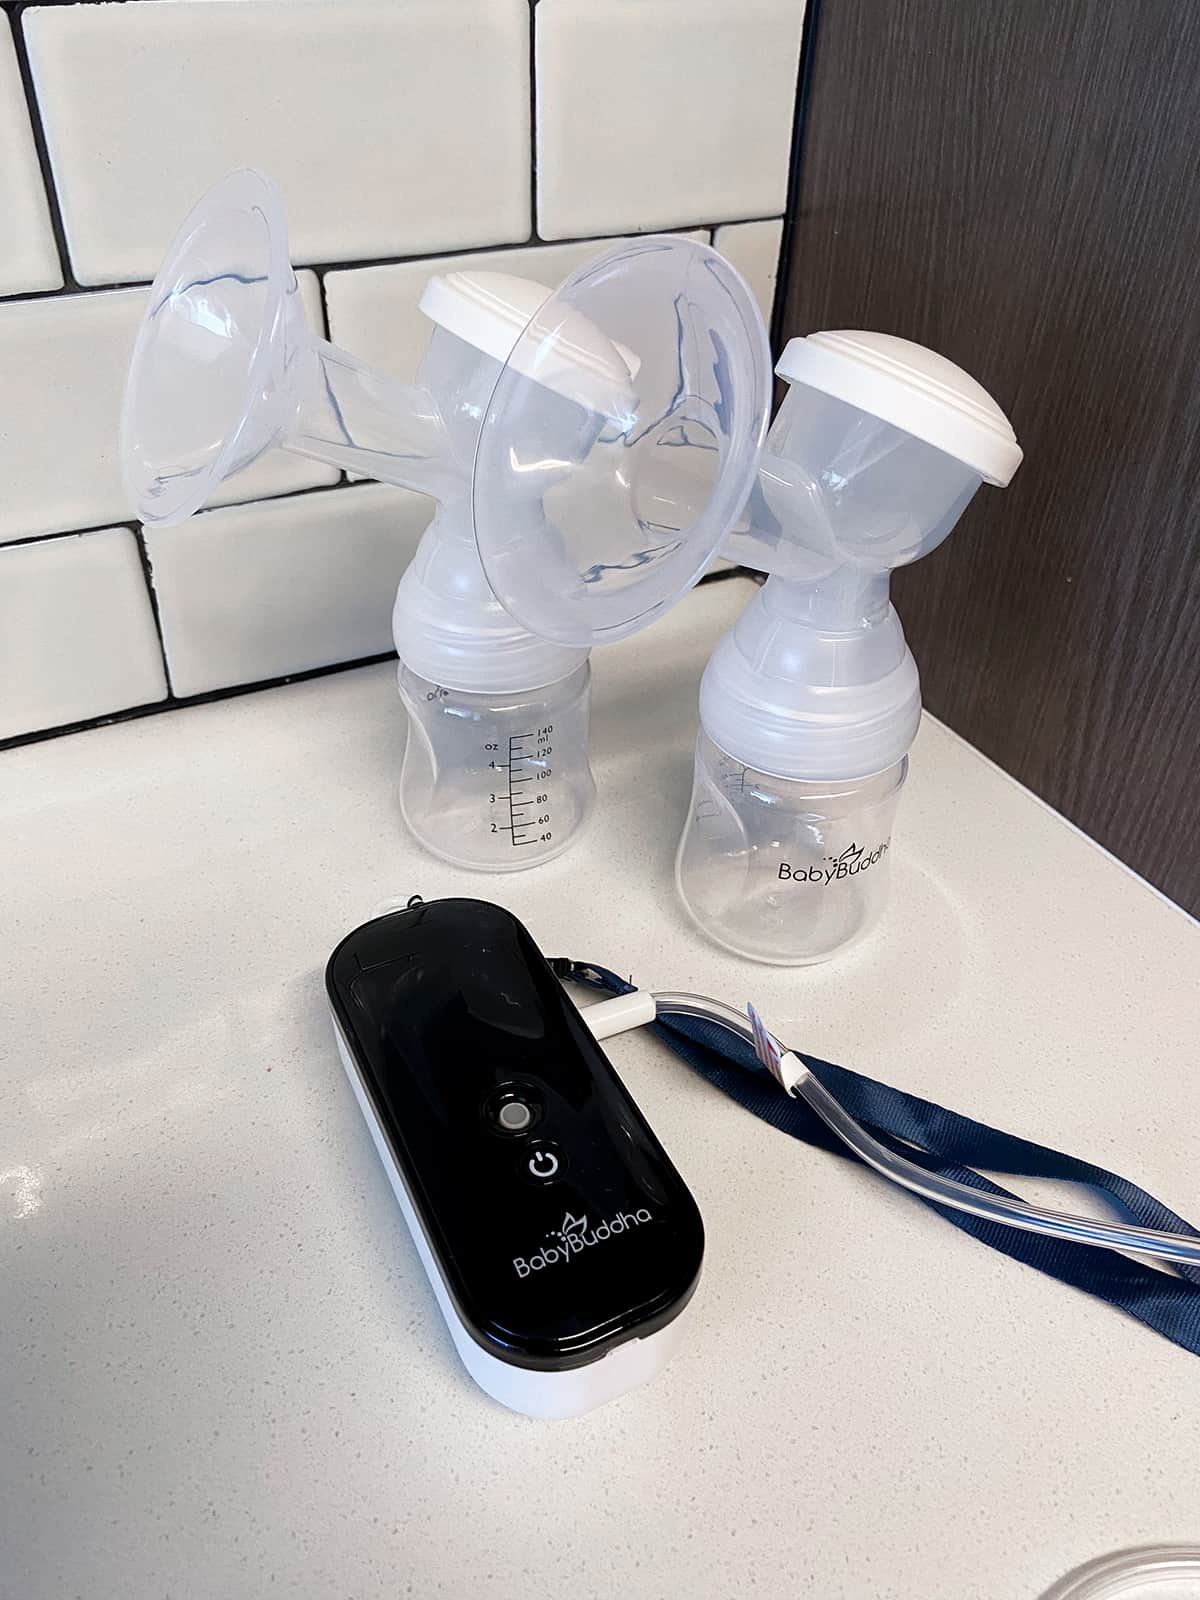
BabyBuddha Portable Breast Pump (the pump I primarily use now)
I decided to give the BabyBuddha pump a try after seeing it recommend by a few pumping accounts that I follow on Instagram. I felt that I had hit my max pumping output with the Motif Luna (around 20 oz per day) and was desperate to increase my supply– something that many moms have claimed happened for them after they started using the BabyBuddha.
I was also really intrigued by the BabyBuddha‘s tiny, wearable size– it’s the world’s smallest double electric pump! While it’s traditional in the sense that it requires flanges and tubing like the Spectra or Motif Luna, the pump motor is about the size of an old school Nokia cell phone and light enough that you can wear it on a lanyard around your neck aka you can be HANDS-FREE! It’s also battery-operated and can be charged via a USB.
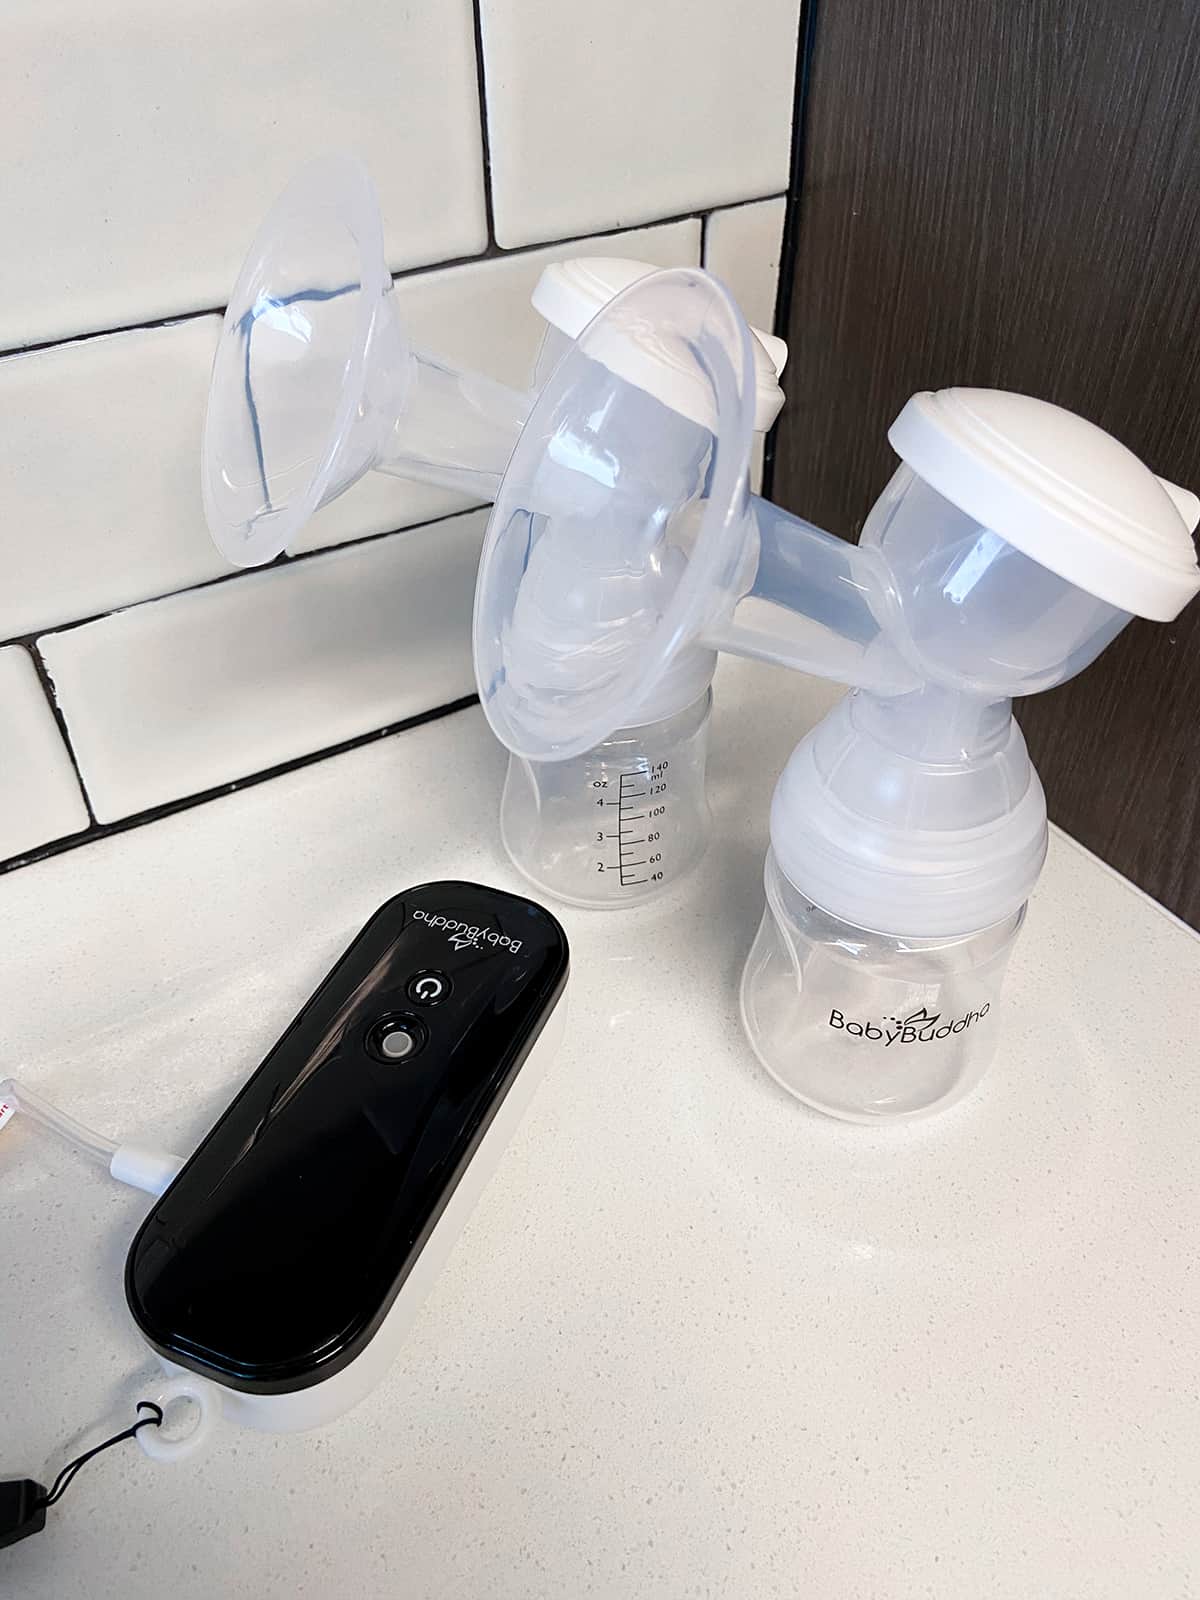
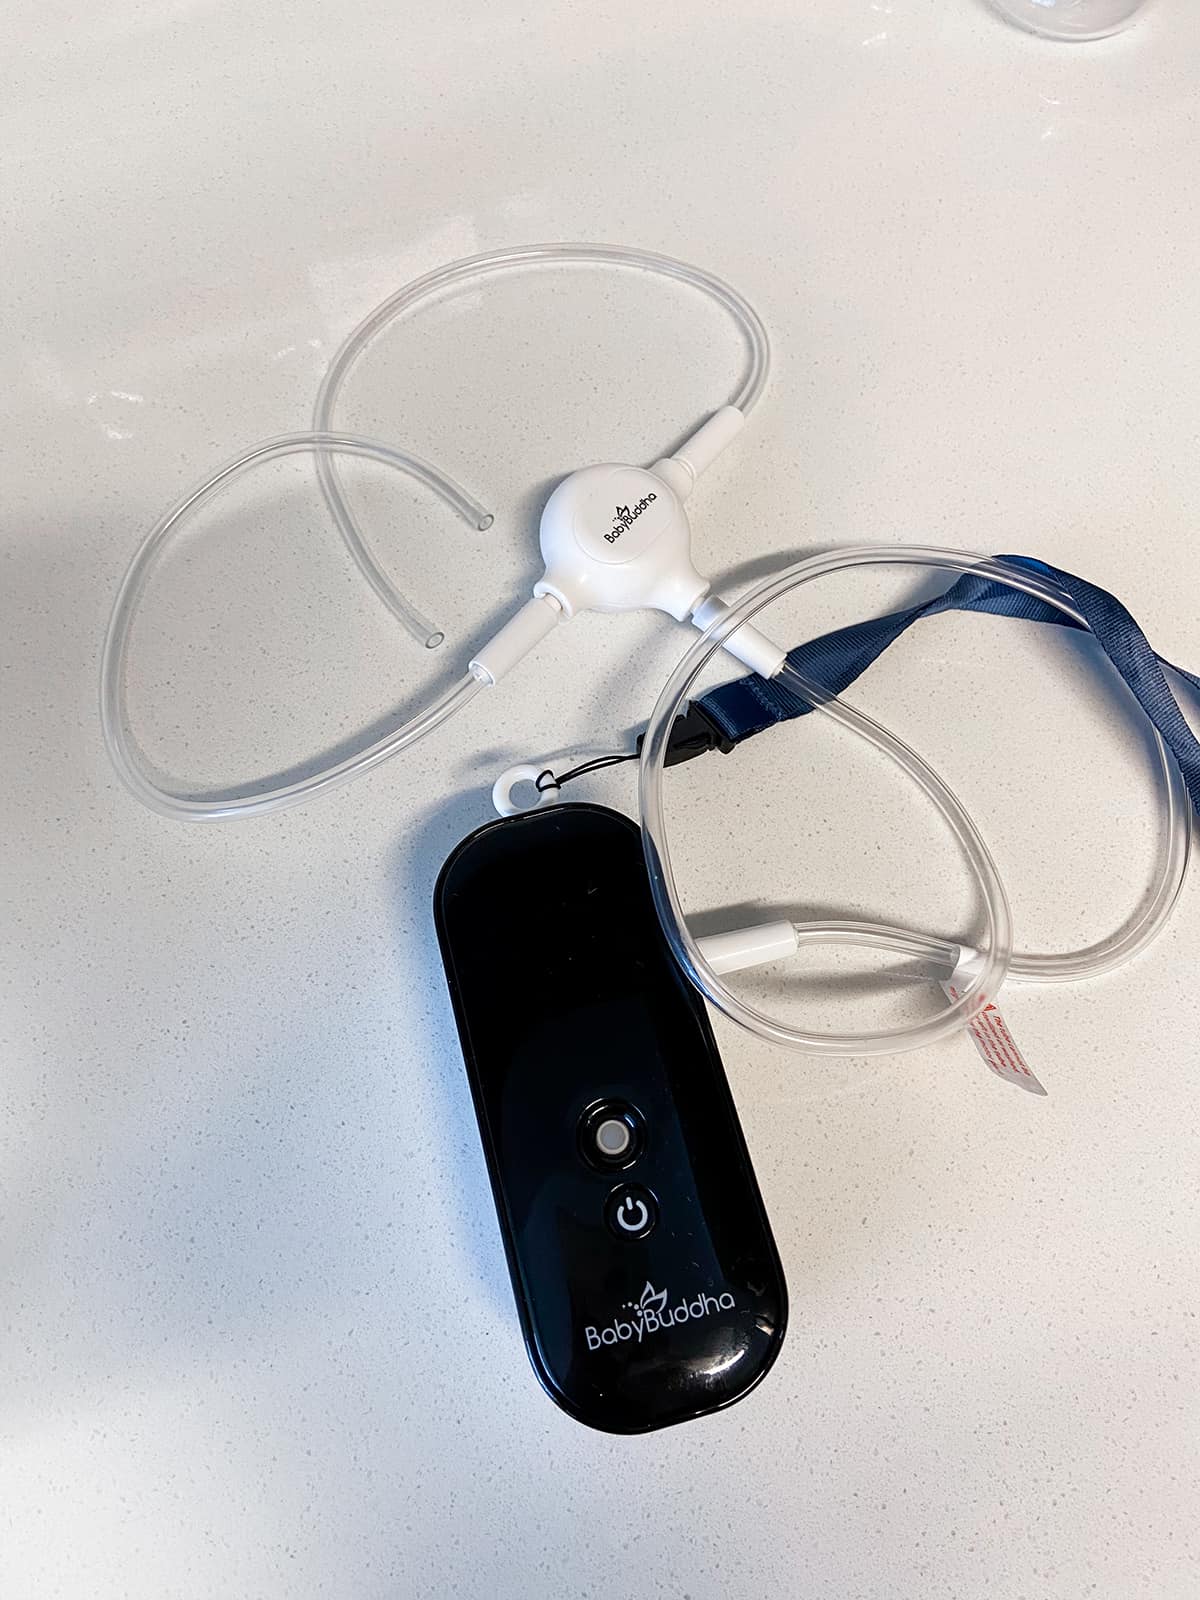
I won’t lie. The strength of this pump is next level. Literally level 1 on the BabyBuddha is stronger than the highest levels on the Spectra or Motif Luna pump. For anyone new to using a pump on strong suction modes, I would actually recommend starting with a gentler pump for 2-3 minutes as a “warm up” (I used my Motif pump) and then transition to the BabyBuddha. It took me a few weeks to get used to the strength, but in my experience it was absolutely worth it because I did notice an increase in my supply. Within two weeks of exclusively pumping with the BabyBuddha 6x a day I was able to pump enough to meet Nate’s daily need (around 28oz) and we were able to stop supplementing with formula. I also have not had a clogged milk duct since I started using this pump.
I love love love this pump and I’m so happy I found it. It completely changed my pumping journey! That said, I would NOT recommend it to new moms as their first pump due to it’s strength. I think if I’d used it right away I would’ve been scared from ever pumping again LOL. It’s a game changer for seasoned pumping mamas who have tried the Spectra and Motif-style pumps and need something more powerful or are trying to increase supply, but it’s probably unnecessary for mamas who only pump occasionally.
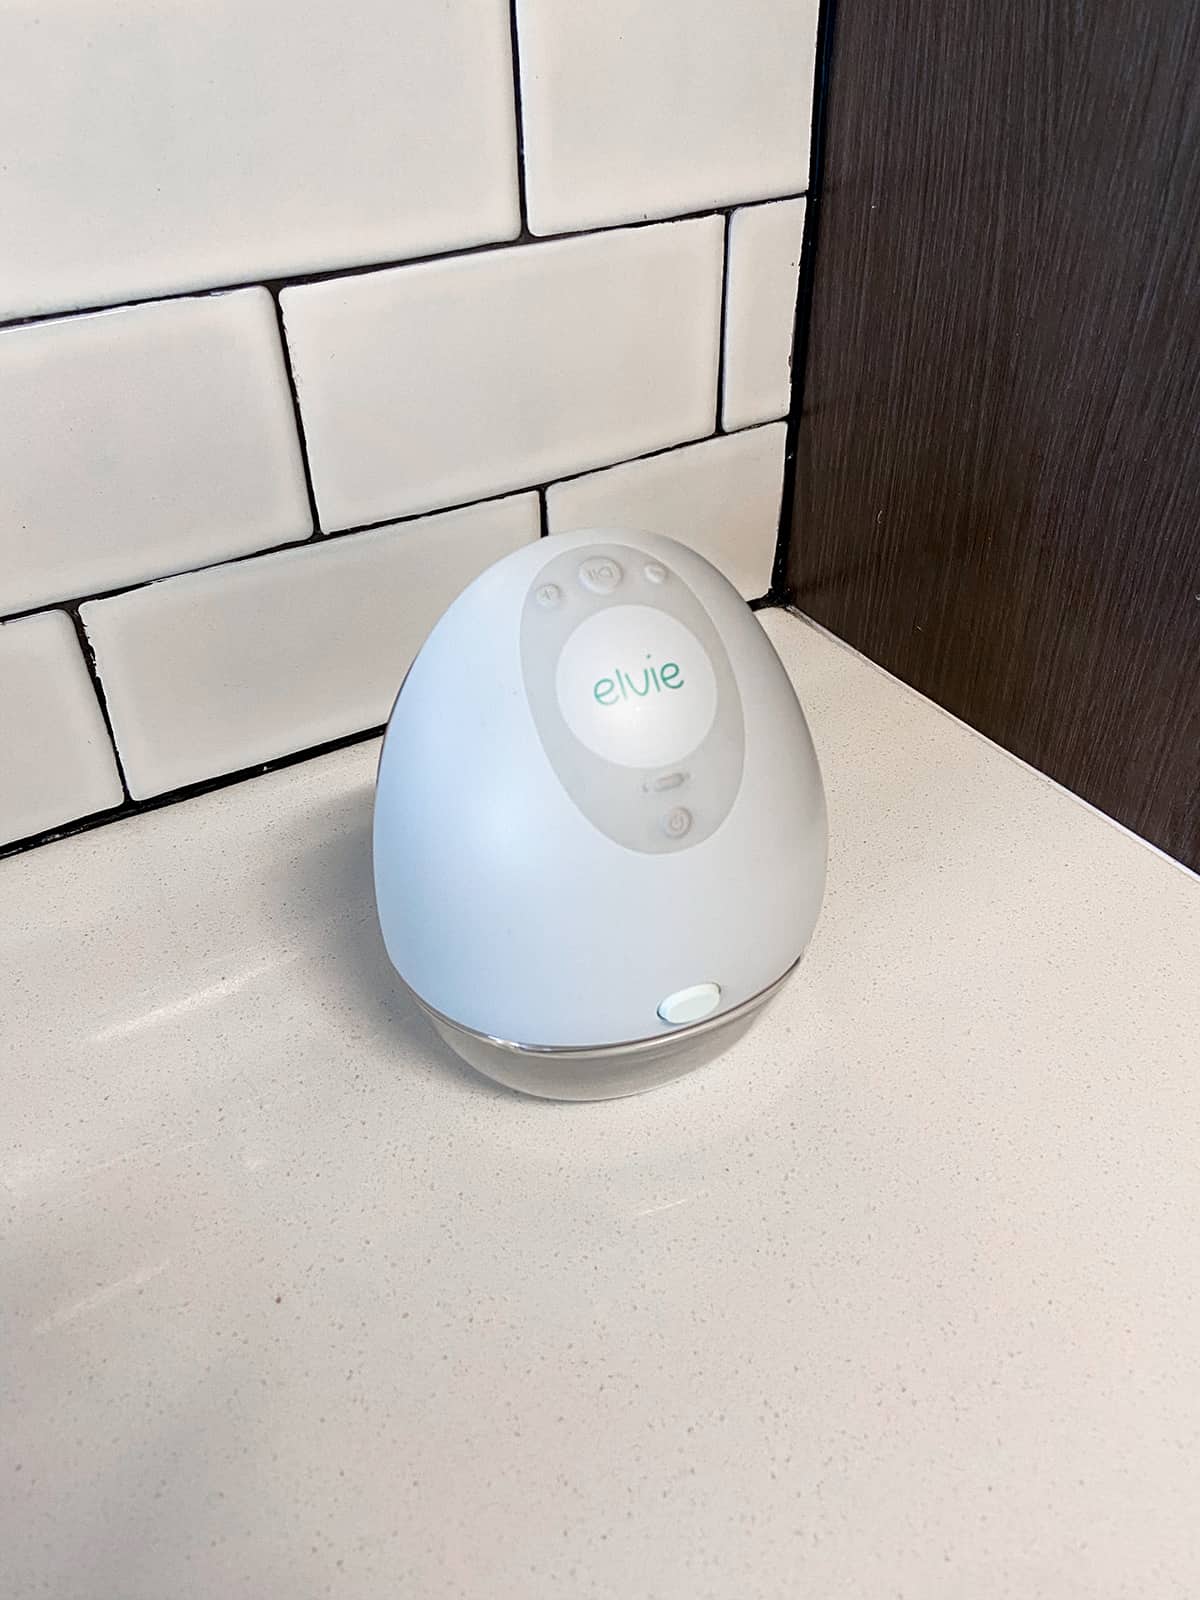
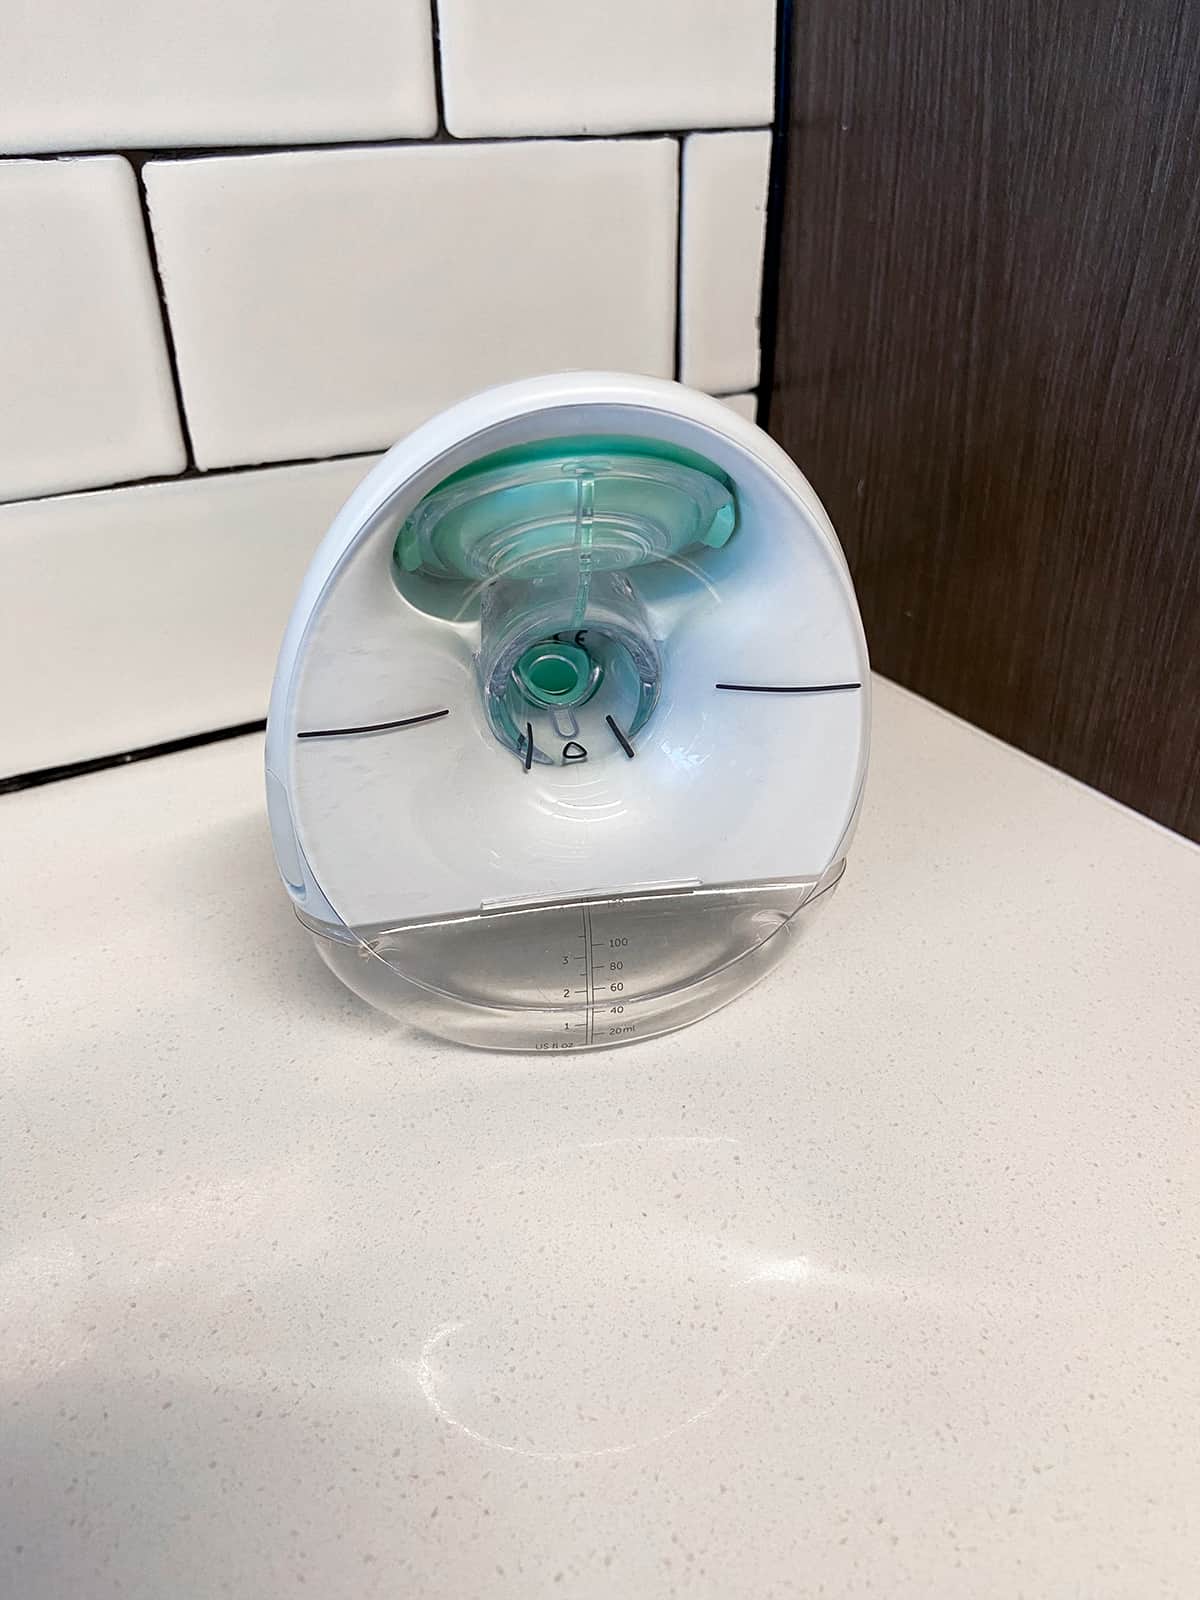
A wearable, cordless breast pump that I can stick in my bra and forget about? Absolutely genius! I really really wanted to like the Elvie, but after a few weeks of on-and-off use early in my pumping journey, I realized it did not have the strength I needed in a pump. When I used it I wouldn’t even pump half of what I would get using my Spectra or Motif Luna pump in the same amount of time. It was SO frustrating. The Elvie really should have a disclaimer warning new moms not to use it until they’ve established their milk supply (typically 12 weeks postpartum) because it does not have hospital grade strength and you risk not fully emptying. After sharing my thoughts about the Elvie on my Instagram story, I got so many messages from mamas telling me that the Elvie tanked their supplies.
I hate to be overly negative because it is an innovative pump with a lot of positives– wearability, ease-of-use and its handy app that tracks how much you’re pumping. I personally think it would be perfect for mamas who have an over-supply, only pump occasionally, or need to have their hands free to care for other children, etc. That said, I would recommend steering clear and opting for one of the other pumps I mentioned above if you’re less than 12 weeks postpartum or you plan to pump on a regular basis.
The post Breast Pump Guide | BabyBuddha, Elvie, Spectra S2 & Motif Luna Breast Pump Reviews appeared first on Katie's Bliss.
]]>
If you’d told me a year ago that I would be writing a post about how I increased my breastmilk supply or that I’d be blogging about anything related to breastfeeding and pumping in general– I wouldn’t have believed you! I always knew that I wanted to breastfeed and when I was pregnant I remember telling myself that no matter how it went, I would give myself grace because at the
The post My Breastfeeding Journey | How I Increased My Milk Supply + Pumping Must-Haves appeared first on Katie's Bliss.
]]>
If you’d told me a year ago that I would be writing a post about how I increased my breastmilk supply or that I’d be blogging about anything related to breastfeeding and pumping in general– I wouldn’t have believed you! I always knew that I wanted to breastfeed and when I was pregnant I remember telling myself that no matter how it went, I would give myself grace because at the end of the day all that matters is my baby is fed. My husband and I were both formula, bottle-fed babies and we turned out just fine. What was the big deal if breastfeeding ended up not working out for me?
If you’ve been following along on my Instagram stories then you know that my breastfeeding journey has not been easy. While I had every intention of taking a laid back approach when it came to how/what Nate was fed, my postpartum hormones completely took over once he was in my arms and I couldn’t imagine any other alternative than breastfeeding.
A quick disclaimer! My goal in sharing all of this is to simply be honest about my story. I never anticipated some of the challenges I’ve experienced and I hope I can shed light on some of the often-not-talked about issues that new moms encounter when trying to breastfeed. I want to make clear that my intentions are not to project my feelings or make anyone question their journey if it happens to look different from mine. We are ALL good moms and at the end of the day there is no one-size-fits-all correct way to feed a baby. Whether you breastfeed, bottle-feed pumped milk, bottle-feed formula or do a combination of both or all three; all that matters is that you and your baby are happy and healthy.
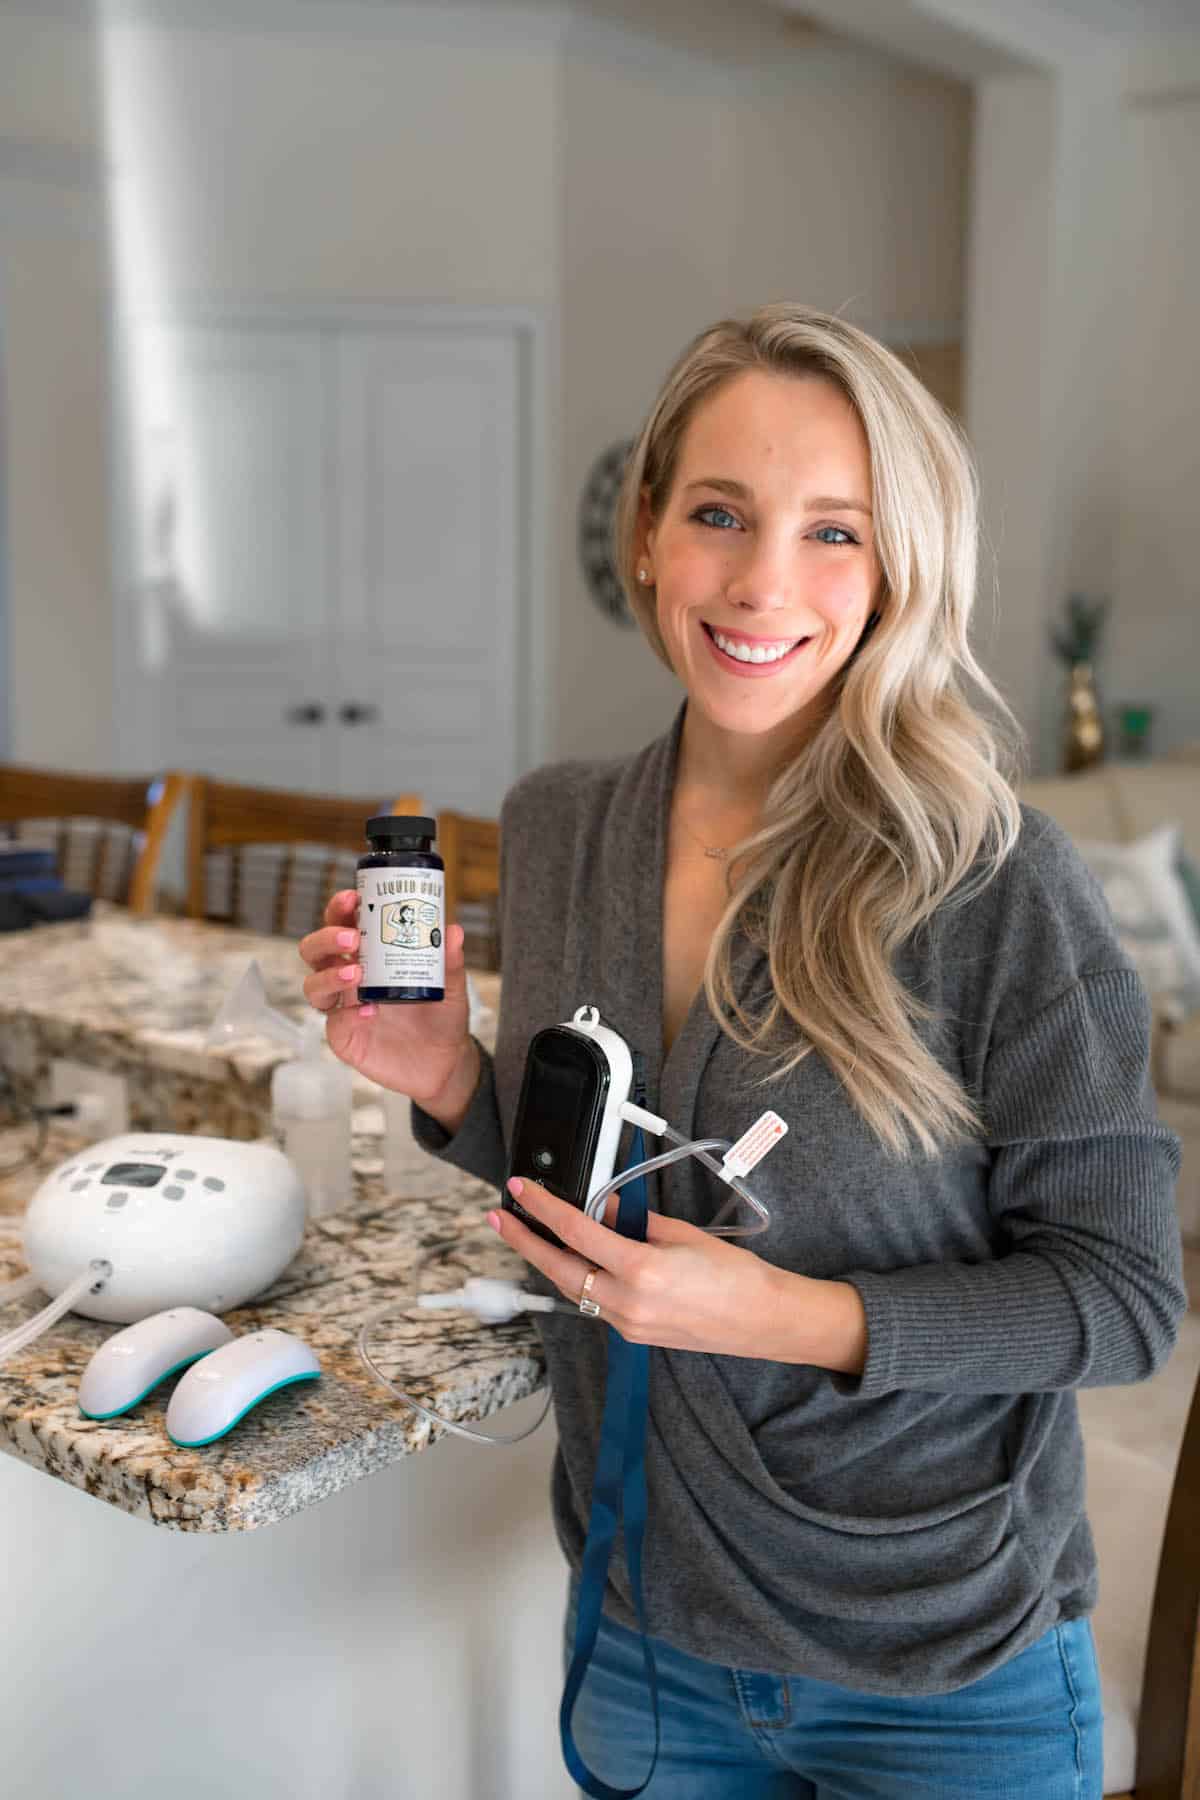
OUTFIT DETAILS // Wrap Top (breastfeeding-friendly) | High Rise Skinny Jeans | Slippers | Legendairy Milk Liquid Gold Supplements | Warming Lactation Massage Pads | BabyBuddha Portable Breast Pump | Motif Luna Double Electric Breast Pump
It’s important to remember that breastfeeding is a learning process for both mom and baby and those first weeks at home you’re both still recovering from the physical and mental stress of birth. I was blessed to have had a very positive birth experience with Nate. I remember leaving the hospital on a high, but once we were home I realized just how completely unprepared I was for challenges I’d be facing trying to breastfeed.
Breastfeeding was painful. His latch pinched me so badly— like a chomp. At first I thought it was normal and I just needed to toughen up, but after a few days it reached a point where it was excruciating and I had terrible nipple damage. Every time I would feed him, I would be in so much pain and even after 30-40 minute long feeding sessions, he’d still wail in hunger. He was also constantly falling asleep on my boob at every feeding. Just trying to keep him active and sucking was exhausting! PS these are a game changer for nipple damage and helped me heal within two days.
At Nate’s first pediatrician appointment (I think it was 3 days after leaving the hospital) we found out that he hadn’t gained any weight, which meant he clearly wasn’t getting enough to eat. To ensure Nate was getting the calories he needed to get back to his birthweight, we began giving him a few ounces of pumped milk or formula in a bottle every time after I would try to feed him myself. My milk had been slow to come in (it took a solid 7+ days) so from the get-go I began regularly pumping multiple times a day in hoping of getting my milk flowing and creating a larger supply for Nate. It broke my heart that he wasn’t getting enough from me when I fed him. I think I cried multiple times a day, everyday for Nate’s first 2-3 weeks.
Those first six weeks of feeding were a blur. Breastfeeding continued to be difficult so my husband and I fell into a routine of combo feeding. I would maybe try to breastfeed 2-3x a day always following with a few ounces via bottle since he’d still be hungry. All the rest of his feeds were then given just by bottle.
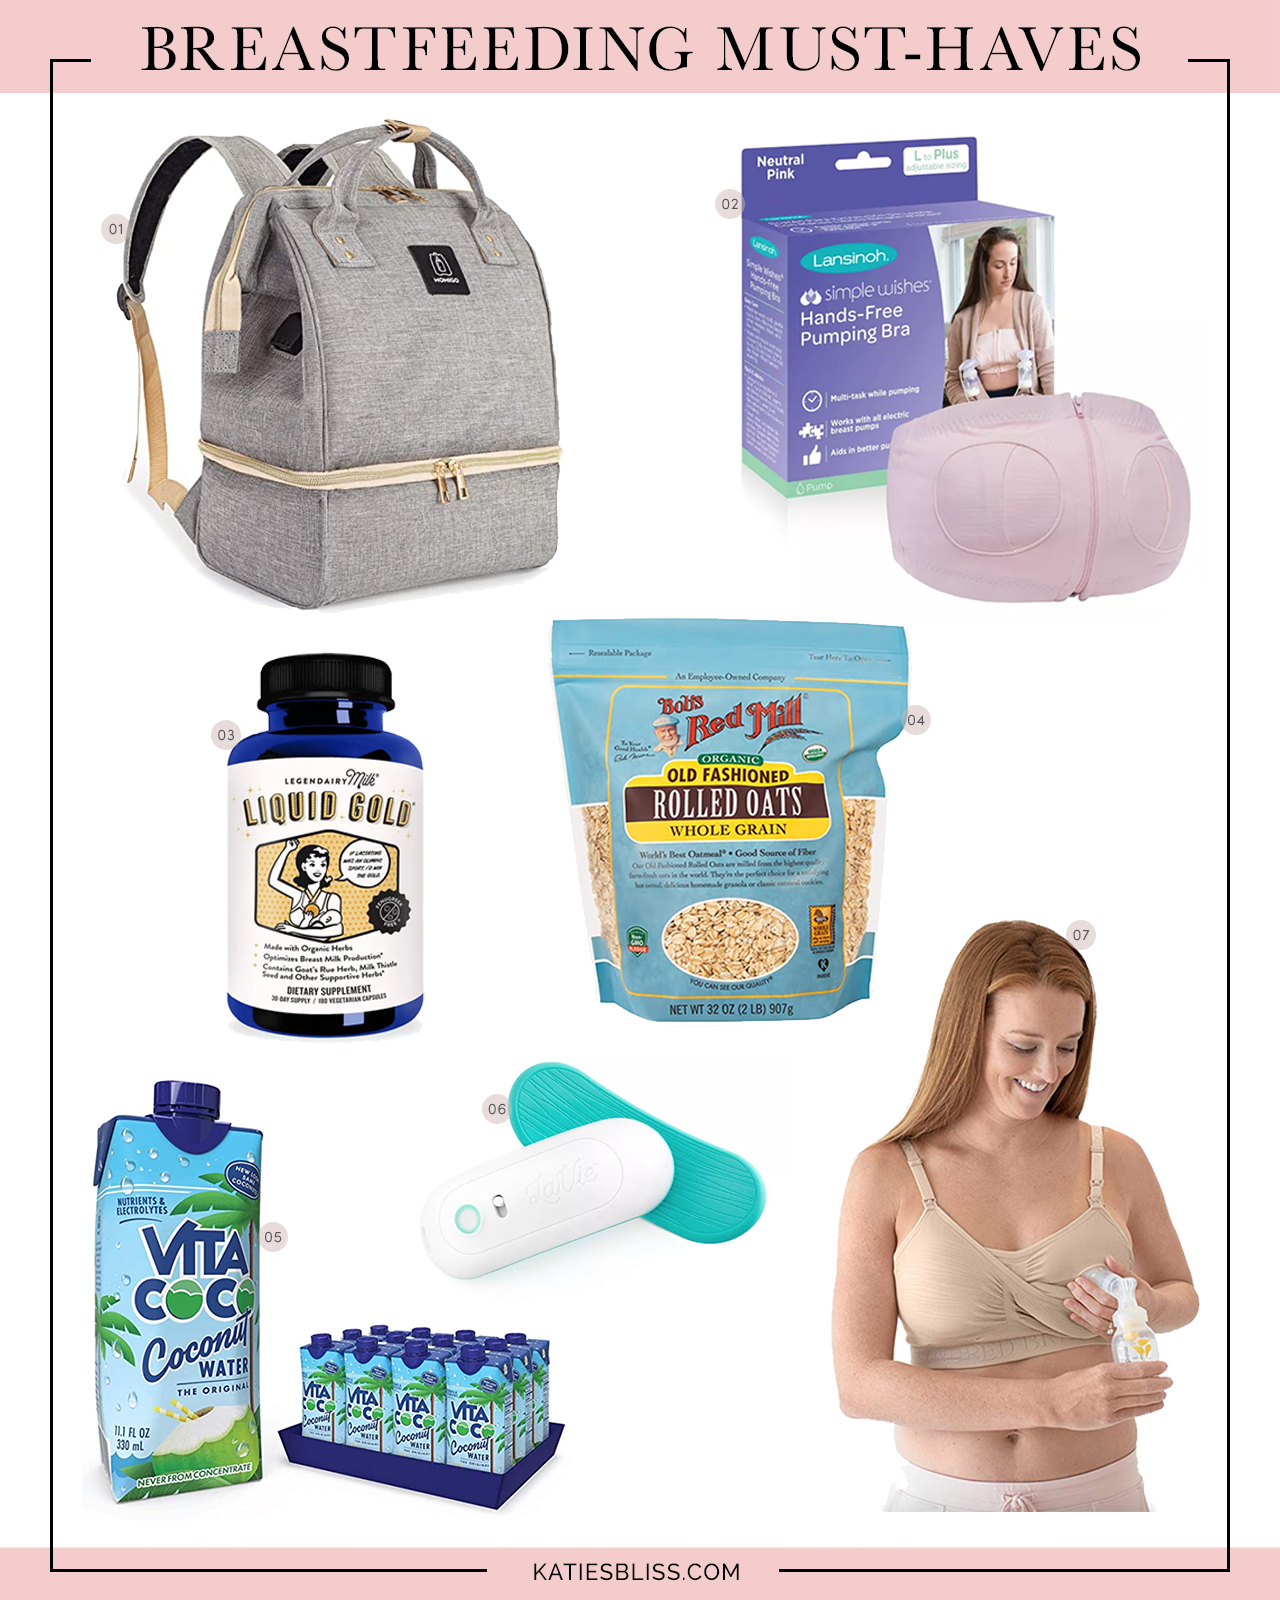
1. Breast Pump Backpack | 2. Hands Free Breast Pump Bra | 3. Legendairy Milk Liquid Gold | 4. Rolled Oats |5. Vita Coco Coconut Water | 6. LaVie Warming Lactation Massage Pads | 7. Kindred Bravely Hands Free Pumping Bra
In between breastfeeding and caring for this new little human, I’d try to pump as often as I could. I want to say I did it maybe 4x a day for 20-30 minutes each time? I honestly can’t remember. I just recall always feeling defeated afterwards because what I was pumping was still not enough to satisfy Nate. At some point everyday we’d run out of pumped milk and have to give him formula. I want to say he got on average 5-10oz of formula per day his first two months while I established my supply.
The stress and frustration of trying and failing (how I felt about myself at the time) to breastfeed and pump started to take a toll on me mentally and emotionally. Six weeks passed and it still wasn’t getting easier. His latch was painful, he still needed a bottle after every feed and while I was beginning to pump slightly more milk, it still wasn’t enough to stop supplementing with formula everyday. I was exhausted and felt like my body was broken. Breastfeeding is all about supply and demand. I knew my baby was hungry and the demand was there. So why wasn’t my body producing what he needed?
I had reached a point where I was very very close to quitting nursing. Trying to make it not painful while also keeping up with a pump schedule literally felt like a full time job. When Nate wasn’t attached to my boob– I was attached to a pump. But before throwing in the towel altogether my mom gut told me that we needed to get one last expert opinion on Nate’s oral anatomy.
When he was first born we had a slight suspicion he might have a tongue tie as oral ties tend to be genetic and my husband has one. We brought it up to his pediatrician at one of his first appointments and after a brief examination she informed us that she didn’t see anything. After that I kind of just forgot about it and fully committed to believing any problems with breastfeeding were my fault. I clearly either had a low supply and/or was just bad at getting him to latch.
Everything changed when I stumbled across this Instagram post about pediatric tongue ties and how having one can impact a baby’s ability to successfully breastfeed. Nate had all of the symptoms! In a last ditch effort to get to the bottom of things, I made an appointment with an oral surgeon who specializes in releasing ties in babies and children. I didn’t even bother trying to get a referral from our pediatrician. I just called Dr. Scott Siegel’s office on my own and was able to schedule Nate a same-day appointment. There we found that not only did he have a posterior tongue tie deep in the back of his mouth, but a lip tie too! We decided to have both released by Dr. Siegel that same day.
PS mamas– the tongue release procedure aka a frenectomy was very simply and easy. Dr. Siegel used a laser and it was over within 10 seconds! Yes Nate cried, but I was able to breastfeed him immediately after and soothe him. I want to say he was a little fussy the night and following morning, but within a day he was back to himself! We just gave him a small dose of baby Tylenol to help with his discomfort. We also made sure to keep up with the 5x daily mouth stretches we were instructed to do by Dr. Siegel for two weeks after his procedure– if you don’t do these ties can re-attach!
I can’t tell you what a sense of relief it was to finally have gotten an answer to our breastfeeding difficulties. I’d spent weeks hating myself and believing I had a terrible low milk supply, when it had all been due to this little piece of skin underneath his tongue. So crazy right?
I wish I could say that the frenectomy solved all of our breastfeeding struggles, but it was only one piece of the puzzle. I’d read that releasing a tongue tie is not always an instant fix and that some babies need therapy to understand their new oral mobility and re-learn how to use their tongue. Tongue ties are also linked to and can be the cause of many issues beyond breastfeeding– shoulder tension, body asymmetry, head tilt, reflux and abdominal distension just to name a few.
We quickly realized that Nate needed more help beyond just the frenectomy. His latch was still painful like a chomp and it was clear that he had no idea how to suck and use his tongue properly. His body was also soooo tight and he had a ton of tension in his neck and shoulders. He’d latch OK on my right side, but when I’d move him to the left he’d refuse because he had so much tightness lifting his head and neck in that direction.
I decided to seek out the help of both a pediatric physical therapist (Dr. Giselle Tadros) and chiropractor (Dr. Alvarez at Hoboken Chiropactric) who specialize in therapy following a frenectomy. For two months I took Nate to weekly appointments with Dr. Giselle and to Hoboken Chiro. I also spent at least an hour everyday working with Nate myself at home on relieving his body tension, strengthening his neck and jaw muscles and practicing using his tongue with suck training. Dr. Giselle has some amazing resources on her Instagram about oral therapy that parents can do at home!
During this time, I also made the tough decision to exclusively pump. Why put so much work into pumping if breastfeeding was the ultimate goal? I decided for my own sanity that I needed a break. It’s hard to put into words just how defeating it feels to spend hours everyday trying to breastfeed (often with a screaming baby) only to have 1) it hurt like hell and 2) realizing baby didn’t get enough to eat and still having to give a bottle. We realized that it was best for me and him if we focused on addressing Nate’s body tension and improving his oral function before attempting to get him regularly back on the boob.
PS you can find reviews of all the breast pumps I’ve tried in this post.
Exclusively pumping while also taking Nate to weekly appointments and doing therapy with him at home was exhausting. From mid-October through early December I lived in a blackhole of pumping around the clock. All I cared about was getting my baby the help he needed and increasing my milk supply. It became a bit of an obsession– pumping. Counting every ounce. I had very little motivation to do my work or any hobbies that I enjoyed pre-pregnancy. Looking back I definitely wasn’t in a great place emotionally, but I had started seeing the light at the end of the tunnel. Nate began making strides in therapy– most notably his body tension began decreasing, we could also tell his neck and jaw muscles were getting stronger. We also saw a lot of improvement in his sucking and swallowing when taking a bottle.
During this time my milk supply really started going up and we were able to stop supplementing with formula. I included a list of everything I did to help build my supply along with my pumping schedule below. Honestly I think time and consistency were the biggest factors. It’s so important to remember that building a milk supply is a marathon and not a sprint. For many women it’s common to take three months to establish a full supply. If only I’d known this at the start I could’ve saved myself a lot of heartache!
I also want to call out that PUMPING IS BREASTFEEDING. A few of you messaged me this on Instagram and it really meant a lot. I know I keep referring to breastfeeding and pumping separately for the sake of explanation, but at the end of the day both are the same. If a baby is given breastmilk– they are breastfed! Pumping is hard work and takes so much time and dedication. Moms who exclusively pump are serious rockstars and should be incredibly proud of themselves.
How I Increased My Milk Supply
- Consistent Pumping (6-8x daily for 20-30mins or until empty)
- Power Pumping (1x a day for 1-2 weeks– just Google power pumping for more info!)
- Consistent Middle Of The Night Pump Session (we were lucky that Nate began sleeping through the night very early– around one month– and since I was so sleep deprived I just went ahead and slept too! I later learned that by going that long without pumping or feeding Nate 6+ hours without having removing milk from my breasts could potentially hurt my milk supply by not waking up to pump.)
- Correct Flange Size (I had no idea that when you use pump flanges that are too big/small it can negatively impact your milk supply! I realized around 10 weeks pp that my 24mm flanges were too big for me so I ordered these 21mm ones from Amazon. Here’s a ruler you can print out to find your correct size.)
- Staying Hydrated (I drink a bottle of coconut water every morning + carry this water bottle with me everywhere)
- Lactation Supplements (I take 6 of these supplements a day)
- Healthy(ish) Diet (trying to eat meals with real, quality protein and calories– when you’re breastfeeding you’re still eating for two!)
- Massage + Heat (I am obsessed with these heated lactation massagers! They make pumping so much more comfortable and the added heat/vibration really helps with milk flow. I slip them in my bra every time I pump!)
- Calm, Stress-Free Environment (I know I know. So much easier said than done, but it’s true! I pump significantly more when I am having a good day and not paying attention to the fact that I’m pumping. Try to find a happy distraction for yourself when you pump– watch a funny TV show, read a book, put on your makeup, look at photos of your sweet baby– remove negative distractions and do something that makes you feel great.)
So I would be lying if I told you that I followed this to a T every day that I was an exclusive pumper. Basically I aimed for at least 6 pump sessions of 20-30 minutes per day, with a mandatory middle of the night session (when the bodies milk producing hormones are highest!)
My Pumping Schedule
7AM
10AM
1PM
4PM
7PM
9PM
11:30PM (sometimes I’d make this an hour long power pump session)
3AM (don’t skip this one! I learned that prolactin levels are highest between 1-4AM so adding a night session is a great way to build demand & get a big pump!)
Taking a break from nursing to exclusively pump was honestly the best decision I could’ve made. Watching my supply go up was a huge mood booster and motivator. Being able to visually see that I was producing enough milk to satisfy my baby gave me the confidence I needed to give nursing another go in early December. I knew the milk was there— Nate just needed to learn to get it himself.
I started off by nursing Nate twice a day. I would do his first feed in the morning when I was most engorged and again later in the evening around dinner after I had finished working. For about two weeks his feeds were hit or miss. Sometimes he would get all that he needed from me and other times I’d still have to give him an ounce or two in a bottle after nursing. His latch still pinched a bit, but I wouldn’t describe it as painful. I would often have to take him off to re-latch, but I noticed such a difference in his body tension! He was so much more relaxed and loose than he’d been 1-2 months prior at the start of his physical therapy. He also easily latched on both sides– previously he would always fight and fuss on the left.
How did I know he had enough or that he was still hungry? While he was bottle fed we learned that 4-5oz was what he needed at each feed to be satisfied. Obviously when breastfeeding you can’t see the amount of milk your baby is intaking, however there is a way to track it by doing a weighted feed.
For my own piece of mind, I would weigh Nate before and after feeding him using his smart changing pad. This thing is amazing because it’s also a scale! Doing this allowed me to know exactly how many ounces he had drank. At first he would maybe get 1.5-2.5oz at each feed, but with practice this increased! Before long he started to drink 4-7oz per feed (yes, sometimes he’d get 7oz in the morning!) and was getting all he needed to be full.
It was such a labor love, but I just knew he could get there and it was also so liberating not having to be attached to a pump all day. Anytime he was able to get a full feed from me, I would cut out a pump session. I want to say that it was the week leading into Christmas (Nate was 14 weeks!) where his latch had stopped pinching me and he began getting all he needed from at every nursing session. I finally was able to exclusively breastfeed. We did it!!!
And when I say “we” I mean this to encompass not only myself and Nate, but my husband too. Since the start of the pandemic, Nick has been able to work virtually, which allowed him to be at home with me for the majority of my pregnancy and now with Nate. There is no way any of this would have been possible if I did not have his full time support.
Without him I never would have been able to take on such a rigorous pump schedule (Nick did most of Nate’s bottle feedings while I exclusively pumped) or likely had the motivation to continue trying to breastfeed. He has been my biggest cheerleader and never doubted that me and Nate could get to where we are now. I recognize what a privilege it is to have this kind of help from my husband at home as a first time mom. Nate and I are very lucky and blessed to have him!
Oh the happy tears. Being able to nurse my baby without pain and frustration is something I thought was never going to be possible. Even after Nate’s frenectomy there were moments that I questioned if the frequent medical appointments and therapy sessions were going to pay off. Was it really worth it to put myself and my baby through all of this work just to breastfeed? Now that I’ve reached the other side of things and I’ve been able to experience the joy of painless, stress-free breastfeeding– yes, it was worth it for me. I went from dreading every feeding to actually looking forward to Nate waking up from his naps so I could feed him.
If you made it to the end of this post– congratulations! I know it was long, but so was our journey to get here
The post My Breastfeeding Journey | How I Increased My Milk Supply + Pumping Must-Haves appeared first on Katie's Bliss.
]]>
Can y’all believe Nate is almost 4 months old? It seems like it was just yesterday that we brought him home, but at the same time it also feels like he’s always been a part of our lives. Does that even make sense? LOL. You all got a sneak peek ofNate’s nursery back in August when I shared our baby registry, but it wasn’t until a few weeks later that the
The post Nate’s Nursery Reveal appeared first on Katie's Bliss.
]]>
Can y’all believe Nate is almost 4 months old? It seems like it was just yesterday that we brought him home, but at the same time it also feels like he’s always been a part of our lives. Does that even make sense? LOL.
You all got a sneak peek ofNate’s nursery back in August when I shared our baby registry, but it wasn’t until a few weeks later that the room fully came together. It’s a good thing Nate didn’t arrive early because I waited until the last minute!
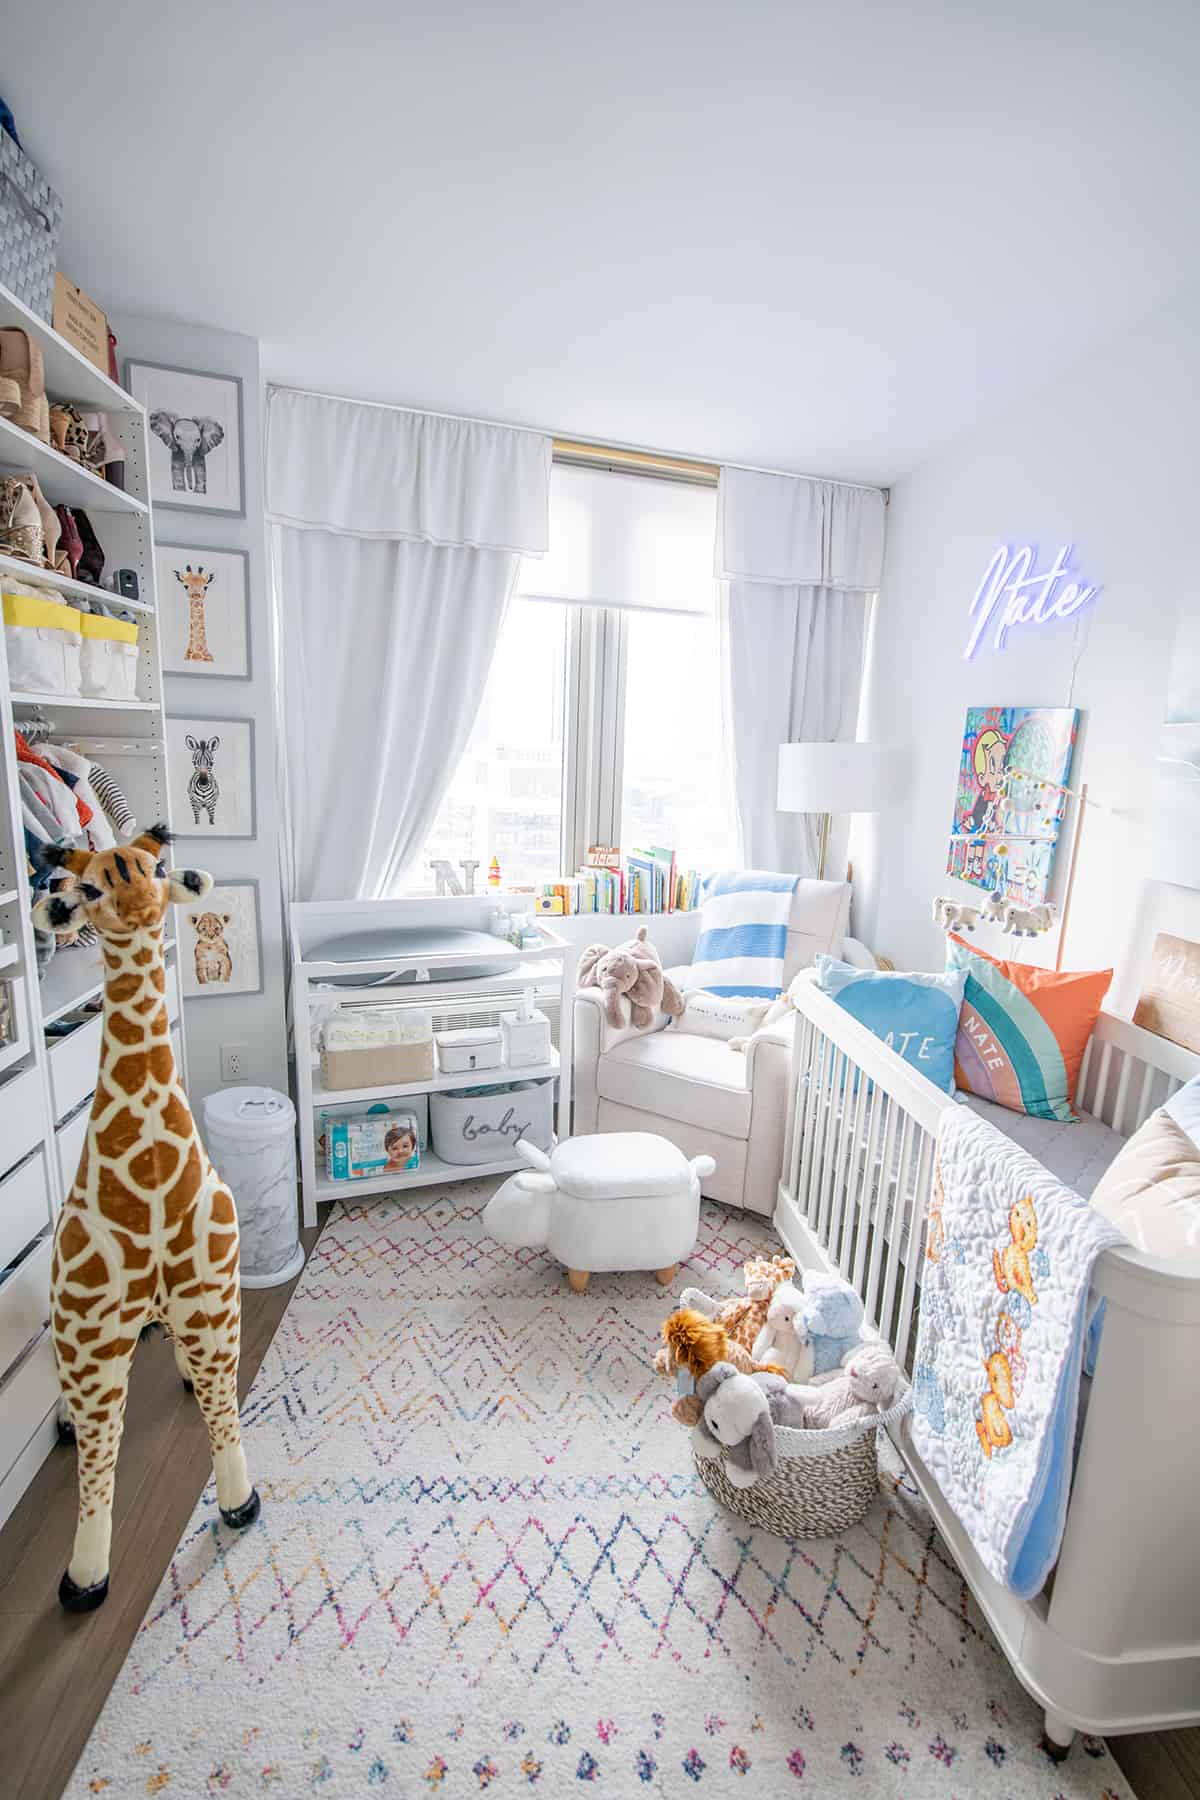
NURSERY DETAILS // Million Dollar Baby Classic Tanner 3-in-1 Convertible Crib | Million Dollar Baby Classic Willa Recliner | IKEA Custom Built-In Closet System | Yellow Border Storage Bins | Area Rug | Floor Lamp | Similar Curtains | Bunny Storage Ottoman | Changing Table | Diaper Pail | Diaper Caddy | “Baby” Basket via HomeGoods | Safari Animal Wall Prints | Neon Name Sign | Hanging Mobile | Custom “Nate” Pillows | Alec Monopoly Art Print | Tall Giraffe (on sale) | Plush Animals (got them all from this brand!)
Our goal for his nursery was to create a place that was bright and cheerful, yet still functional for small apartment living. If you recognize this room it’s because it previously was my office/closet. When we found out we were pregnant, we quickly had to adapt and I had to do some major condensing, but we made it work! I now keep most of my clothing and accessories in the first panel of the IKEA built-in system you can see on the left side of the room, this free-standing garment rack and on my shoe wall, which I revealed to y’all in this post.
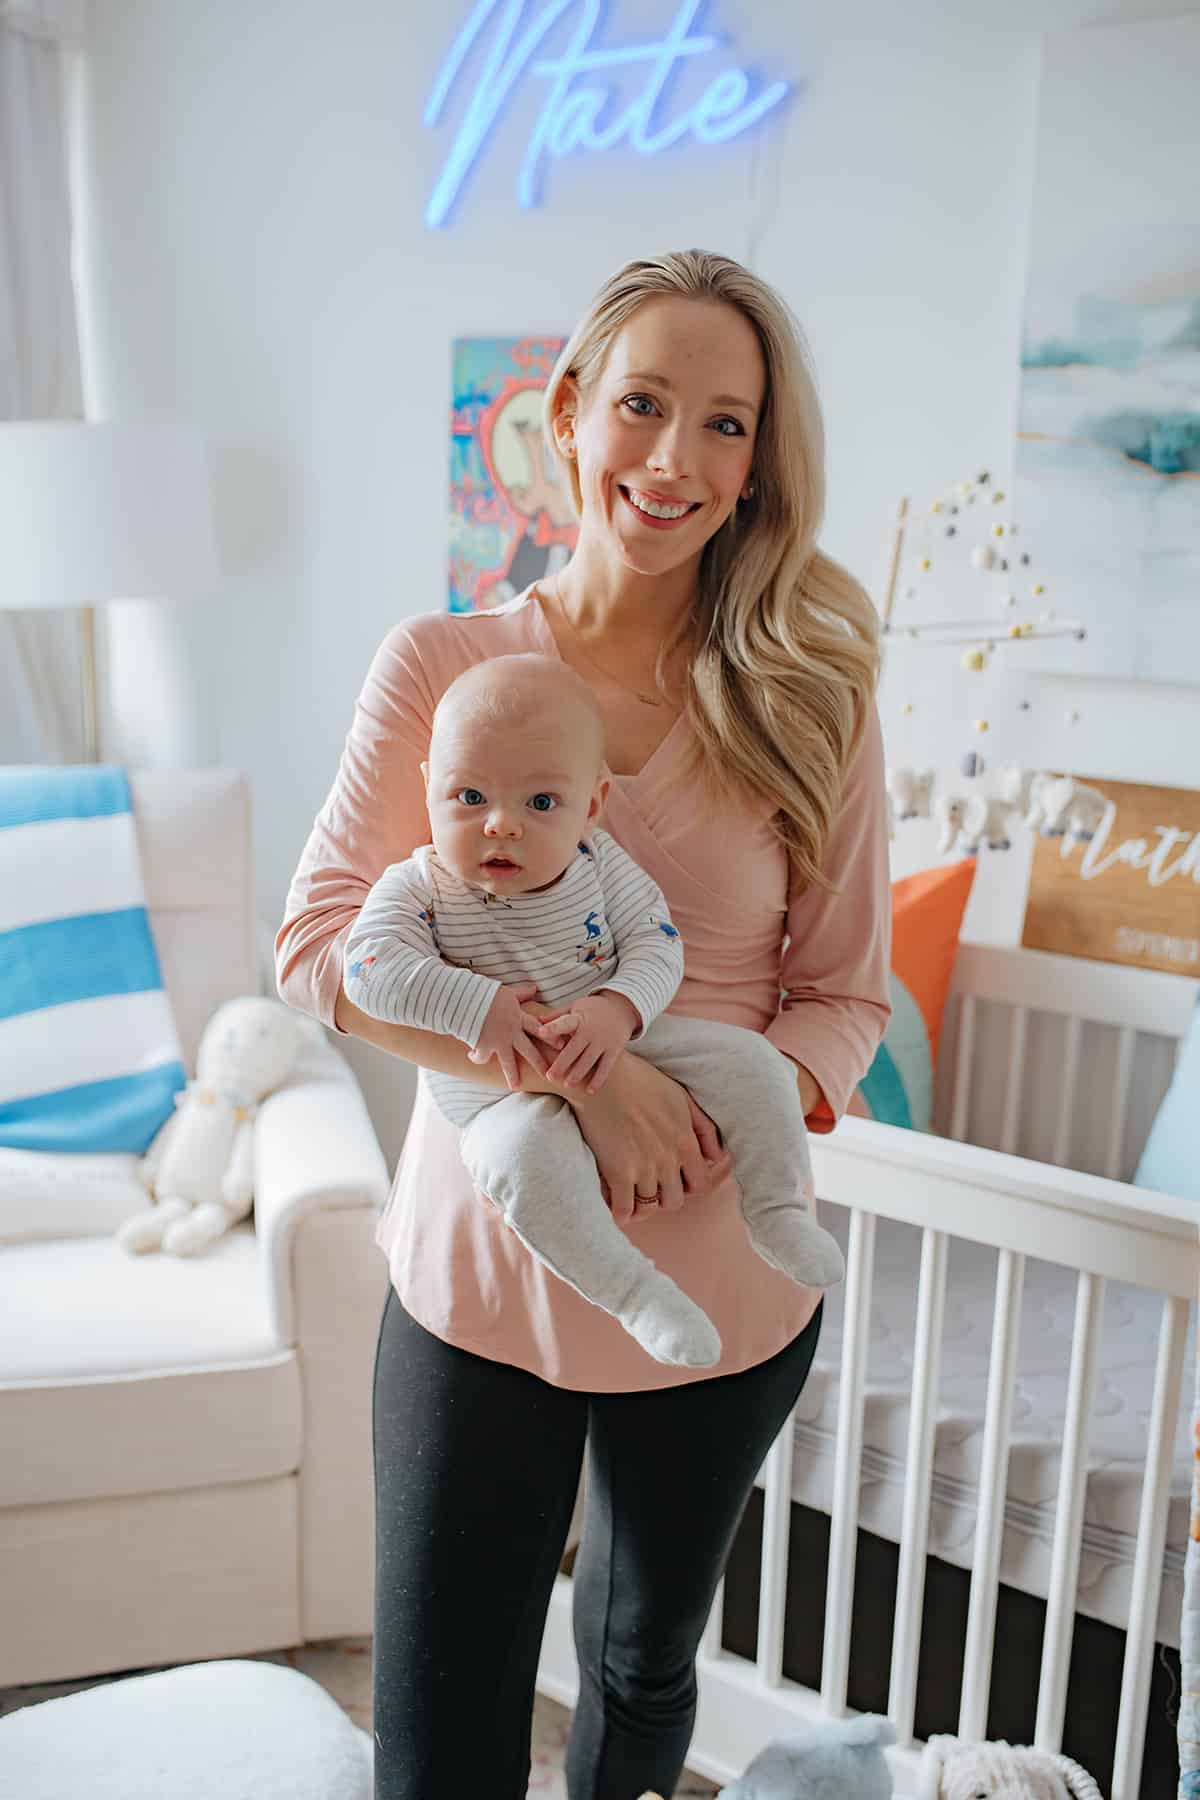
OUTFIT DETAILS // Kindred Bravely Nursing Top | Leggings | Striped Onesie + Joggers (on Nate)
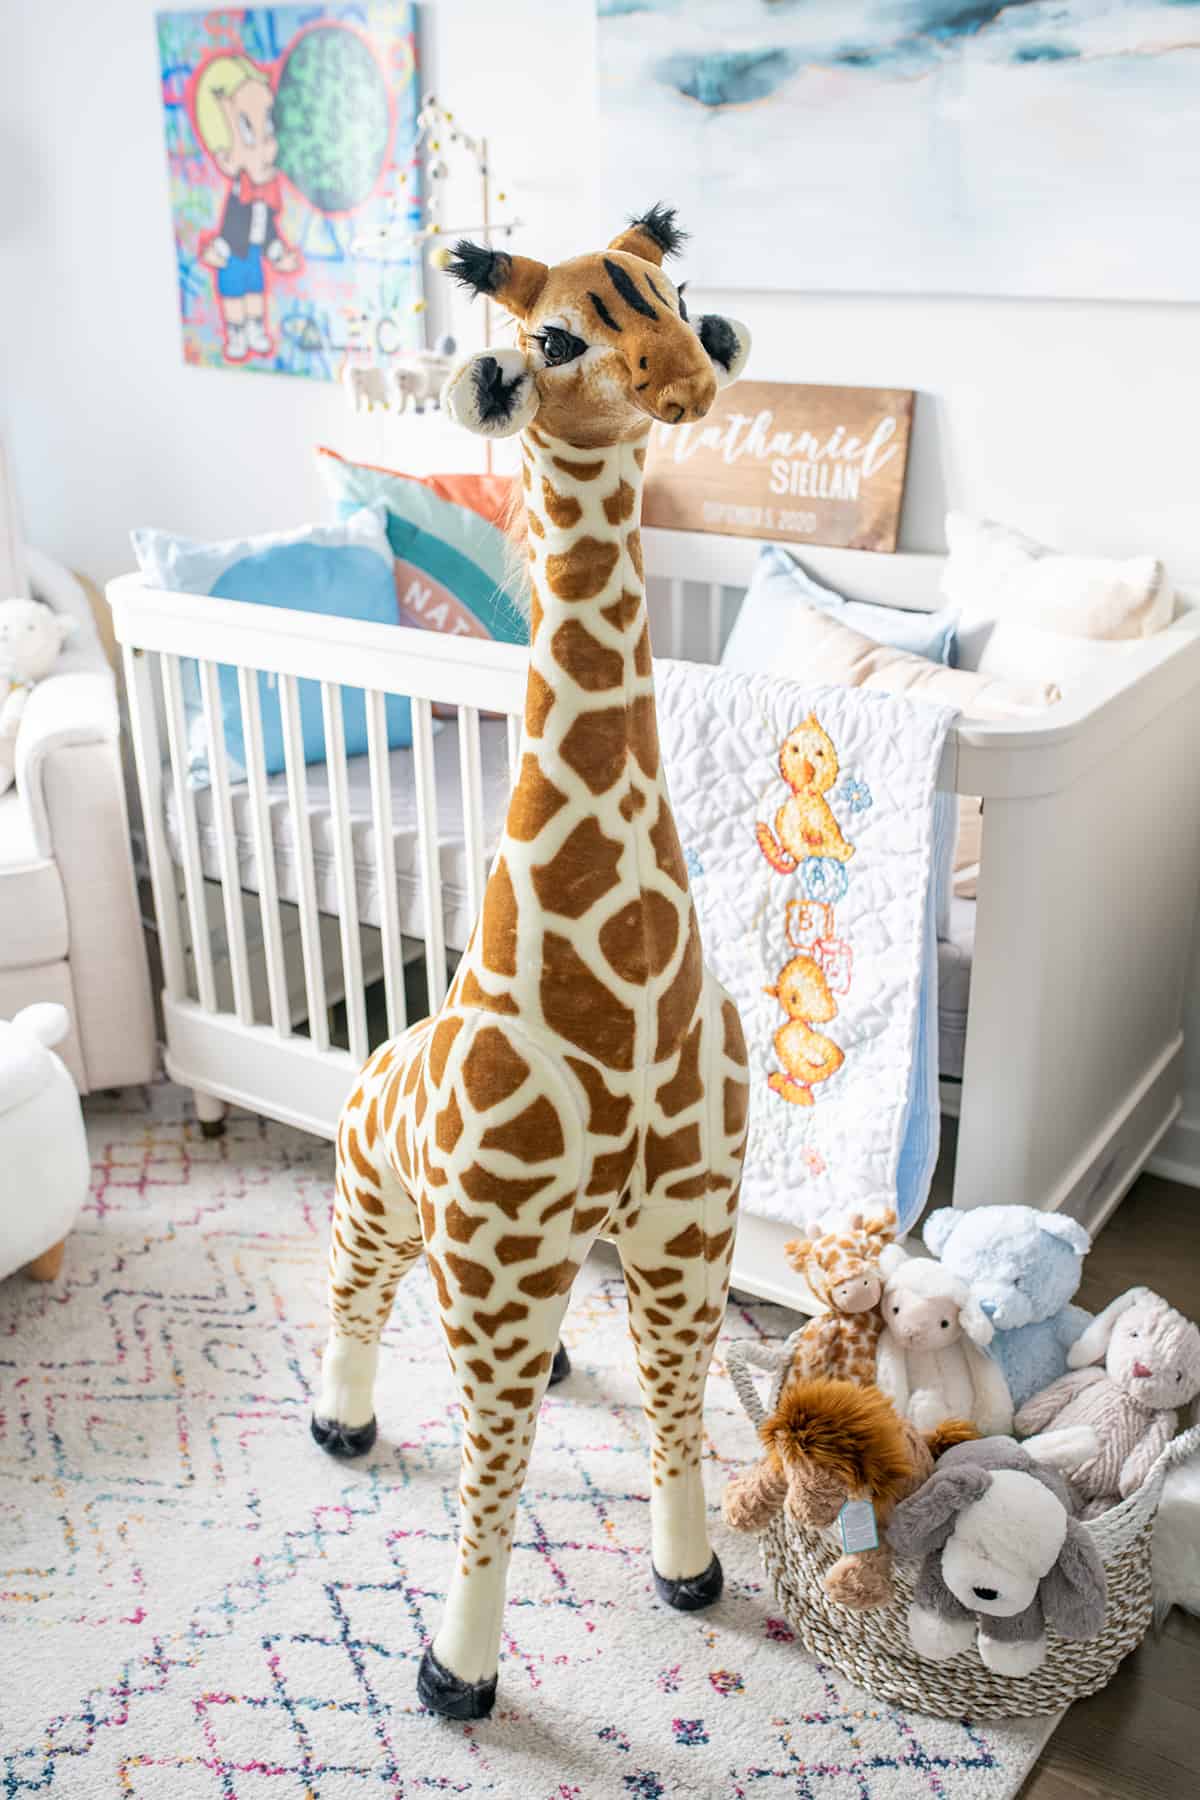
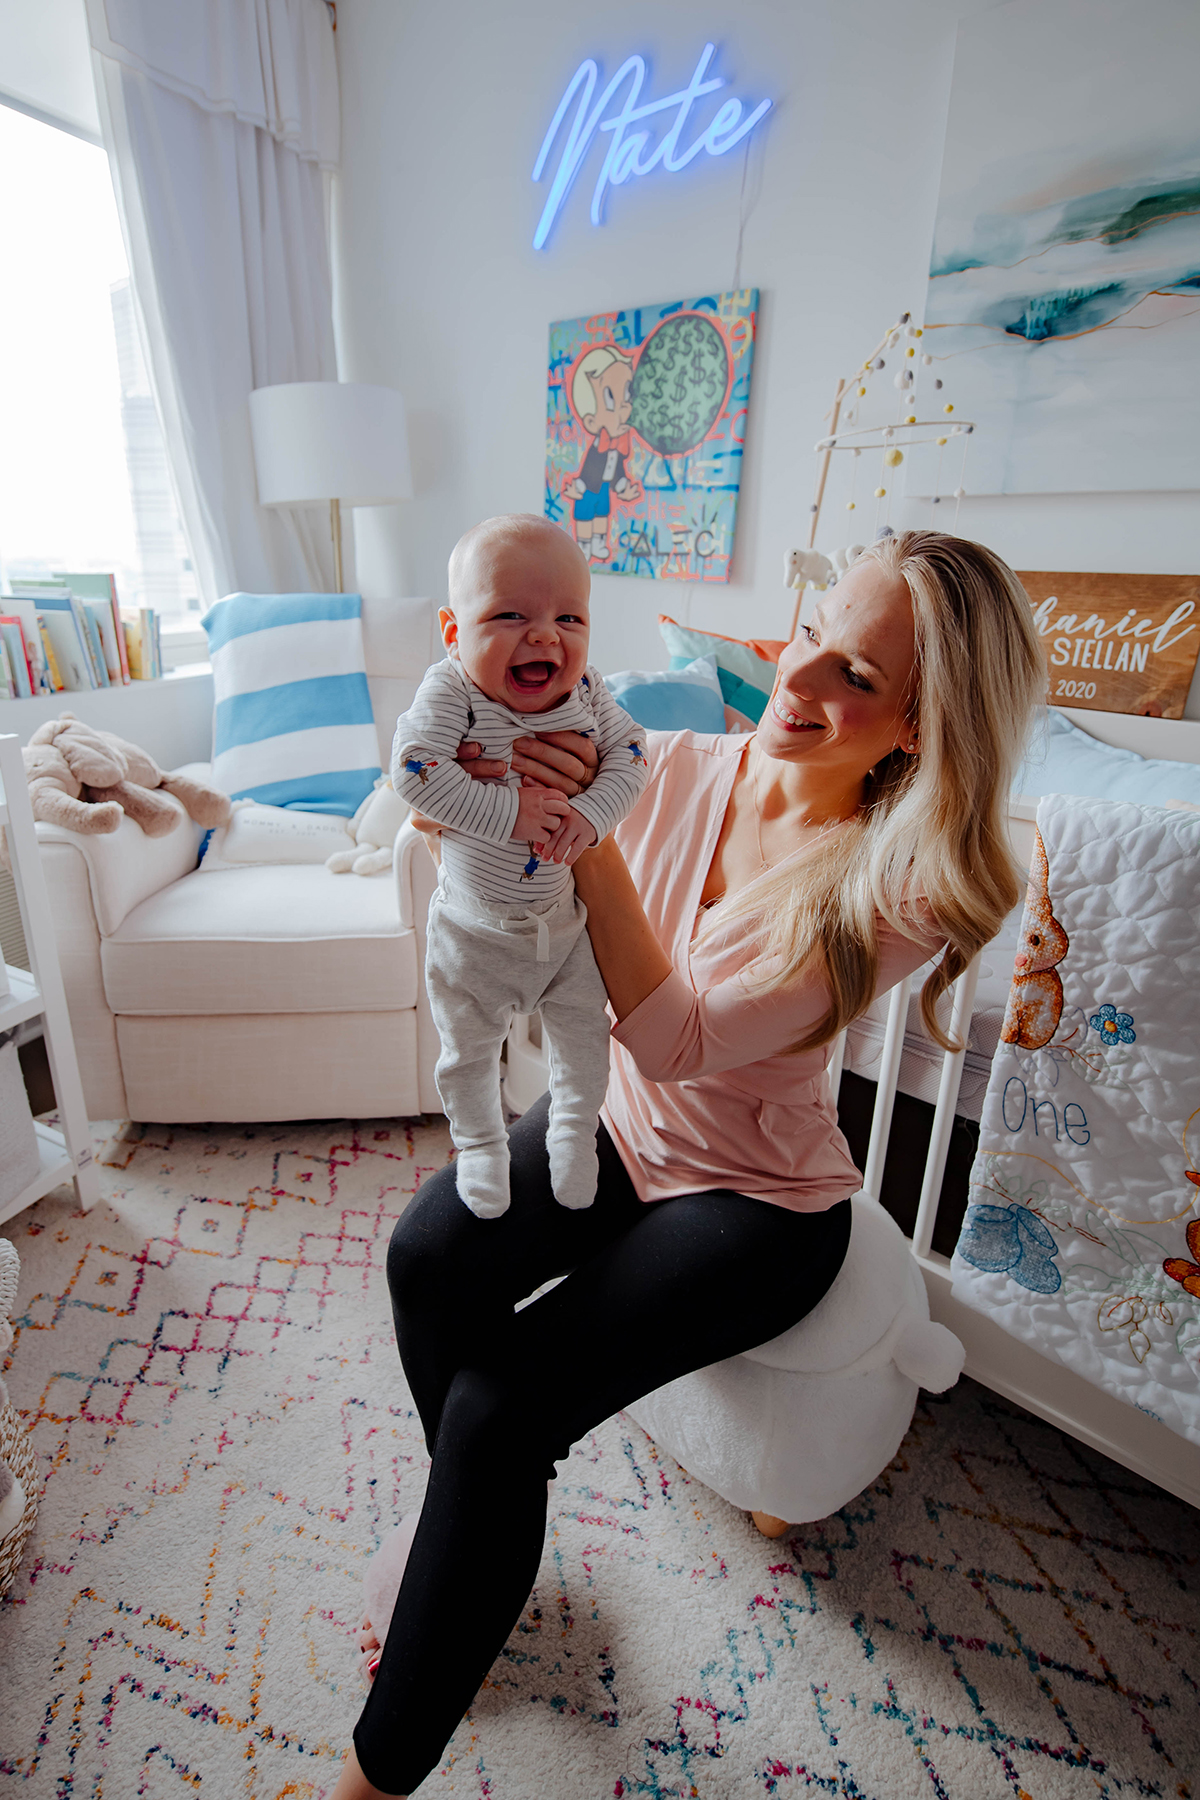

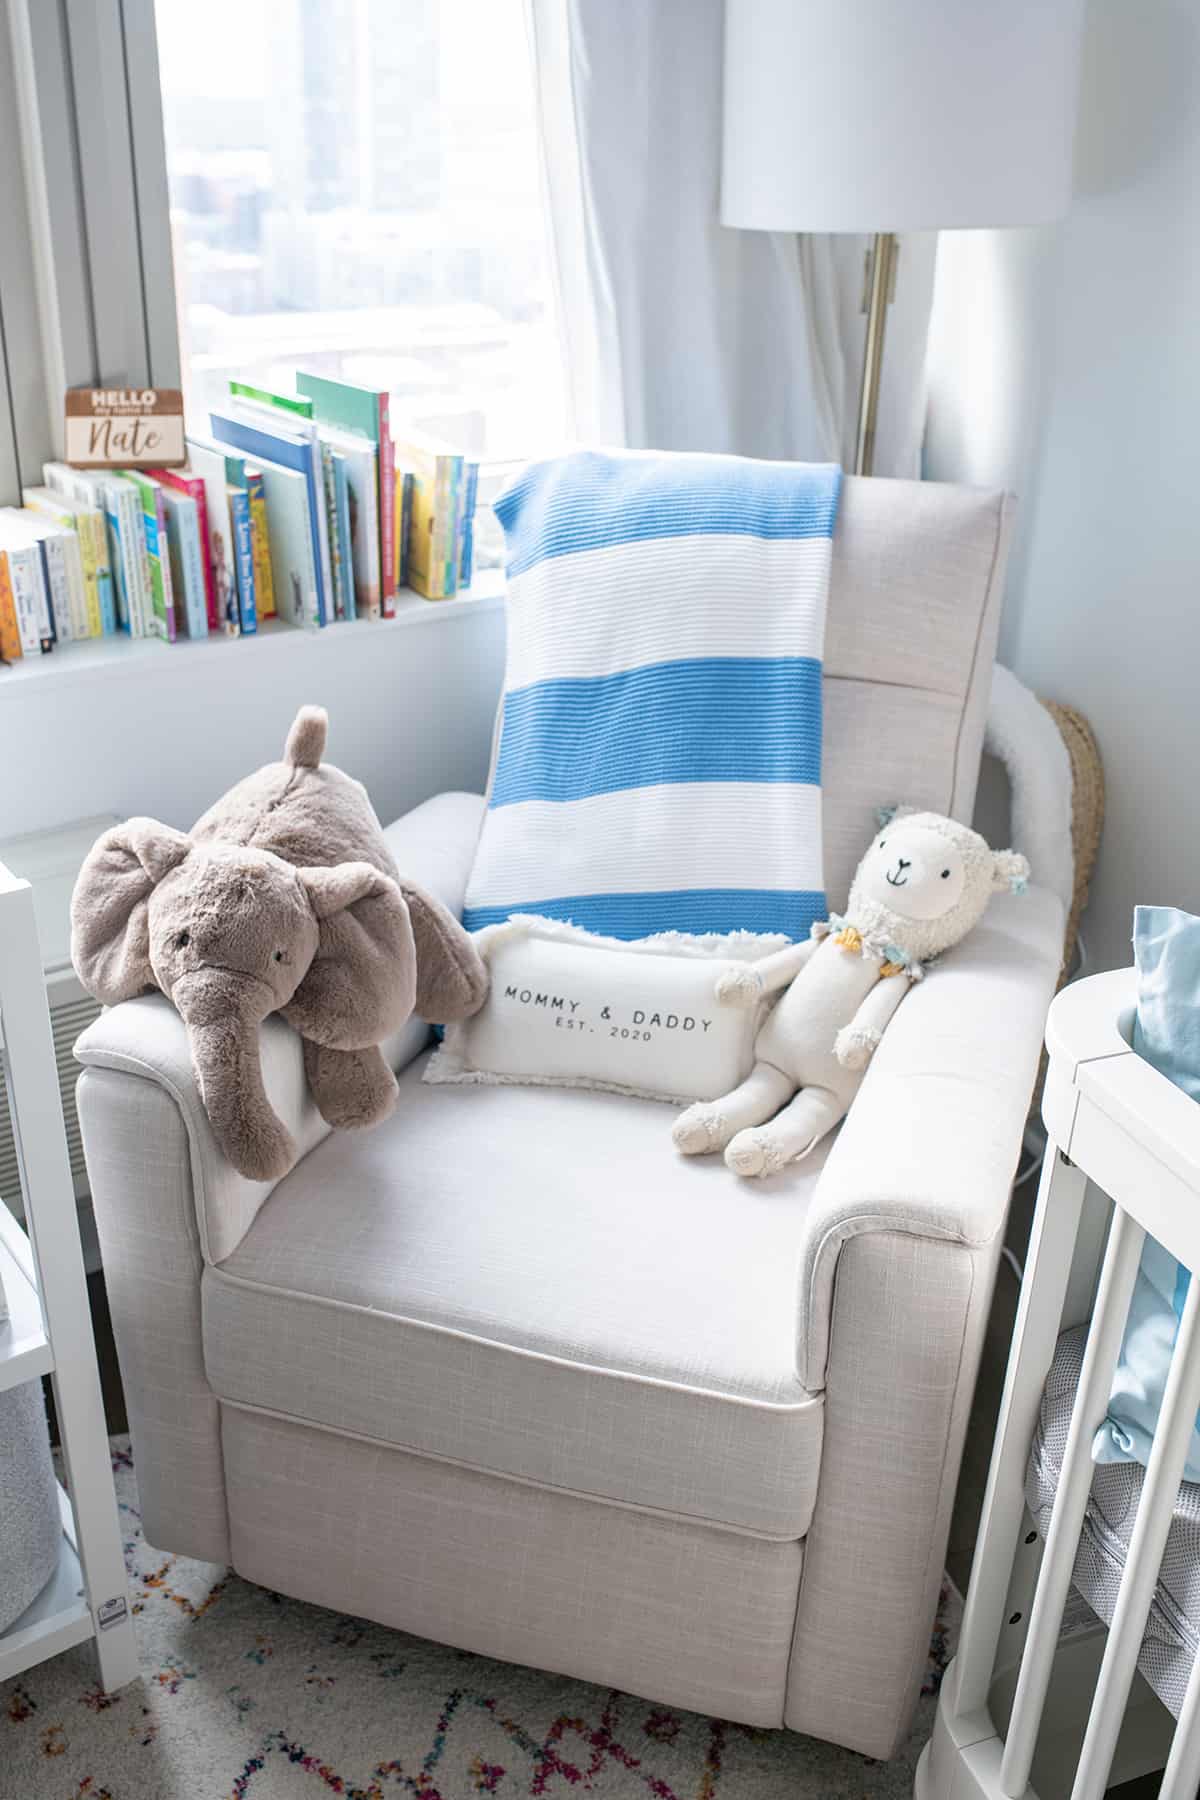

NURSERY DETAILS // Million Dollar Baby Classic Tanner 3-in-1 Convertible Crib | Million Dollar Baby Classic Willa Recliner | Area Rug | Floor Lamp | Similar Curtains | Bunny Storage Ottoman | Changing Table | Diaper Pail | Diaper Caddy | “Baby” Basket via HomeGoods | Neon Name Sign | Alec Monopoly Art Print | | Hanging Mobile | Custom “Nate” Pillows | Tall Giraffe (on sale) | Similar Mom + Dad Pillow (on chair) | Stripe Blanket (on chair) | Cuddle + Kind Doll (on chair) | Plush Elephant (on chair) | Plush Animals (got them all from this brand!) | Embroidered Blanket (custom from my mama)
When choosing Nate’s nursery furniture, the number one thing we kept in mind was versatility. This apartment isn’t our forever home (our lease is up in early 2021) so we specifically looked for a crib and glider chair that would work in a house when we move. Right away I fell in love with this classic white convertible crib (it transitions to a toddler bed!) and reclining chair (we spend hours breastfeeding + reading here) from Million Dollar Baby Classic. The quality of both are top notch and will be with us for many years to come!


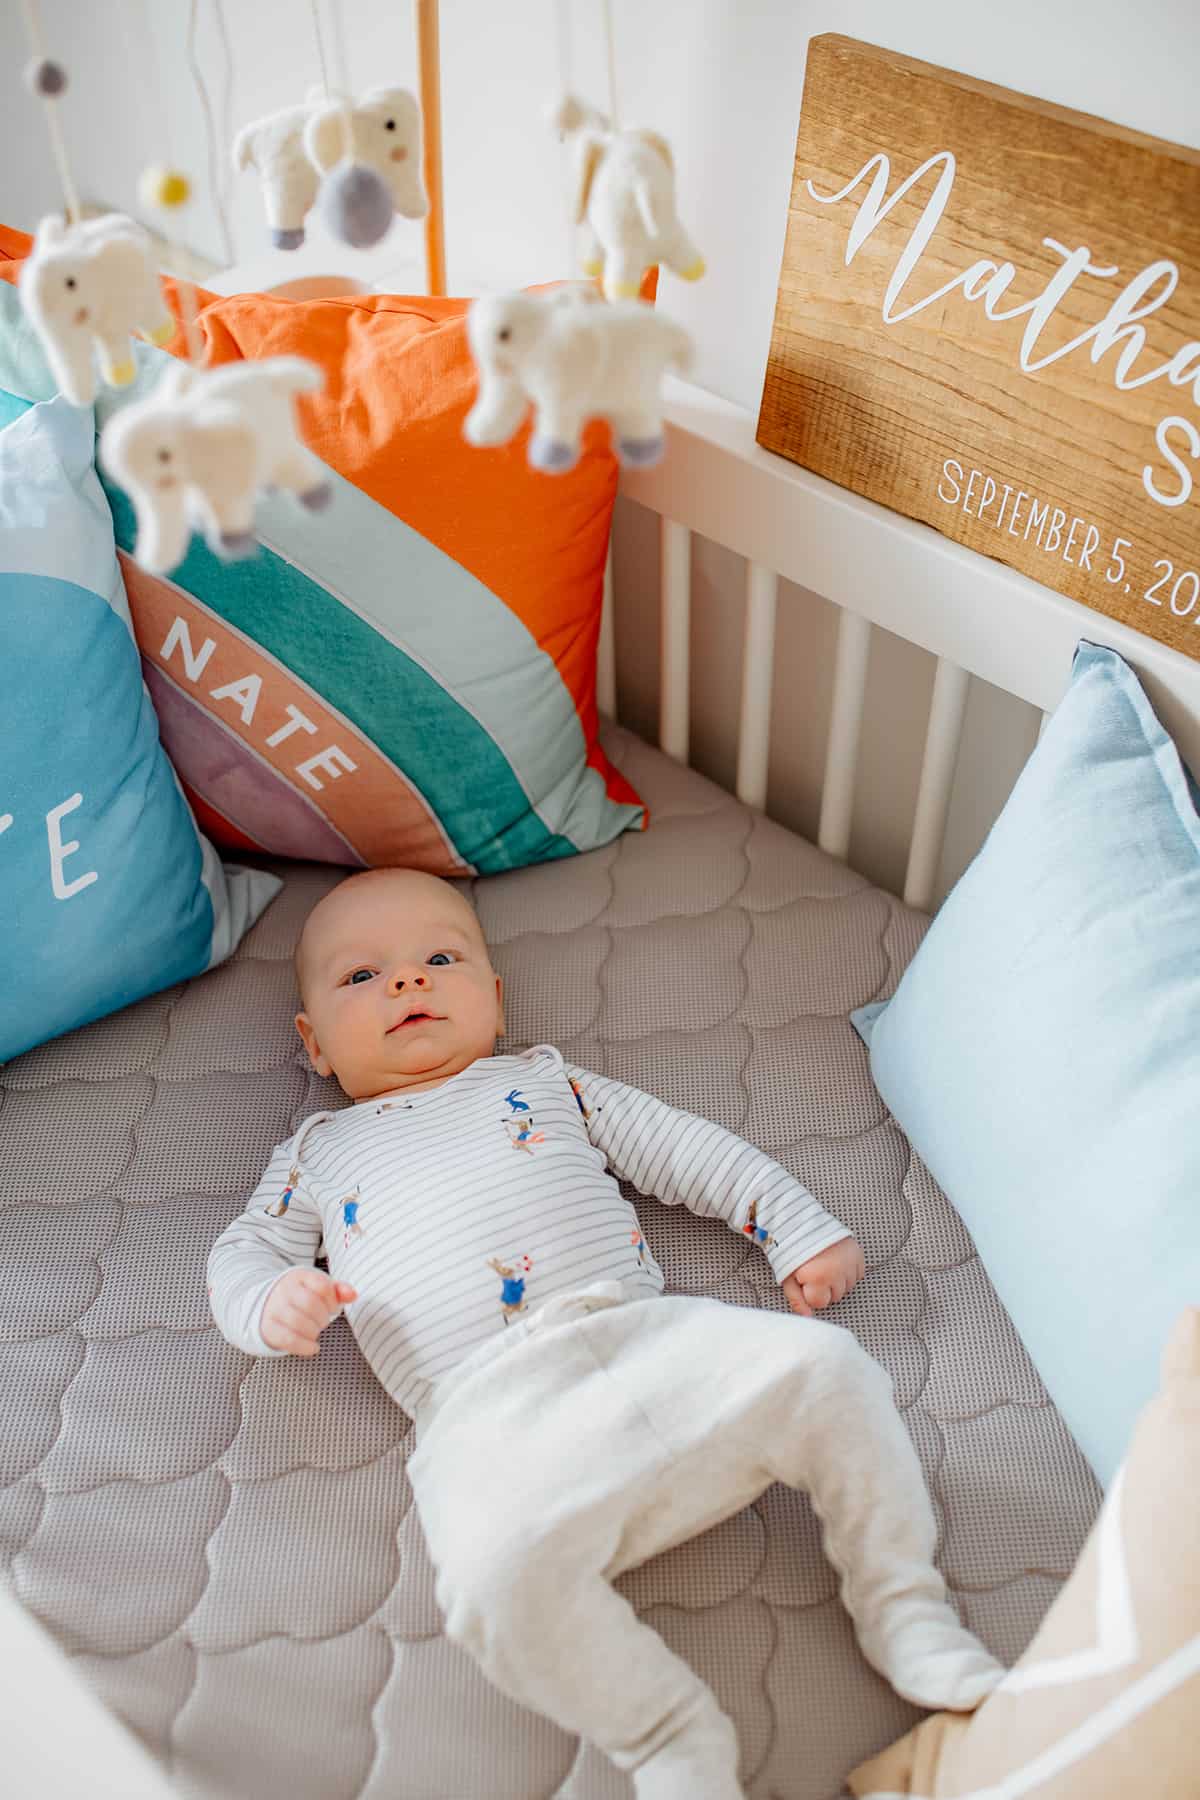
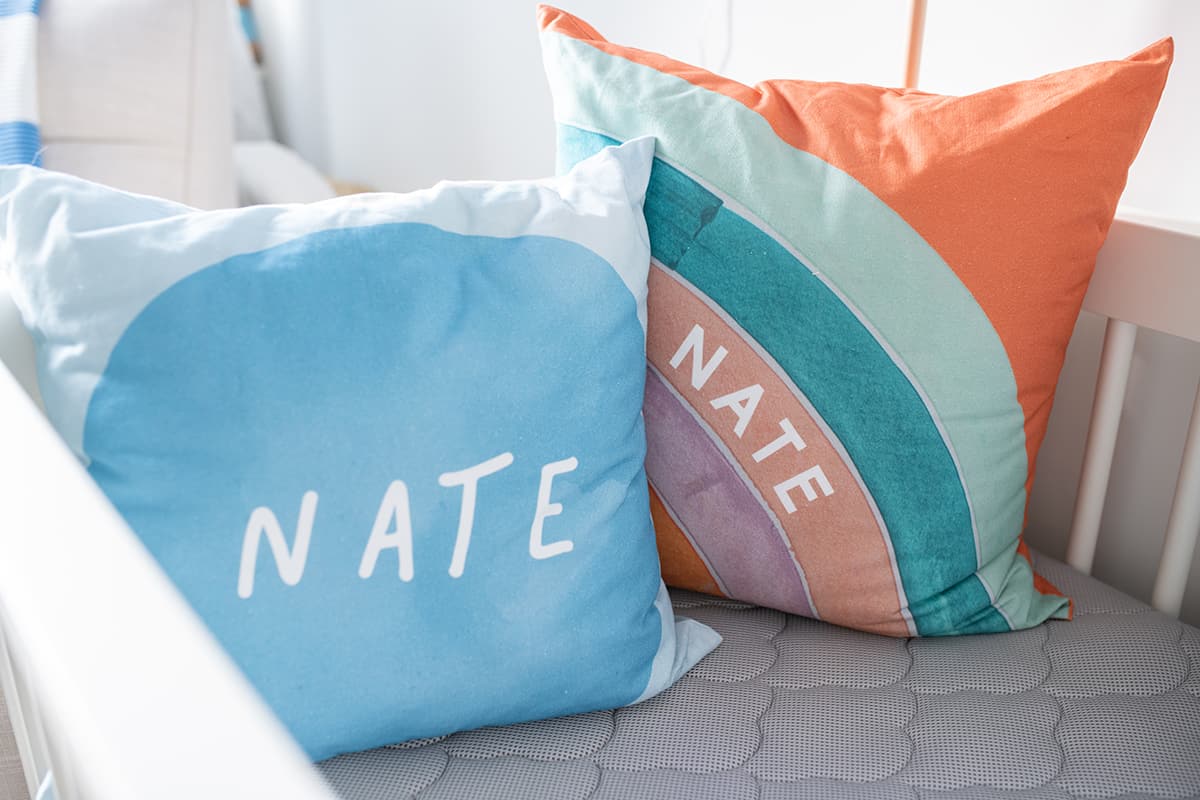

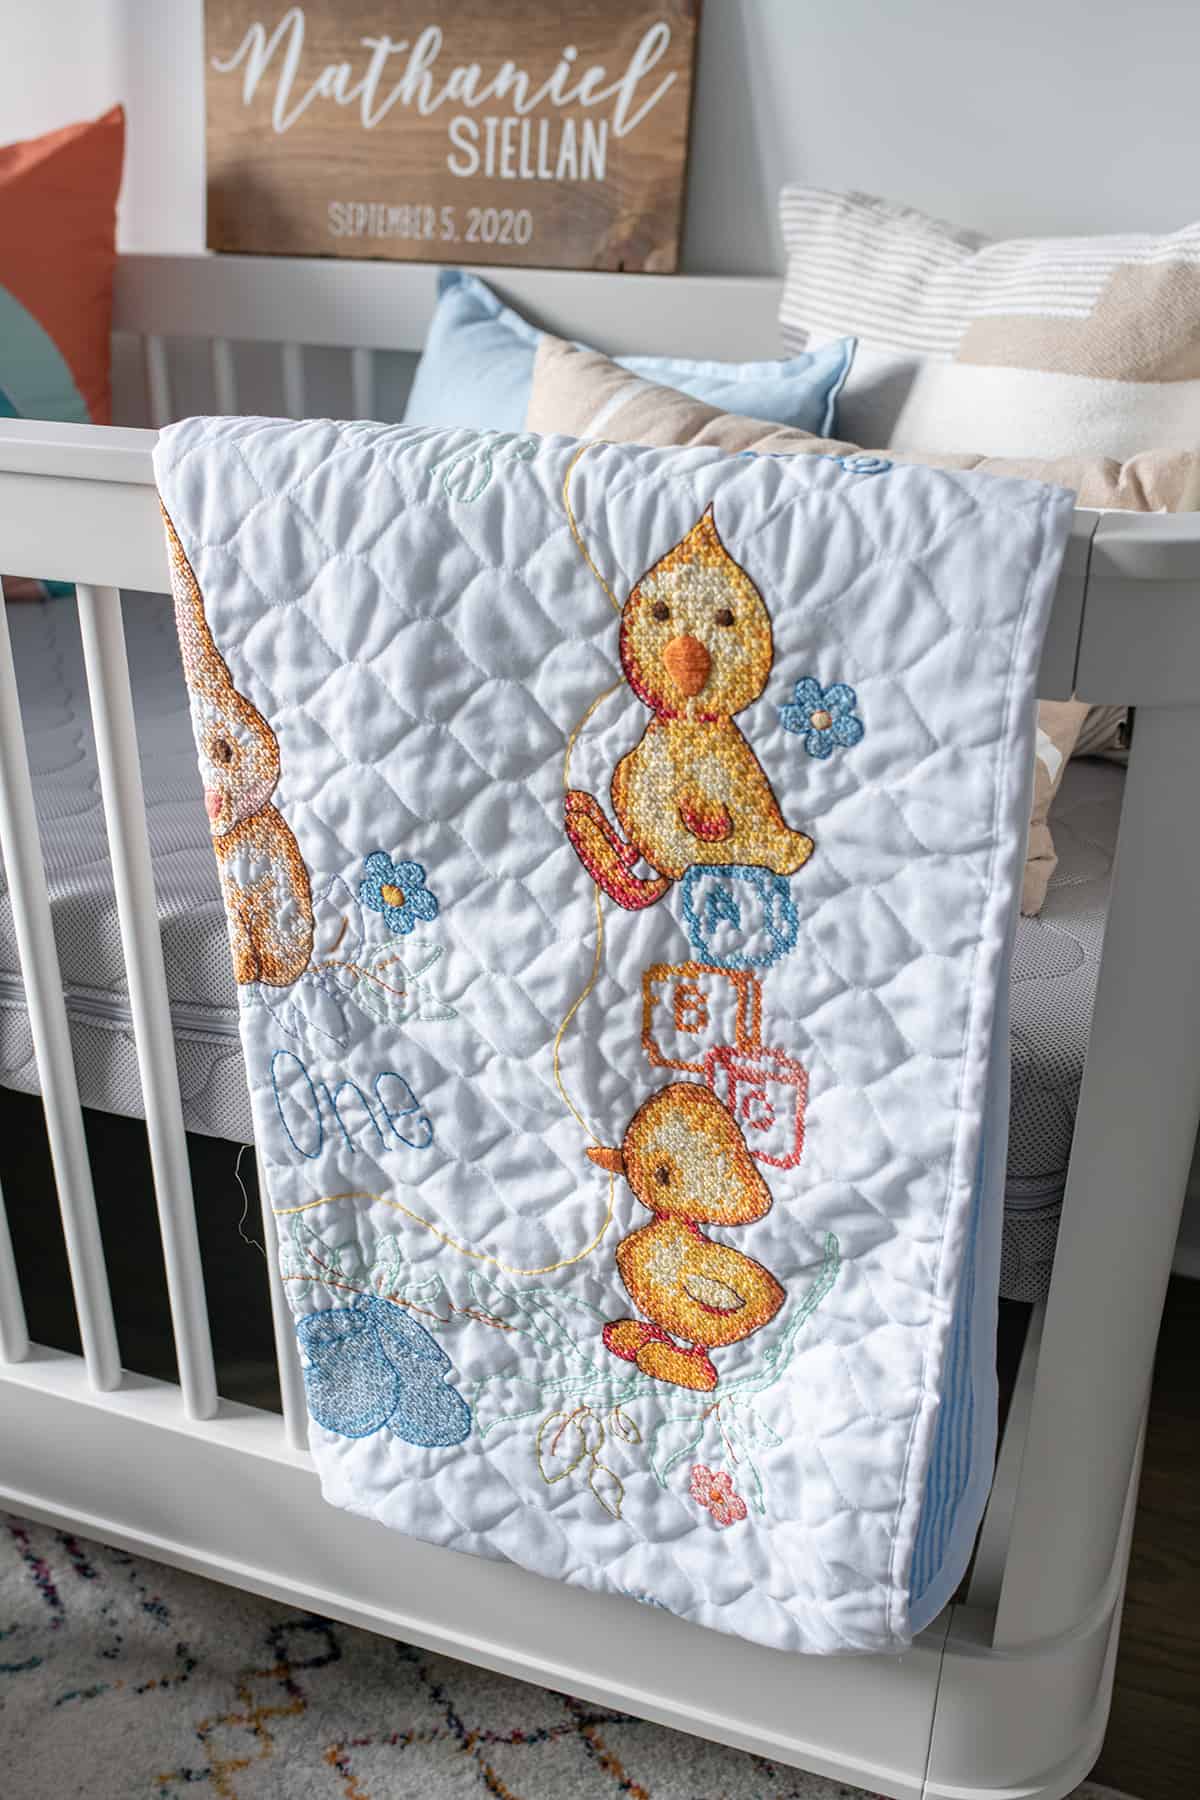
NURSERY DETAILS // Custom Wood Name Sign | Hanging Mobile | Custom “Nate” Pillows | Tall Giraffe (on sale) | Similar Mom + Dad Pillow (on chair) | Stripe Blanket (on chair) | Cuddle + Kind Doll (on chair) | Plush Elephant (on chair) | Plush Animals (got them all from this brand!) | Embroidered Blanket (custom from my mama)
Things I love: bright colors, personalized decor and stuffed animals. Clearly I had to go all out for my boy! During my pregnancy I went on a plush animal ordering spree… This brand makes the softest, most cuddly ones! Some of my other favorite decorative pieces in his room are this custom wood name sign, his hanging elephant mobile and an embroidered blanket handmade by my mom!

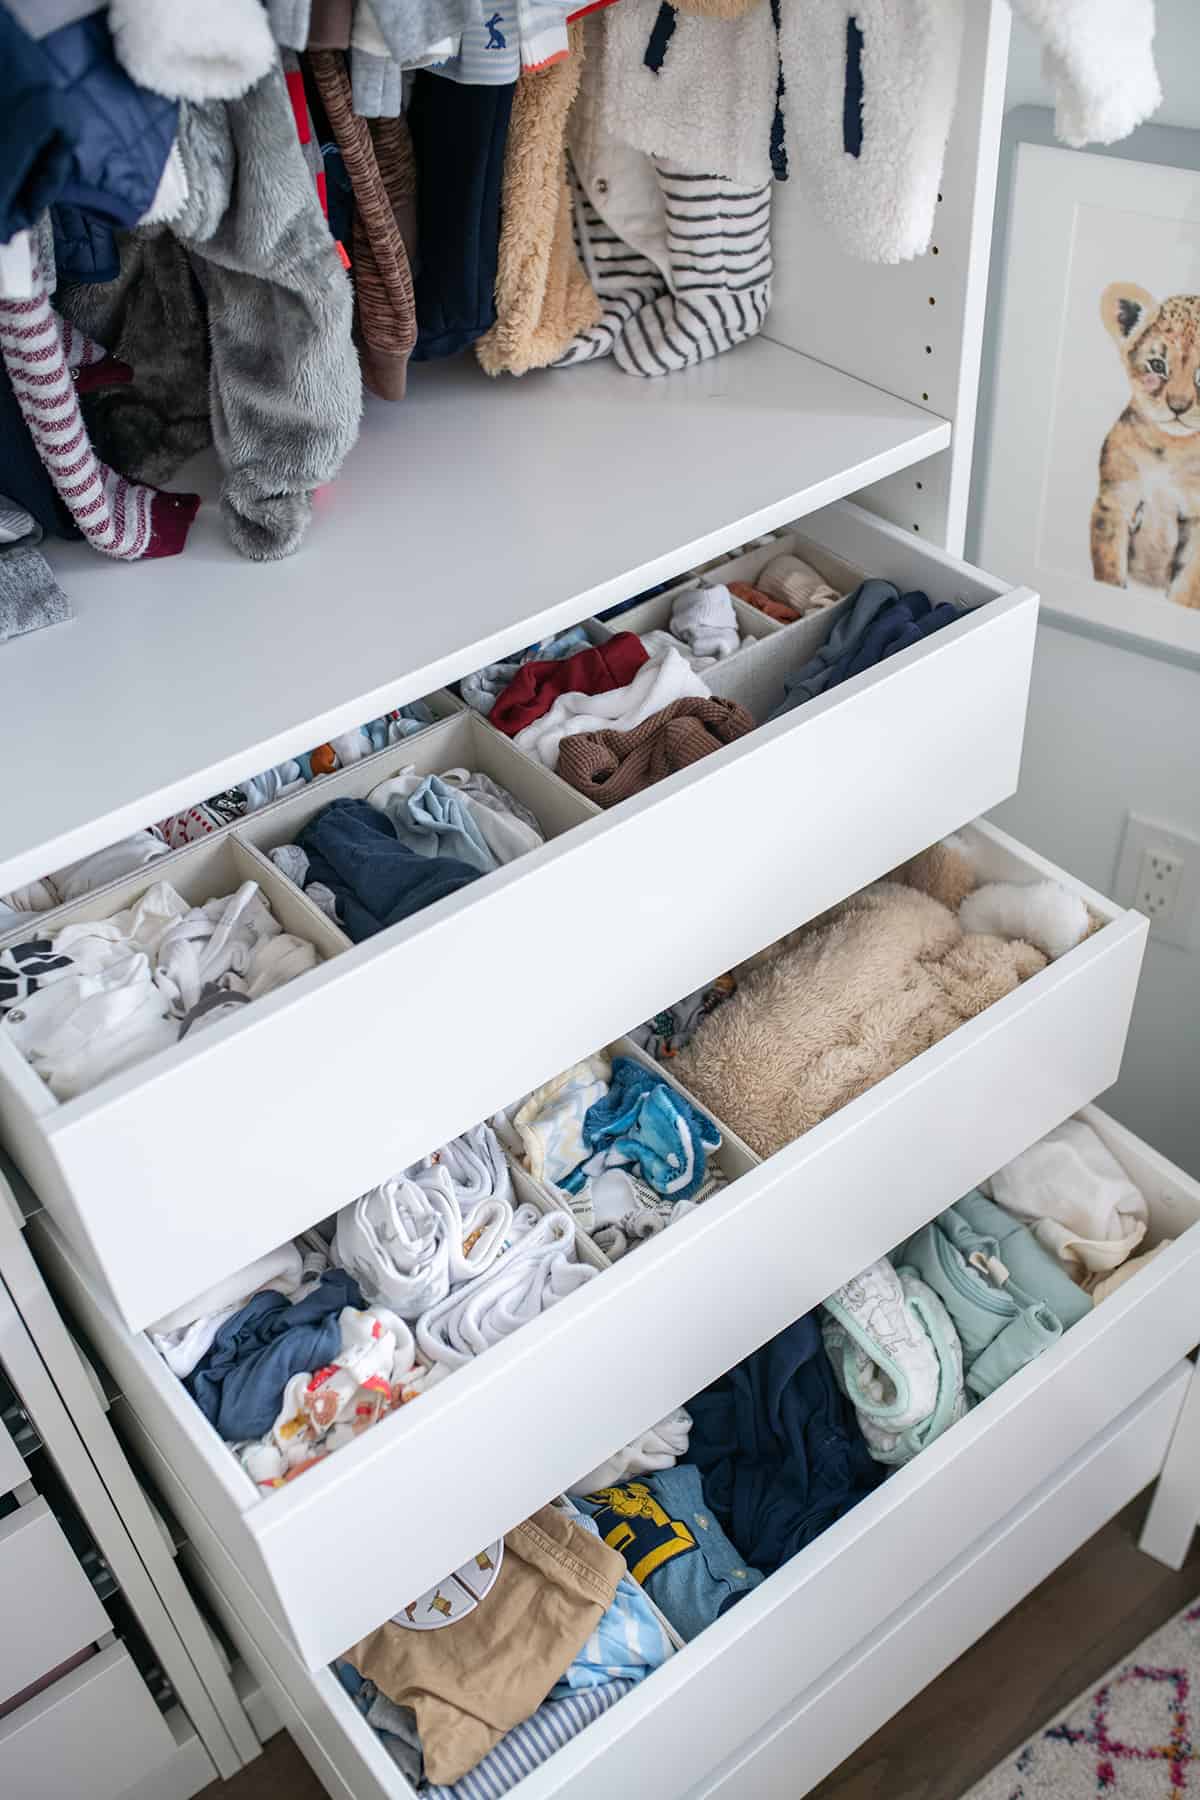
NURSERY DETAILS // IKEA Custom Closet System | Yellow Border Storage Bins | Baby Clothing Hangers | Drawer Organizers | Safari Animal Wall Prints
Confession: Nate’s clothing is 10x more organized than my own. Maybe it’s because the fun of folding and hanging all his teeny baby clothes hasn’t worn off yet? These drawer organizers have been a game changer at keeping all of his things neat and tidy. The perfect size for kids clothing, underwear, socks, etc!
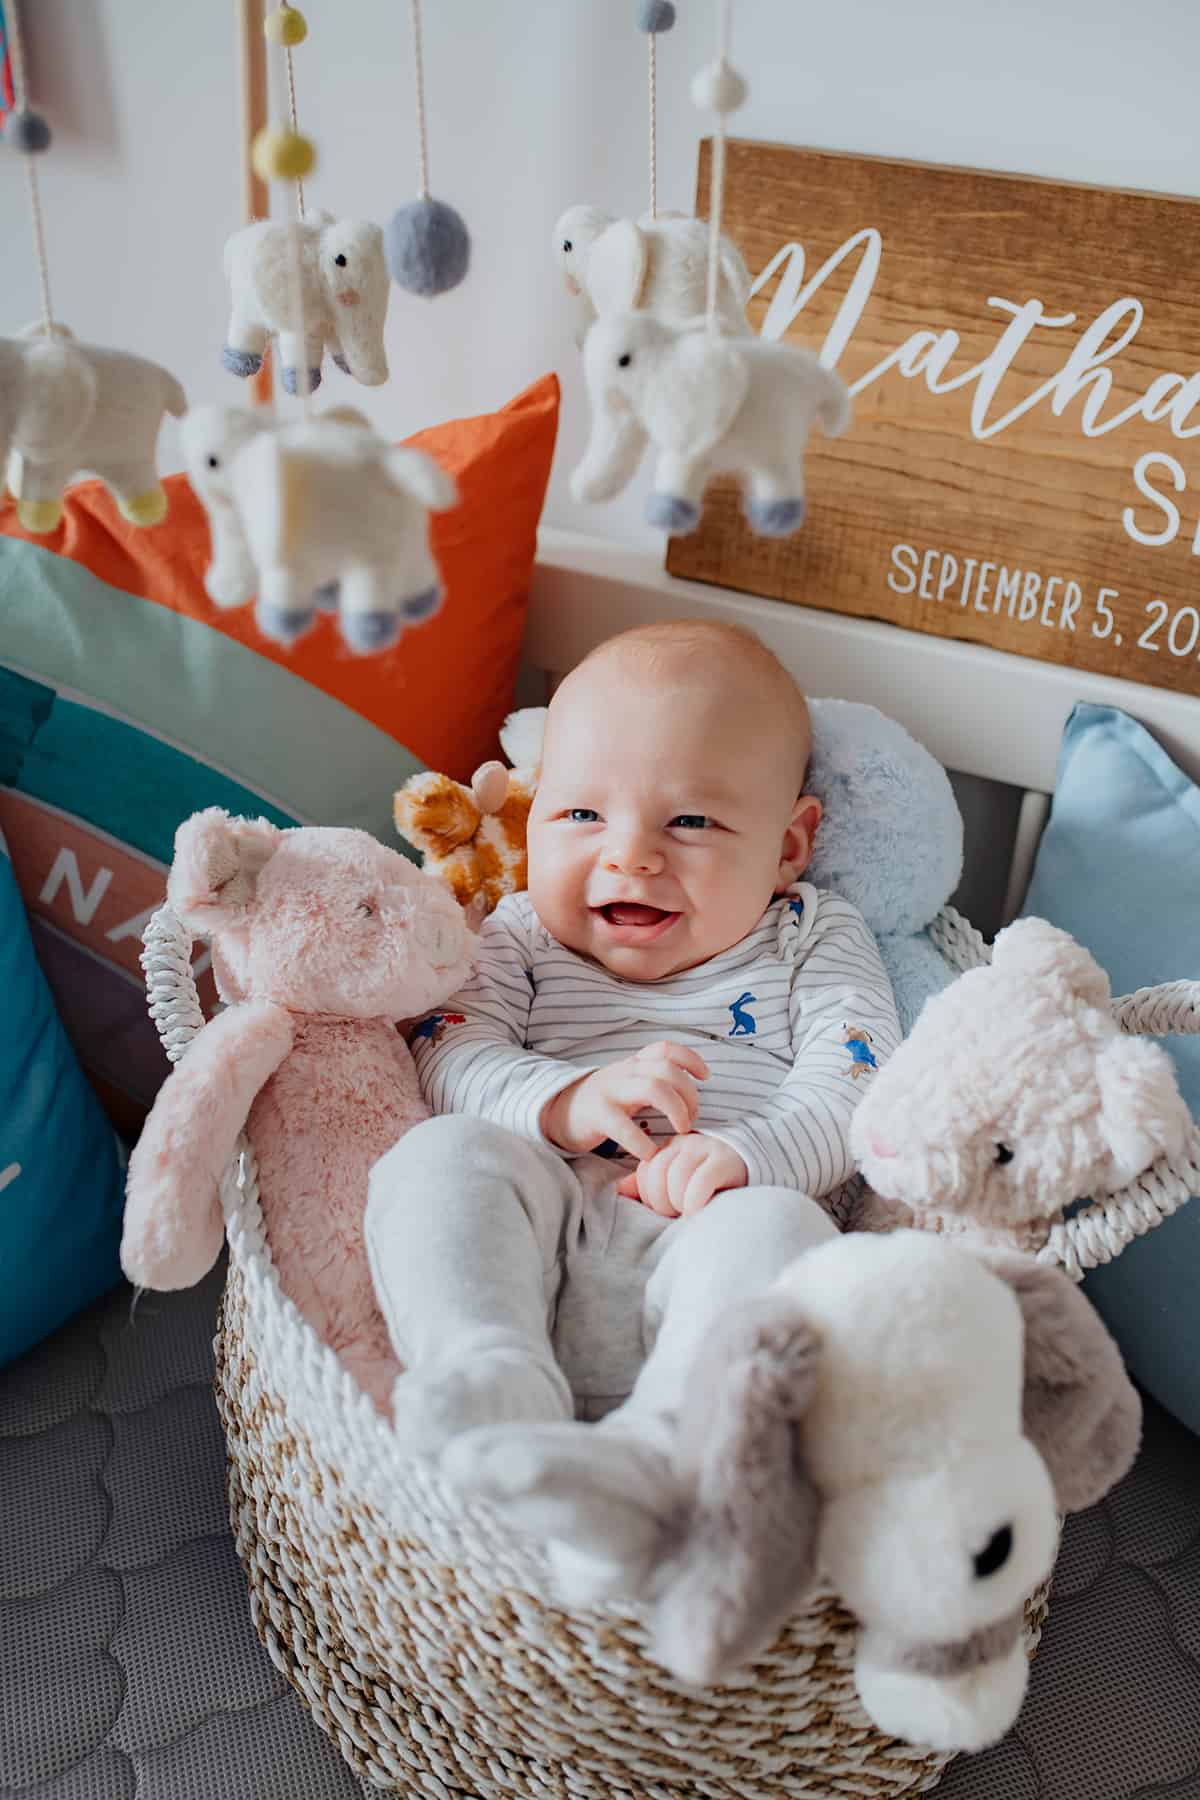
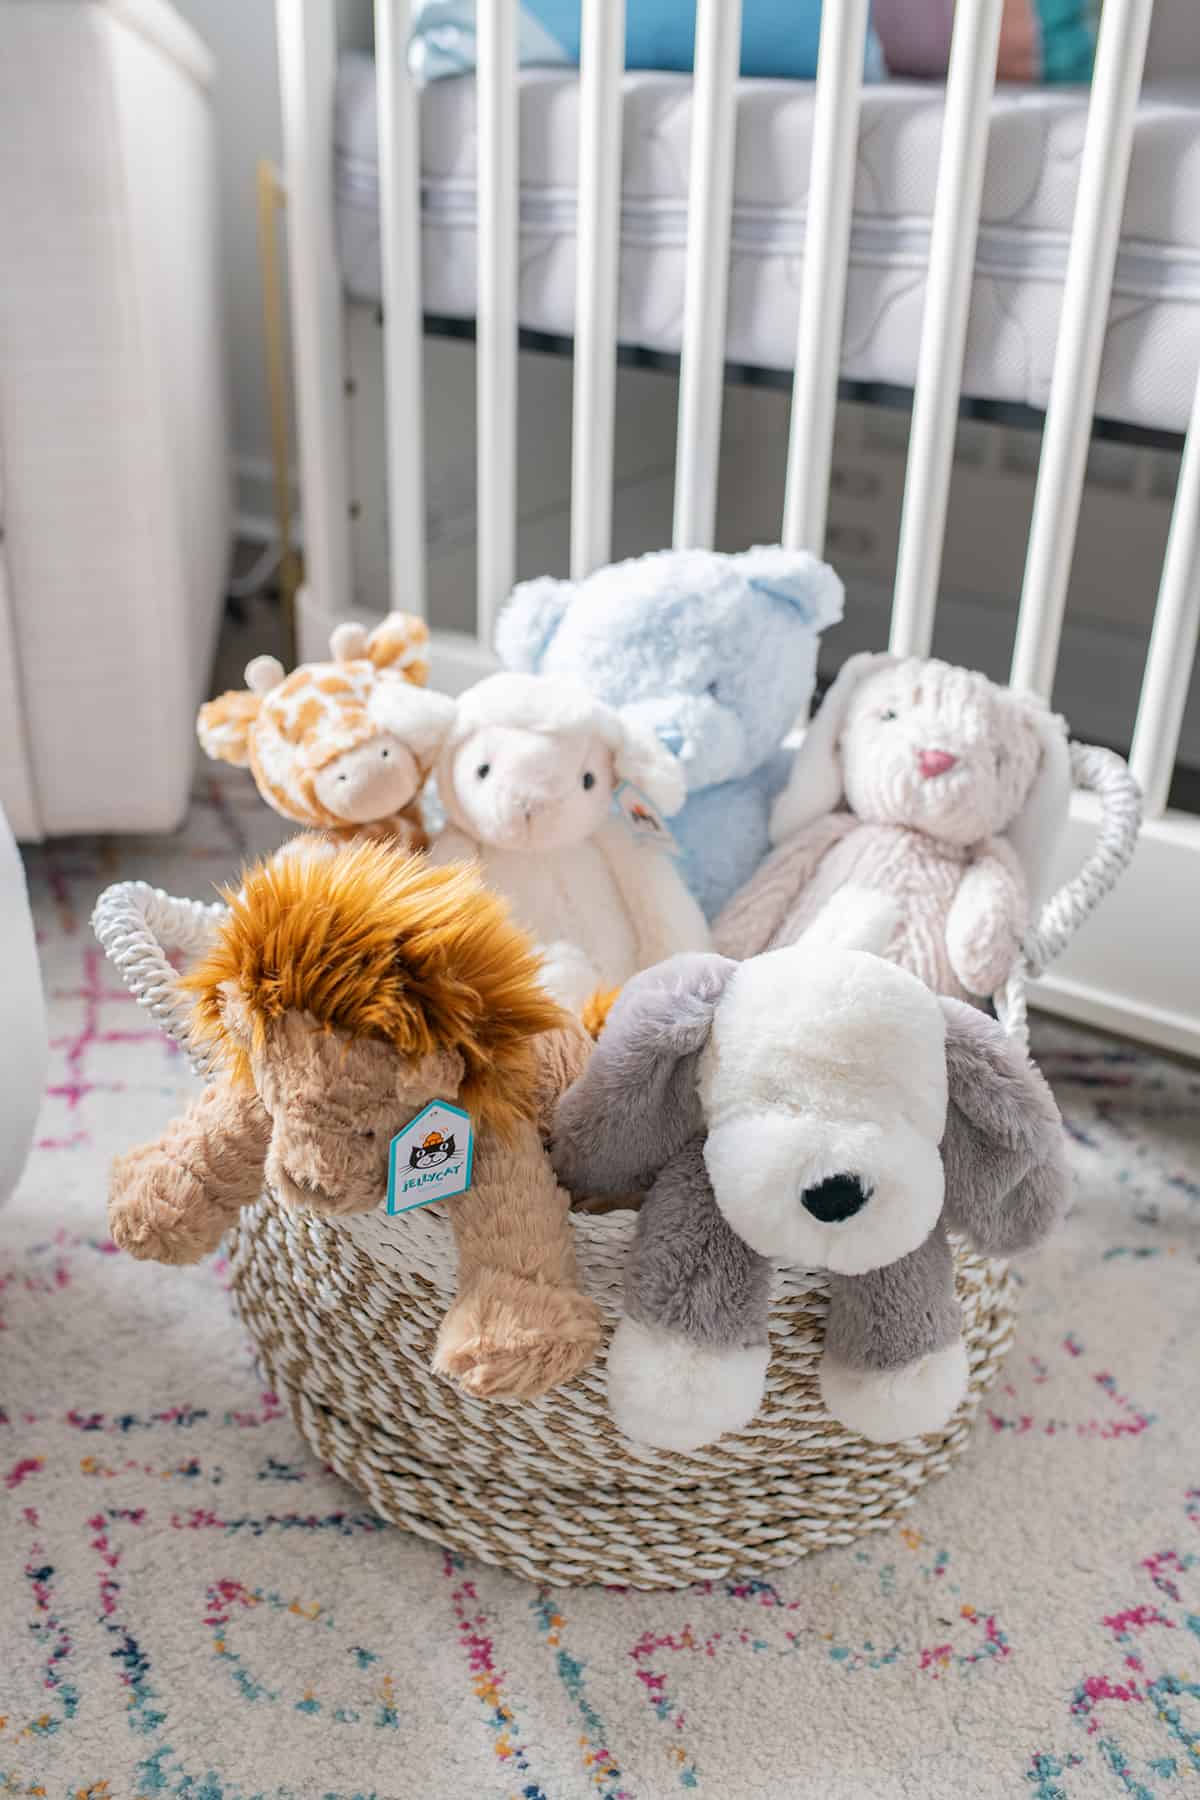
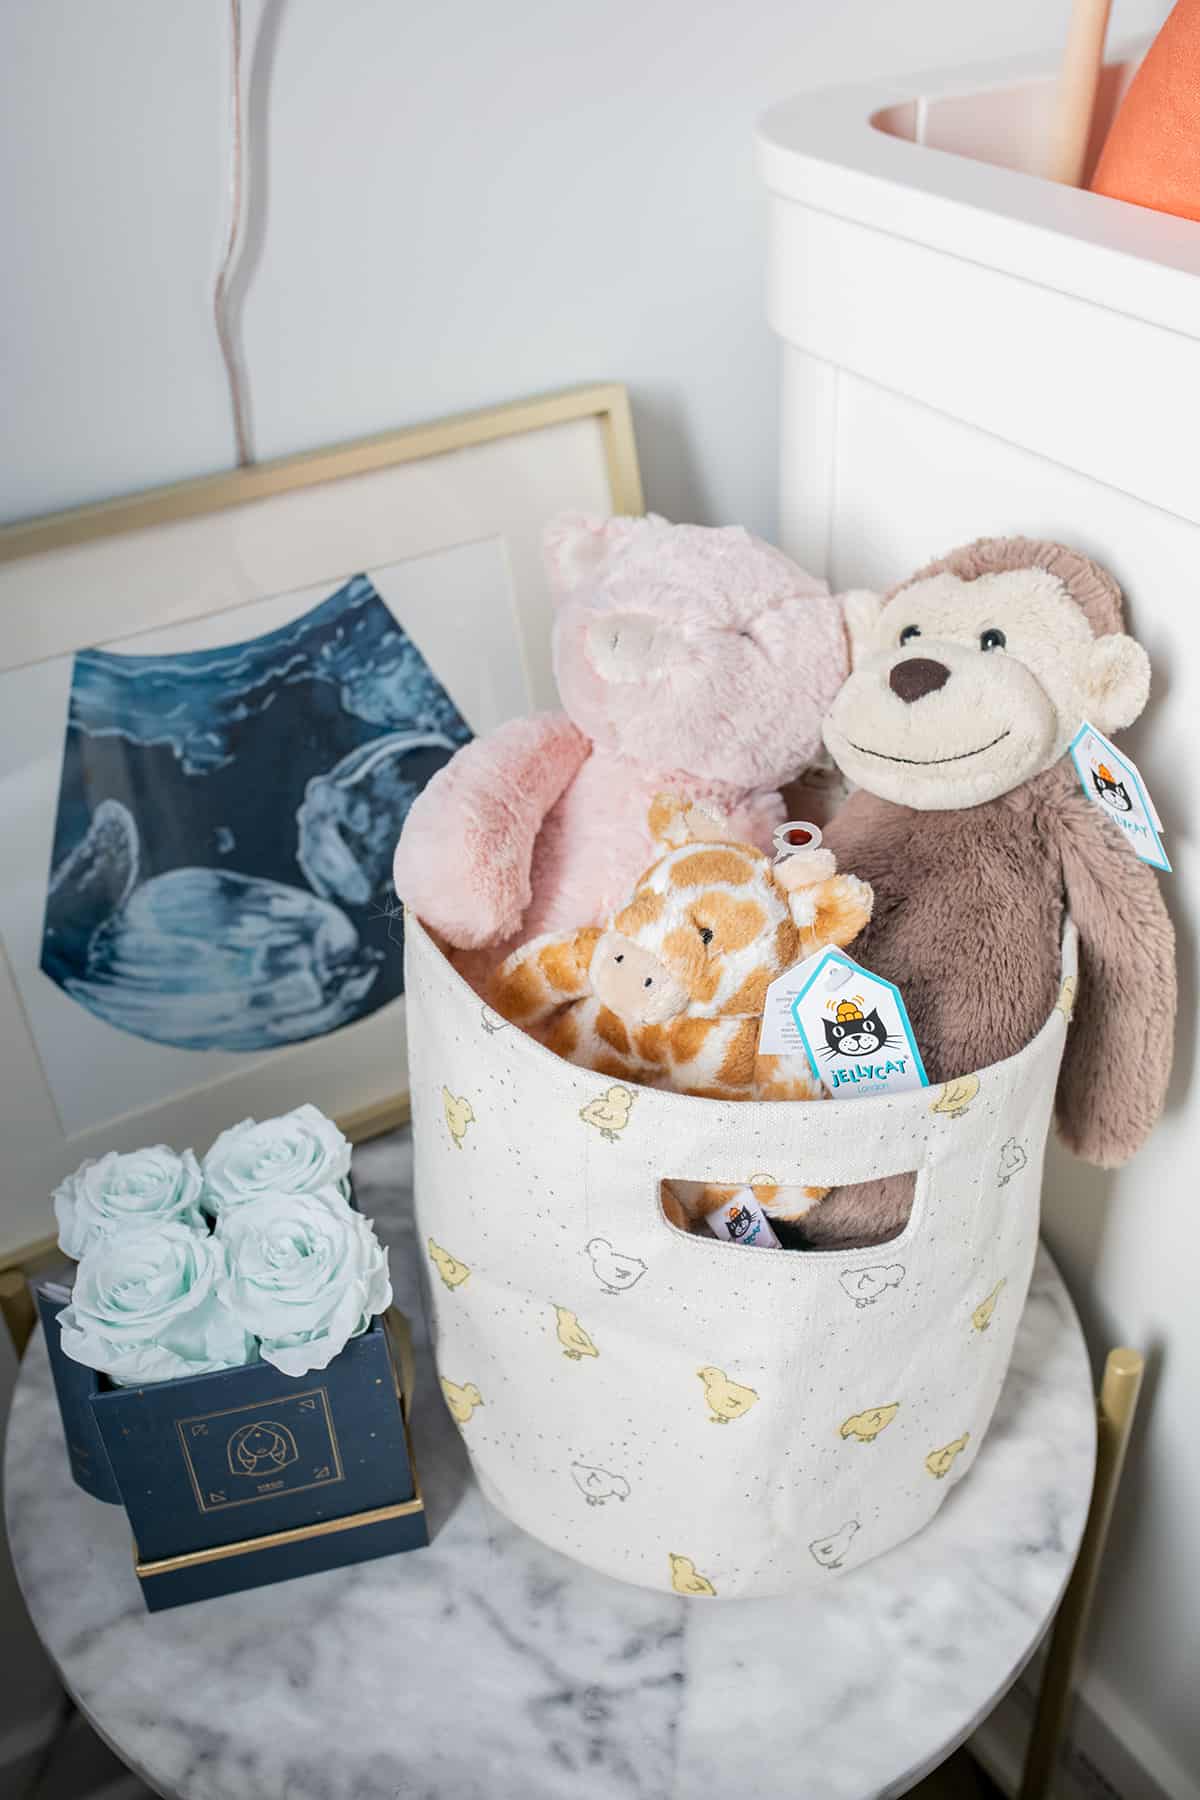
NURSERY DETAILS // Accent Table | Plush Animals (got them all from this brand!) | Canvas Duck Bin | Custom Ultrasound Art | Preserved Roses
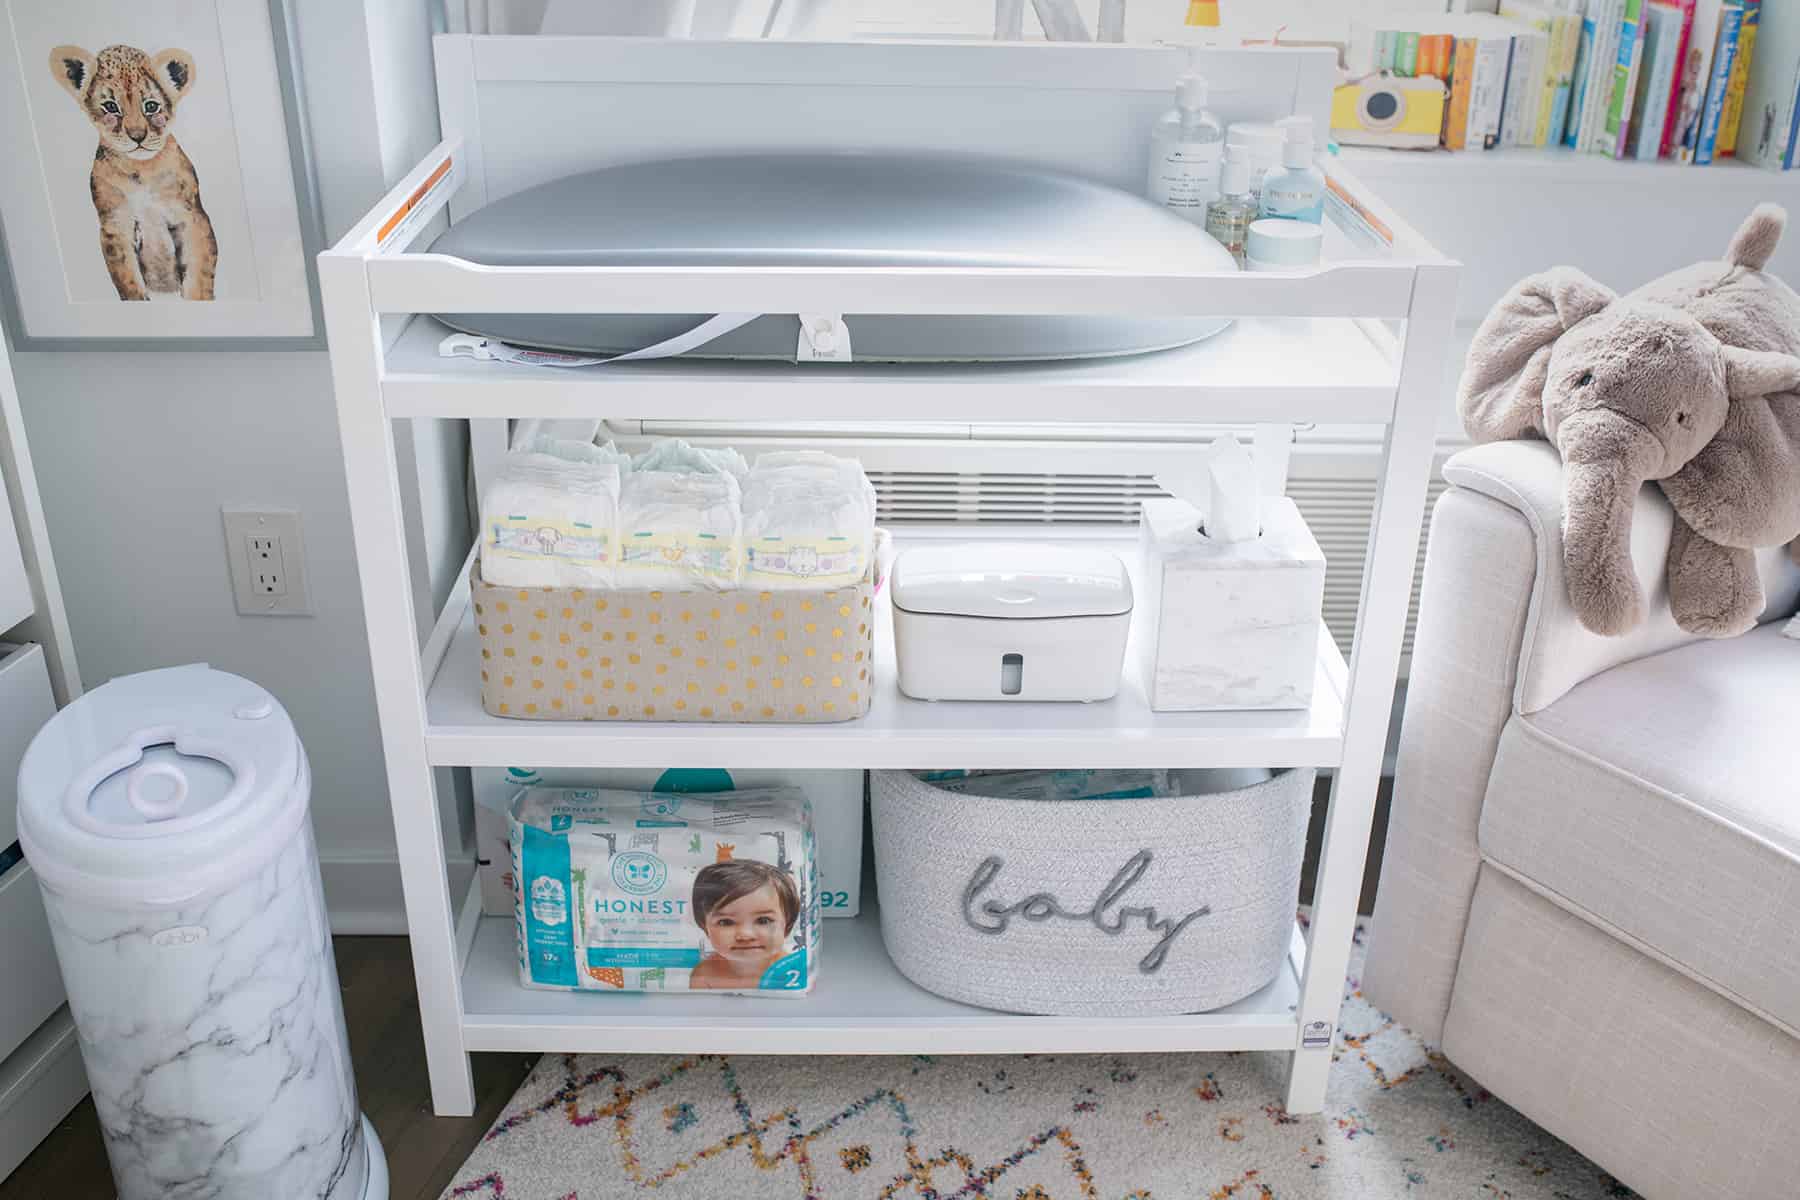
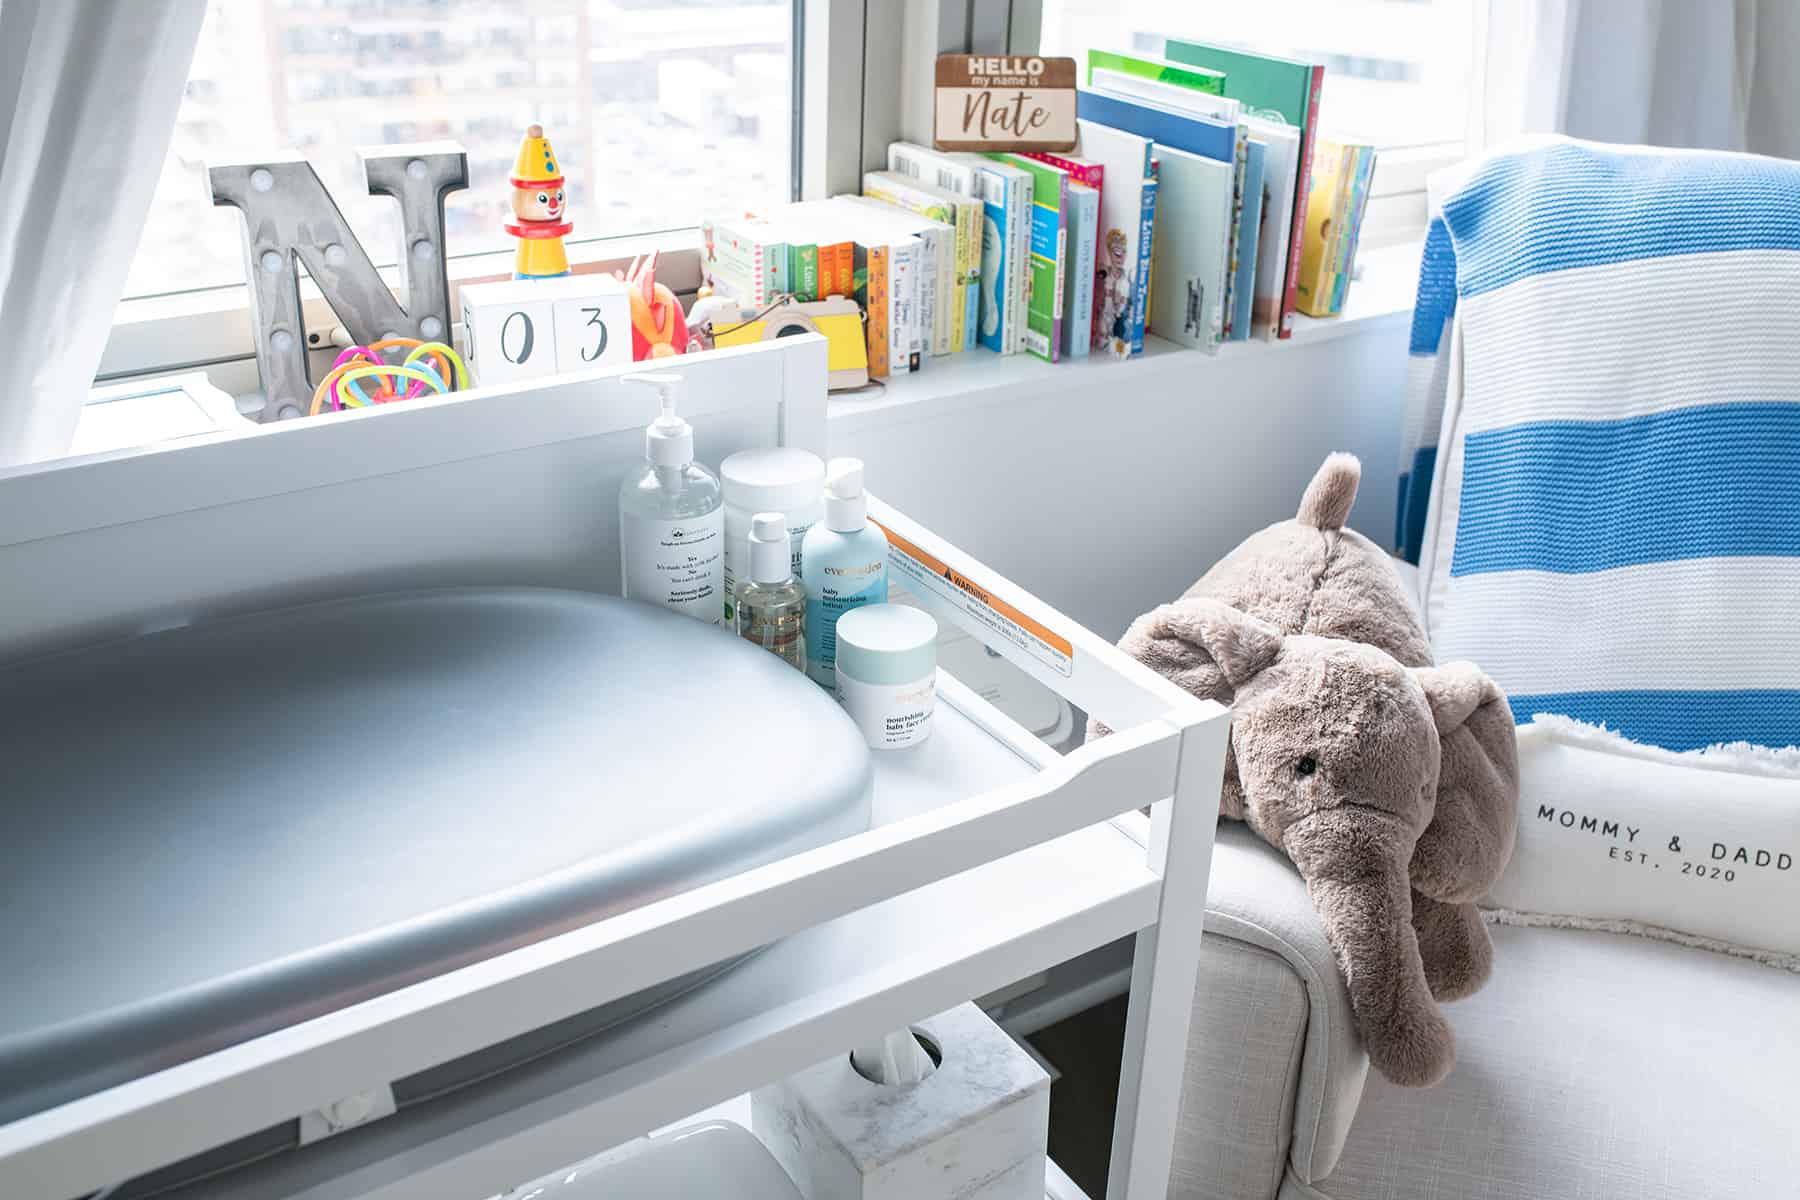
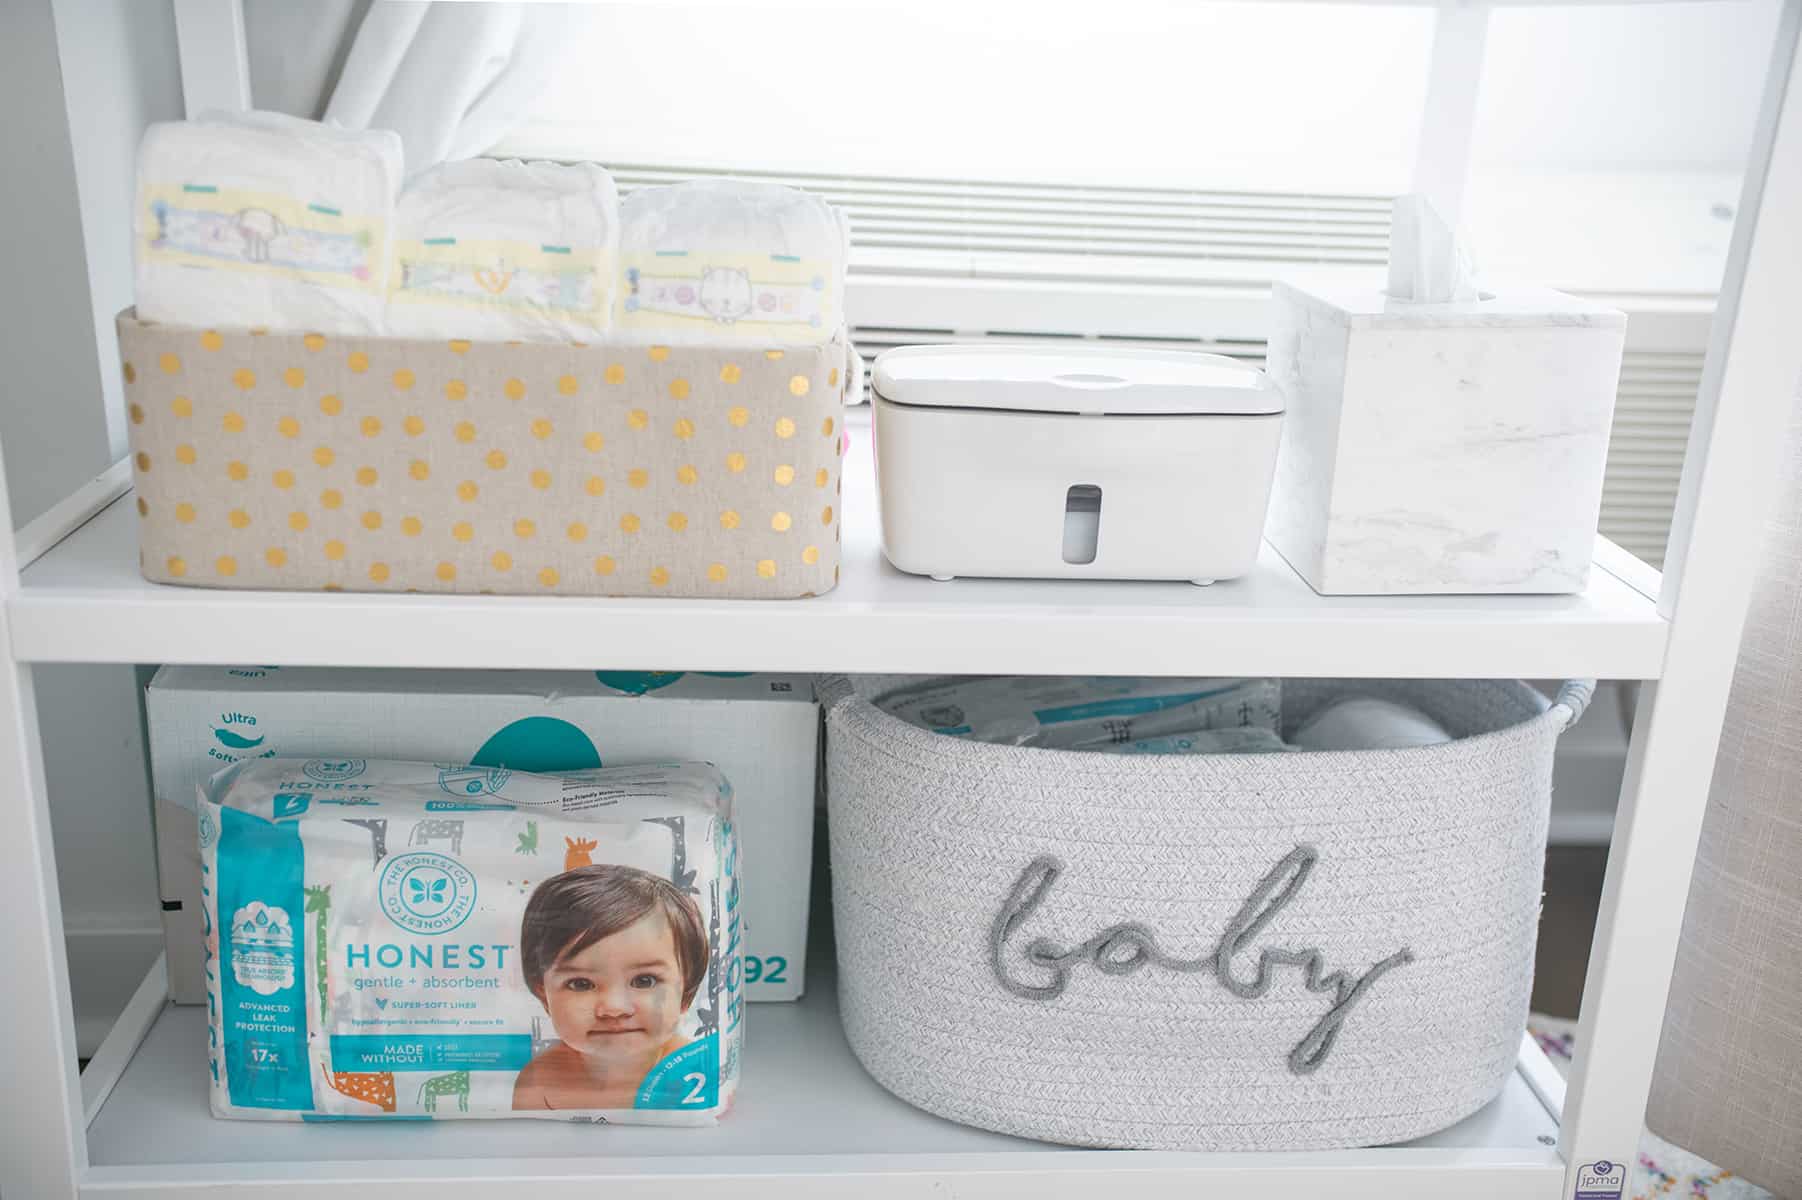
NURSERY DETAILS // Smart Changing Pad + Scale | Changing Table | Marble Diaper Pail | Mable Tissue Box Cover | Diaper Caddy | “Baby” Basket via HomeGoods | Wipe Dispenser | EverEden Natural Baby Bodycare Products
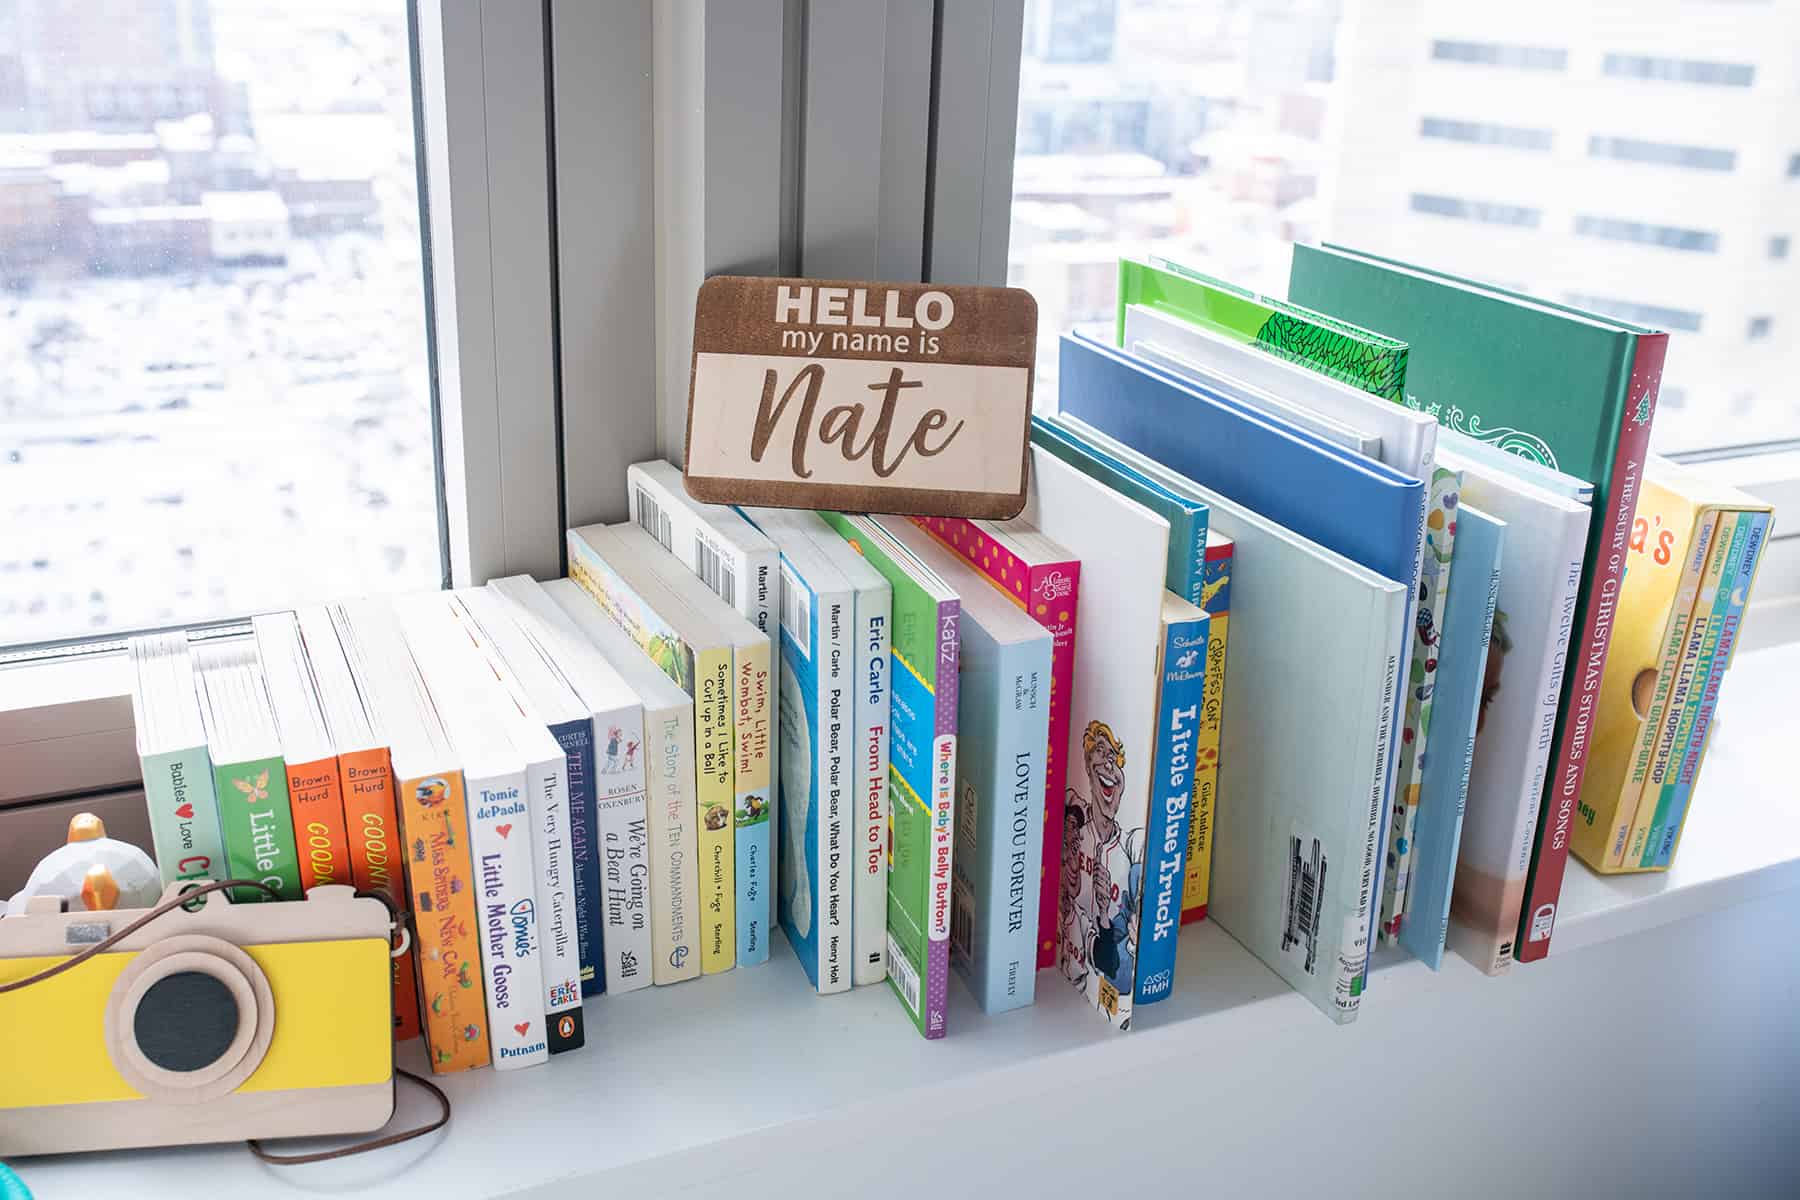
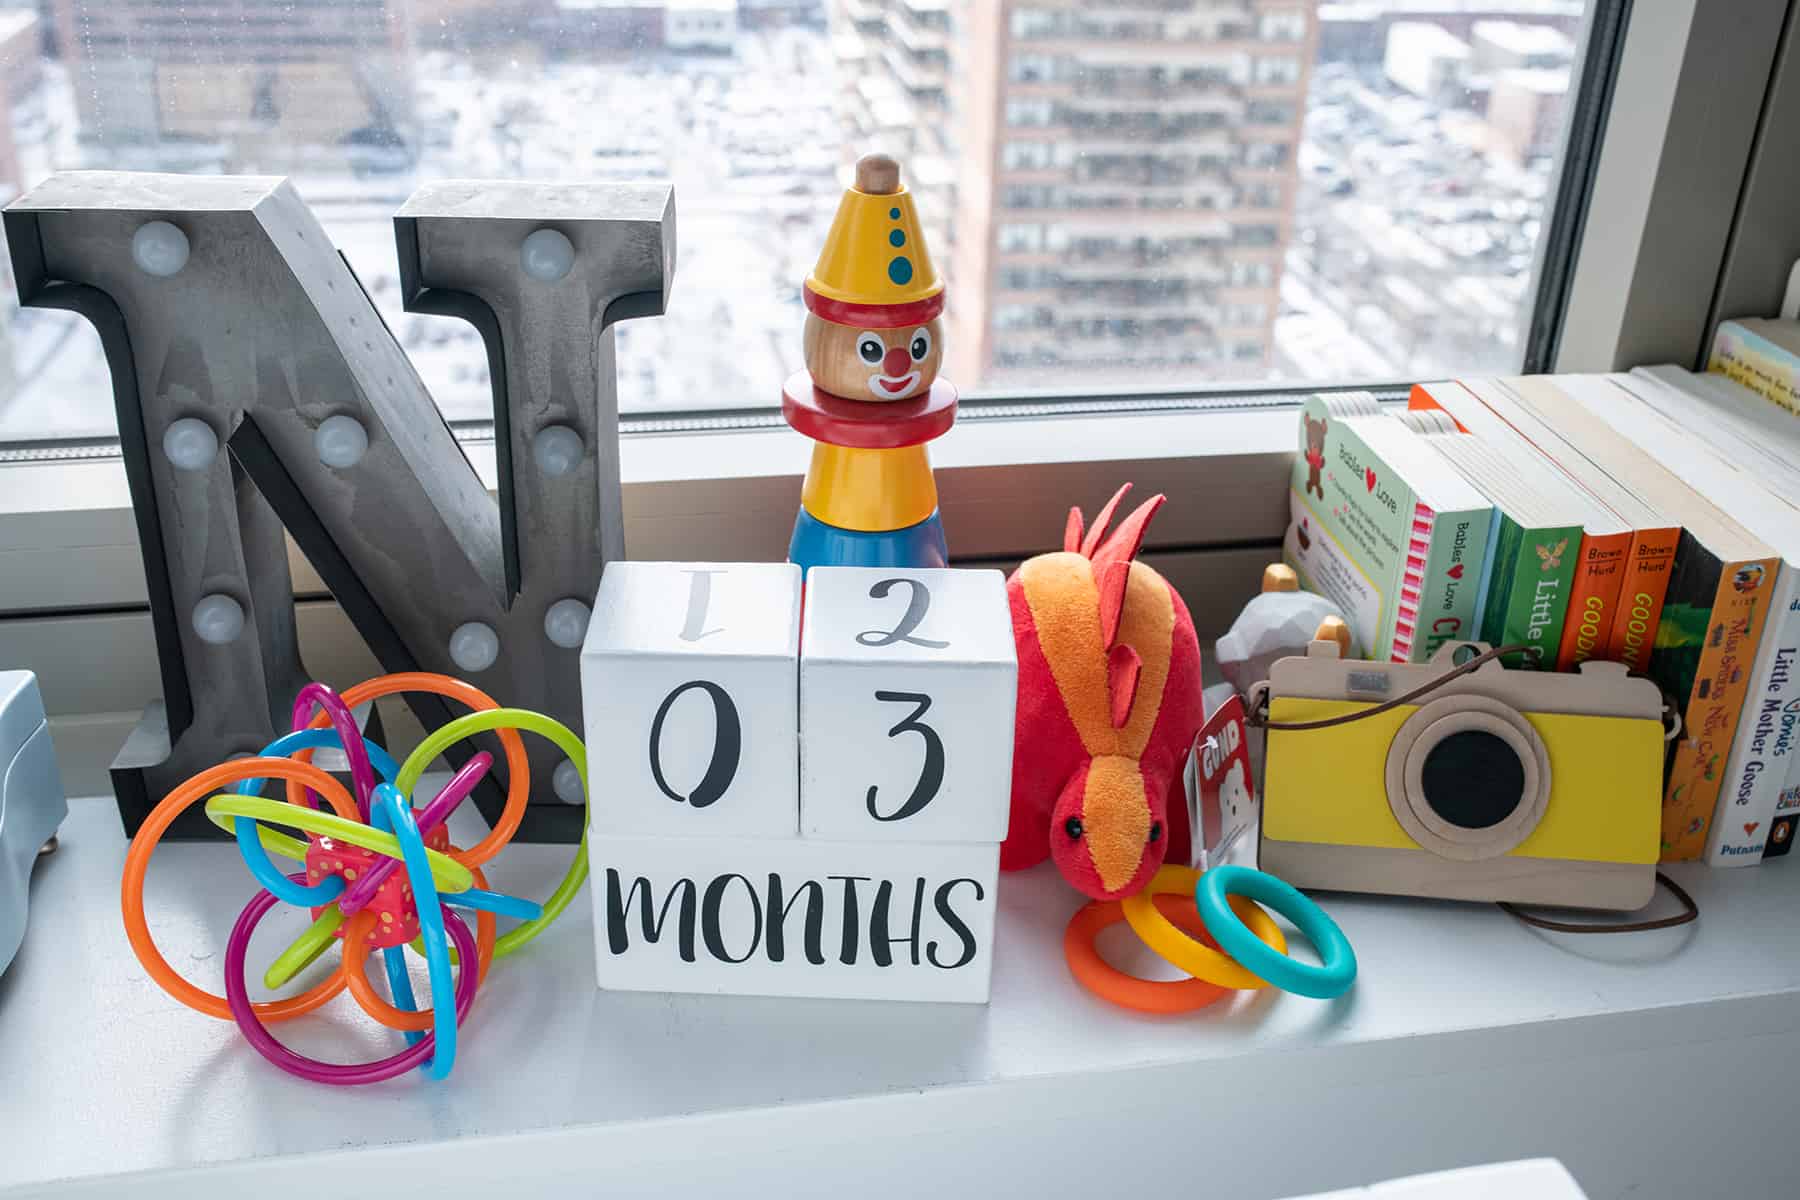
NURSERY DETAILS // N Marquee Light | Rubber Teether Toy | Milestone Blocks | Wood Camera Decor | Bear Bookends
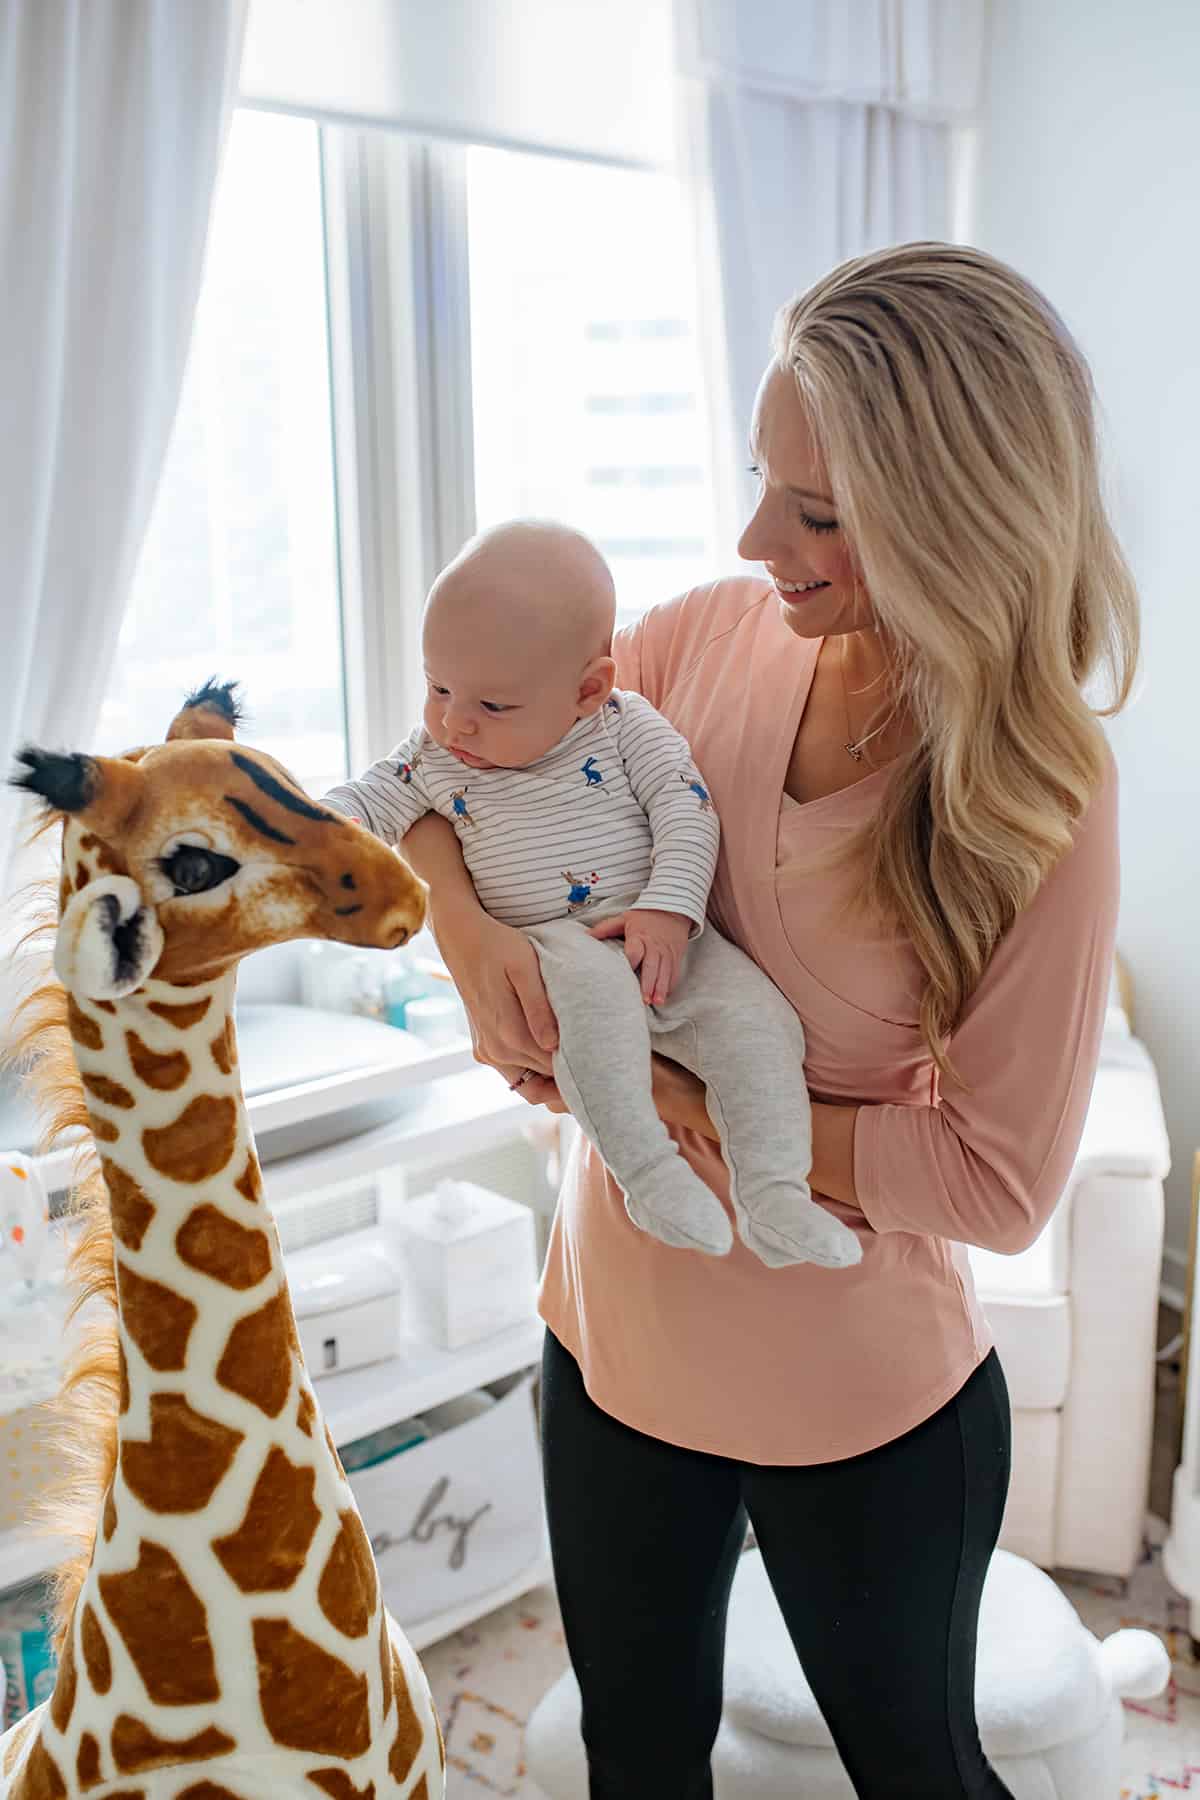
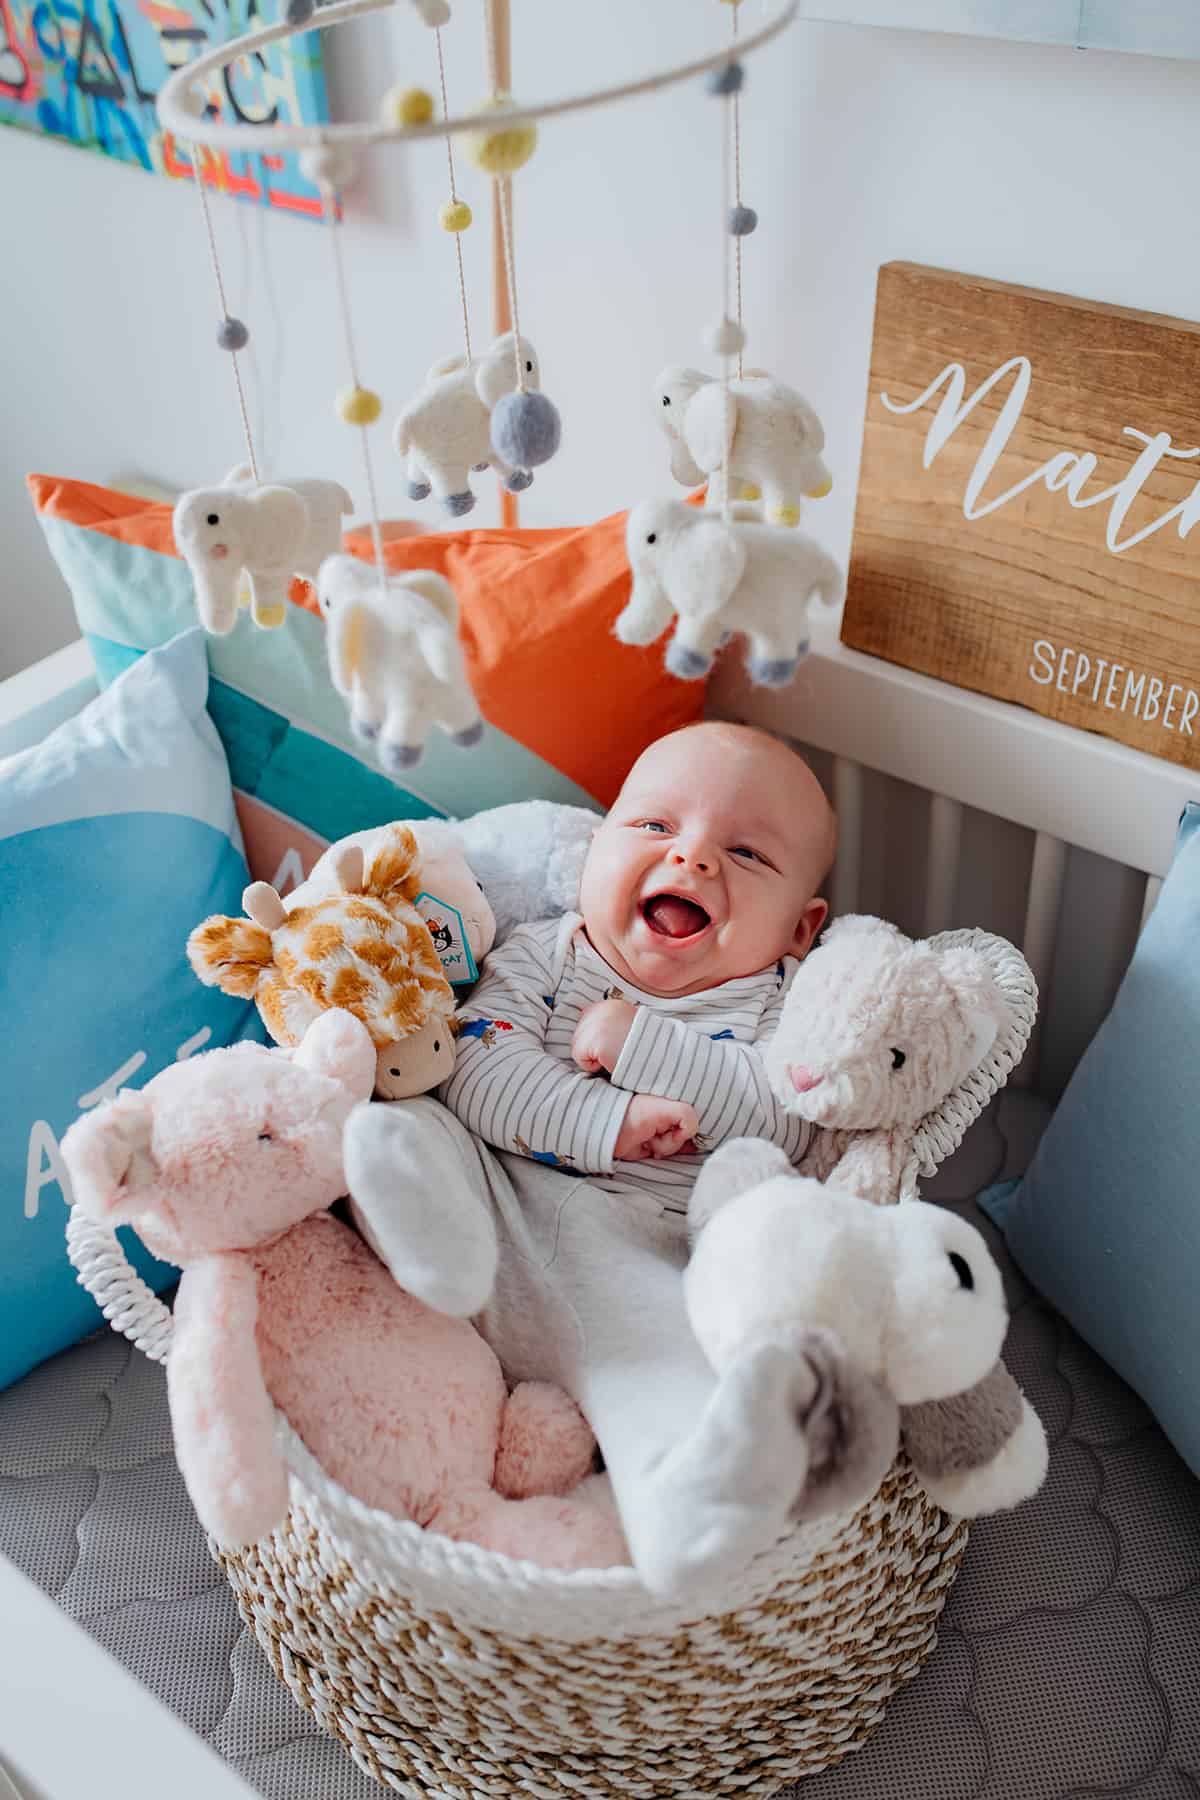

NURSERY DETAILS // Million Dollar Baby Classic Tanner 3-in-1 Convertible Crib | Million Dollar Baby Classic Willa Recliner | Area Rug | Floor Lamp | Similar Curtains | Bunny Storage Ottoman | Changing Table | Diaper Pail | Diaper Caddy | “Baby” Basket via HomeGoods | Neon Name Sign | Alec Monopoly Art Print | | Hanging Mobile | Custom “Nate” Pillows | Tall Giraffe (on sale) | Similar Mom + Dad Pillow (on chair) | Stripe Blanket (on chair) | Cuddle + Kind Doll (on chair) | Plush Elephant (on chair) | Plush Animals (got them all from this brand!) | Embroidered Blanket (custom from my mama)
The post Nate’s Nursery Reveal appeared first on Katie's Bliss.
]]>